Setting Up Coding Environments on Linux for Educational Use

With so many strong attributes, such as robustness and flexibility, Linux stands as a powerful platform for teaching coding among many other educational purposes. So this guide is meant to help educators and students set up a suitable coding environment when they are on this journey of learning to program.

Step 1: Choose the Appropriate Distribution of Linux

The first thing needed is choosing a suitable distribution of Linux. For novices, it is Ubuntu or Linux Mint, as these two can be user-intuitive and include many documented features and options. Some other users more advanced may incline towards Fedora or Debian for the vastness of packages and community support. If you want a comprehensive course for children programming that can work with these distributions, Codemonkey offers quite a few interactive coding courses.

Step 2: Install Required Software

Once the Linux system runs on your computer, you are supposed to install software in order to be able to code. Essential tools include:

Text Editors: Using Atom, Visual Studio Code, or Sublime Text for writing out code.

Compilers/Interpreters: If you’re going to teach a programming language, then just install Python, GCC for C/C++, or JDK for Java.

Version Control Systems: Git for tracking changes in code and enabling collaborative development.

Step 3: Setting up a Development Environment

Configure the environment post installation of the required software.

Customize the IDE: Most IDEs, and text editors, for that matter, will support the ability to easily change settings. Make slight changes to the settings to fit your educational needs, such as setting up auto-save, and enabling line numbering and syntax highlighting.

Install Extensions: Extend the functionality of VS Code to include linters, code formatters, and debuggers.

Create a Project Template – You can create project templates for subjects that students may use to jumpstart their assignments.

Step 4: Using Learning Tools

Think about including instructional and collaboration tools:

  • Code Sharing Platforms: Use tools such as GitHub Classroom to be able to distribute assignments and collect student submissions.
  • Interactive Learning Environments: Jupyter Notebook is a really good platform to write Python since you are able to see code and output in real time.

Step 5: Ensure Accessibility and Security

It ensures that every student is provided with the necessary resources for their needs.

Accessibility: Configure accessibility options available in Linux to accommodate all students.

Security: Install a firewall and regularly update to prevent unauthorized access to the systems.

Step 6: Documentation and Additional Support

Finally, give resources that can enable the learner to self-study:

  • Write Documentation: Provide tutorials or links to online tutorials, on tools and languages you are teaching.
  • Support Offered: Providing forums or chat groups where students can ask questions and help one another.

Final thoughts

Setting up a Linux-based educational coding environment first requires making extensive plans on all the necessary tools and resources and then going ahead to implement the laid plan. Through these steps, instructors can create a stable and effective environment in which their students can learn.
A Little About The ‘echo’ Command

That’s right, in today’s article we’re going to learn a little about the ‘echo’ command. We’ll barely be scratching the surface of the ‘echo’ command. There are so many ways to use ‘echo’ that we simply can’t fit it all into an article. Do, read on!

So, what is ‘echo’? Well, basically, the ‘echo’ command is a command that tells the computer to output text – be it in the terminal or using standard output to add that text to a file. It’s useful for regular people, but you’ll find it’s most commonly used in things like bash scripting

That sort of thing, scripting, is outside the scope of this article – and probably beyond the scope of the entire site. Maybe I’ll get to it, but those would end up being long articles, or articles written in parts. Besides, I’m not really all that good with scripting. (If you are good with scripting and would like to write some articles, do let me know.)

This is how the man page describes the ‘echo’ command:

echo – display a line of text

That’s indeed what it does. When you combine it with things like variables, you open up a whole new world. I don’t actually have a very good article about variables, other than existing variables. I should probably have said article.

Anyhow, we’ll just be scratching the surface of the ‘echo’ command. There are all sorts of ways to use ‘echo’, but we’re just going to use it in ways that a new Linux user might use it. Some basic familiarity is probably a good thing.

The ‘echo’ Command:

This article requires an open terminal. If you don’t know how to open the terminal, you can do so with your keyboard – just press CTRL + ALT + T and your default terminal should open. Otherwise, just open your terminal like you normally would.

So, how you start with this ‘echo’ command:

You can also add quotes, and in some cases probably should:

You can also use the > operand and echo the text to a file. Like so:

Read: How To: Write Text To A File From The Terminal with “>” and “>>”

However, that’s not all you can do with the ‘echo’ command. You can also automatically fill in the information by way of environment variables. For example, try this:

Or you can try:

Read: How To: Show All Environment Variables

See? It’s good that I’ve written so many articles. I get to refer to ’em and save us all a bunch of time. So, be sure to visit those articles – especially if you’re a new user. If you’ve forgotten something, you can ‘echo’ the variable to be reminded.

Bonus:

This next bit is really just some information you’re gonna need down the road. I can sense it! This is a bit advanced for some of you, and you won’t need this until later in your Linux journey, but others will see this and suddenly understand the potential. If you’re new, you’ll get there.

The first thing we’re going to do is set a variable. It’s actually very easy to set your own variables in Linux. In this case, we’ll use:

Now, let’s just ‘echo’ the variable you just created:

Or, even better, you can then try:

See? It will output the variable when you echo it. You can create all the variables you’ll realistically ever need. 

You can actually format the output from the ‘echo’ command. For example, the -e flag with the \n separator. An example command looks like:

You can format the text in a variety of ways, just read the man page. You can do quite a lot with the ‘echo’ command and you should definitely check the man page if you’re interested in exploring all the possibilities:

There’s a ton of ways to use ‘echo’ (and with it variables) for those with a clever mind. When you do move on to learn about scripting, you’ll learn that it’s a basic tool used for all sorts of things, in all sorts of clever ways.

Closure:

And there you have it. You have a new article. This time, we’ve covered just the slightest bit of the ‘echo’ command. It’s enough to get your mind working, or so I hope. It’s enough to get a slight taste of the potential and to understand why you may want to be familiar with it.

Thanks for reading! If you want to help, or if the site has helped you, you can donate, register to help, write an article, or buy inexpensive hosting to start your own site. If you scroll down, you can sign up for the newsletter, vote for the article, and comment.

How To: Install Eclipse On Ubuntu 20.04

Today’s article will tell you how to install Eclipse on Ubuntu 20.04. Though I suppose that, technically, it was tested on Lubuntu. Still, it should work for any Ubuntu official flavor and probably any derivatives. 

Eclipse is the IDE (Integrated Development Environment) for Java. I’m pretty sure it’s number one in that role, or really close to it. It’s also useful for other programming languages, so I thought I’d check it out. It’s actually just a couple of commands to install Eclipse on Ubuntu, but it can be a little confusing, and I figured I’d document it here. 

I didn’t spend all that long using it, as I’m not really a Java dev, but I did look around and I can see why it’s popular. It’s fairly intuitive and there’s a plugin for anything you can think of. Seriously, there’s a lot of plugins – like ~1500 of them. I’m a bit under the weather, so you get what you get today.

Not being a Java developer, and mostly just being curious, I really can’t say that it’s a good IDE. But, it did look intuitive – things were where I expected to find them – and there’s a robust community surrounding it. On top of that, the list of plugins is huge and there were plugins to cover a lot. So, you might as well take a look if you’re looking for an IDE. This is programming software, so its popularity is almost certainly deserved and for good reason.

Install Eclipse On Ubuntu:

This article requires an open terminal, like many other articles on this site. If you don’t know how to open the terminal, you can do so with your keyboard – just press CTRL + ALT + T and your default terminal should open.

Usually, you just install stuff from the Snap Store and that’s it. Installing Eclipse is actually a little different. It’s actually written in Java and  so will need a JRE. That’s not actually included in the Snap. That right there kinda makes me wonder about how well Snaps will fill their roles into the future – as being complete packages is one of the Snap goals.

That was it. That was the ‘trick’. You can now install an up-to-date Snap version (as there have been older versions in the default repositories and PPAs). To install via Snap, you just:

Once that has run its course, you can test the Eclipse IDE to see if it’s what you need in your programming tool-chain. It wasn’t all that hard and you should now have the most recent Eclipse installed. The Snap should stay updated regularly, much more regularly than the old repository way. So, there’s that. Which is nice.

Closure:

And there you have it. This article is nice and easy, and short! It’s also one more said and done, thankfully. I was feeling a bit icky when I wrote this one, so it’s definitely not a great article – but it is an article!

Thanks for reading! If you want to help, or if the site has helped you, you can donate, register to help, write an article, or buy inexpensive hosting to start your own site. If you scroll down, you can sign up for the newsletter, vote for the article, and comment.

You Can, And Probably Should, Use VSCodium Instead Of VSCode

This article’s goal is to raise awareness of VSCodium, an open-source alternative to VSCode that has a couple of important benefits and changes. This isn’t the kind of article that I usually write, but it seems important to make people aware of the choices they have here.

This isn’t really a software review, nor is it really news. After all, if you’re in the business you’re already aware of VSCode (Visual Studio Code) and the benefits. If you’re not in the business, VSCode is a source code editor that comes with a bunch of features that make a programmer’s life easier.

VSCode is quite popular, made by Microsoft, and is available to Linux users. Microsoft has made VSCode’s source code mostly open (but not necessarily ‘free’) and VSCode is free-as-in-beer for anyone who wants a source code editor. It’s popular because it’s actually pretty good. 

It was released back in 2015, with most of the source code covered by the MIT license. In the 2019 SE Dev Survey results, it was #1 among respondents, which was the most recent I could actually find. By most accounts, it’s a great piece of software and a valuable tool.

Why VSCodium:

Not all of VSCode is open source and it’s only free as in beer. The source isn’t free as in libre, because it doesn’t preserve all freedoms. It also comes with telemetry, meaning that it reports on things like how you use the software, what software you’re using with it, what kind of hardware you’re using, and things like that. 

Many Linux users care about those two things. They want their software to have a permissive license. They don’t want their software reporting anything about them to anyone. Those are reasonable wants and the community is usually pretty good about providing alternatives.

In this case, they’ve changed the way it is compiled, and what is compiled with it. They’ve also packaged it for most operating systems out there. They’ve made a package available that’s entirely licensed under the MIT License (permissive, free) and made it easy to get.

I’m not going to duplicate a bunch of information by cutting and pasting. That’s also a good practice when the content may change, so I’ll just link to a couple of pages.

Visit the VSCodium home page, click here.
Visit the VSCodium code repo page, click here.

To get a feel for the project, and to see the vast amounts of effort the maintainers put into it, visit the first link. If you just want to find the right package to get for your system, click the second link. Those links will help you get VSCodium properly installed, usually in a pretty painless fashion. Worst case scenario, they show you how to compile it and how to make your own packages.

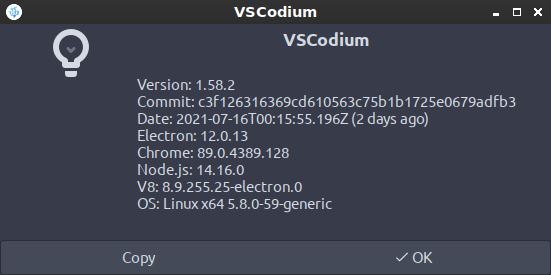
It’s so easy to install that I did so just to have access to it on this system, one I mostly only use for writing and browsing. It took a total of three commands. If you’ve done it properly, it’ll look something like this:

VSCodium's about page
That’s the current version, using the PPA method. It was an easy-enough process.

Just follow the installation instructions for your particular version of Linux and you shouldn’t have any issues. If you do, you can always raise issues at their GitHub link, leave a comment here, or drop us a line at Linux.org. Someone will help get you sorted.

By using VSCodium, you can have all the greatness that is VSCode while preserving the important liberties. It’s a great piece of software!

Closure:

This isn’t my “normal” type of article, but I’ve really wanted to make sure people are aware of the options when it comes to VSCode and VSCodium. This is one of those times when you can have your cake and eat it to. 

By the way, there are all sorts of great pieces of software out there. I’ve written a review, an introduction, and some comparative pieces. I think I may do more of them. They take about the same amount of time to write and edit, but there are some great pieces of software out there and people just aren’t aware of them. Feel free to drop an idea or the name of your favorite software as a comment. If you like these types of article, be sure to vote and comment!

Thanks for reading! If you want to help, or if the site has helped you, you can donate, register to help, write an article, or buy inexpensive hosting to start your own site. If you scroll down, you can sign up for the newsletter, vote for the article, and comment.

Linux Tips
Creative Commons License
This work is licensed under a Creative Commons Attribution 4.0 International License.