Mastering Efficiency: Unleashing the Power of Bash Aliases

In the realm of command-line prowess, efficiency is king, such as Bash aliases. Every keystroke saved is a victory, and every shortcut mastered is a step toward domination over the terminal.

Among the arsenal of tools at your disposal, one weapon stands out as a champion of efficiency: Bash aliases. These humble shortcuts can transform your command-line experience from mundane to magnificent, allowing you to wield the power of complex commands with the simplicity of a single word.

Join us on a journey as we delve into the world of Bash aliases and unlock their full potential.

What are Bash Aliases?

Bash aliases are custom shortcuts or abbreviations that you can create to simplify and speed up your command-line tasks. They allow you to define your own commands or override existing ones with your preferred options or parameters.

Think of them as your personal command-line assistant, ready to execute your commands at a moment’s notice.

Why Use Bash Aliases?

The benefits of Bash aliases are manifold:

  1. Speed: With aliases, you can execute complex commands with just a few keystrokes, saving valuable time and effort.

  2. Simplicity: Long and convoluted commands can be distilled into concise aliases, making your command-line interactions more intuitive and less error-prone.

  3. Customization: Aliases are highly customizable, allowing you to tailor your command-line environment to suit your specific needs and preferences.

  4. Productivity: By automating repetitive tasks, aliases can significantly boost your productivity and streamline your workflow.

How to Create Bash Aliases

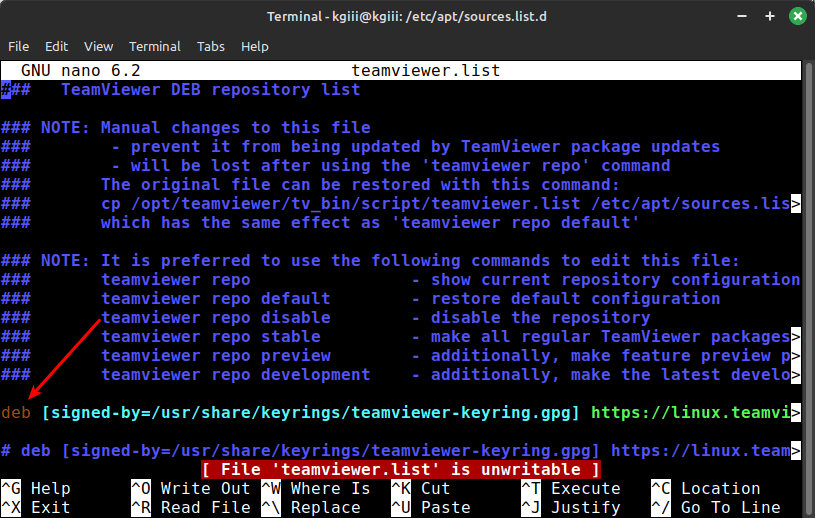
Creating Bash aliases is a breeze. Open your .bashrc  file, located in your home directory, using your favorite text editor (such as Nano). Then, add your alias definitions to the file using the following syntax:

Replace shortcut with the alias you want to create and command with the command you want to associate with the alias. For example:

This alias allows you to list all files in the current directory in a long listing format with file details.

Once you’ve added your aliases, save the .bashrc file and either restart your terminal or run source ~/.bashrc to apply the changes.

Examples of Useful Bash Aliases

Here are some examples of useful Bash aliases to get you started:

Best Practices for Bash Aliases

To make the most of Bash aliases, keep the following best practices in mind:

  1. Choose meaningful names: Use descriptive names for your aliases to make them easy to remember and understand.

  2. Avoid overriding existing commands: Be cautious when overriding existing commands with aliases to prevent confusion and unintended consequences.

  3. Document your aliases: Consider adding comments to your .bashrc  file to document your aliases and their purposes for future reference.

  4. Stay organized: Group related aliases together and organize them logically within your .bashrc  file for easier management.

Conclusion

In the fast-paced world of the command line, efficiency reigns supreme. Bash aliases empower you to wield the full power of the terminal with unparalleled speed and simplicity.

By mastering the art of aliases, you can elevate your command-line prowess to new heights and easily conquer even the most daunting tasks. So go forth, fellow command-line warriors, and unleash the power of Bash aliases upon the digital realm!

Can you tell that this was written by AI? The prompt I used for this was:

Write an article about Bash Aliases in the style of linux-tips.us.

It didn’t do very well at nailing my style and it used a lot of headers. It also rambled on quite a bit, but I do that too. I’m not sure how much time this saved. I still had to do quite a bit of formatting. A simple cut-and-paste would not match the mostly consistent formatting I have used as of late. That meant quite a bit of formatting.

I also ran the article through Grammarly. It’s too bad that they won’t accept me into the affiliate program. I quite like what they do for my writing. They make me look almost literate!

Thanks for reading! If you want to help, or if the site has helped you, you can donate, register to help, write an article, or buy inexpensive hosting to start your site. If you scroll down, you can sign up for the newsletter, vote for the article, and comment.

Playing With Your Bash History

Your Linux computer, assuming it’s ‘normal’ will retain the commands you typed in the terminal and this is your Bash history. Like all things Linux, this is something you can control. The ability to customize these things is one of the things that makes Linux great!

More specifically, this article will cover how to change the Bash history size. That’s one of the things you can control. It’s one of the settings you can customize. You don’t have to accept the default Bash history size. It’s easy enough to change those settings to whatever you want.

I’m going to assume ‘normal’. That is, normal to me. I’m going to avoid the word ‘standard’ because I don’t know if these things that are normal to me are standards. For example, even the Bash shell isn’t a standard. However, it’s normal for a Linux distro to provide Bash – typically as the default shell. It’s not a standard, it’s just normal. That is, normal to me.

Got it?

Well, your Linux computer usually uses Bash shell. It also normally keeps a history of commands you type. This file is normally a hidden file, called .bash_history and is a plain text file. 

Bash has a control file. That is, Bash has various settings that can be configured. This file is also normally hidden. It’s usually called .bashrc. As this is about the shell and Bash, you will need an open terminal to follow along with this article. You can normally just press CTRL + ALT + T to open a terminal.

What is the Bash shell?

Bash is a Unix shell. It stands for Bourne Again Shell. It has long since been ported to Linux and is what you’ll normally find when you look into the more popular Linux distros.

A shell is a command line interpreter. It’s a user interface that lets you interact with your computer in a text-based manner. There are other shells besides Bash, but this article isn’t going to cover any of them.

This article presumes you’re using the default Bash shell. If you’re curious, here’s a big comparison of shells. Some people like to use different shells with csh and and zsh being popular choices. 

Bash is just one of many possible shells, but it’s normal to see Bash as the default. If you’re not using Bash, this article may not apply. You won’t see me writing much about other shells, as I’ve mostly just used the default shell rather than spending time exploring other options.

Bash History:

As mentioned above, you usually have a .bash_history and Bash usually stores the commands you’ve entered in that file. That file is plain text, meaning you can search it, edit it, or even modify it. I’ve written some about Bash’s history before.

Search For Command History By Date
Dealing With Duplicates In Your Bash History
Let’s Delete An Entry In Your Bash History
How To: Not Save A Command To Bash History

This shouldn’t be a foreign concept to my regular readers, though I’ve not written much about Bash recently. This seems like a fine time to cover this subject.

Today, we’re going to change the Bash History Size. There are three variables you’ll need to know. Well, you can get away with just knowing two of them, but we’ll learn all three.

Bash History Variables:

As I said, there are three variables we’ll be using to control the size of your Bash history. They’re all pretty simple and they all control one aspect of the Bash history.

HISTFILE:

The first variable is ‘HISTFILE’ and you can echo this to get the information. The file is normally located at ~/.bash_history but you could change that value and have the history file anywhere you want. You can find the Bash history location with this command:

The output would look similar to this:

HISTFILESIZE:

The next variable we’ll concern ourselves with is ‘HISTFILESIZE’. This is how long, specifically how many lines, will be saved in the .bash_history file. You can your current configuration with this command:

Again, the output from that command might look similar to this:

That means the .bash_history file can be up to 2000 lines. That’s quite a bit, but not far from normal. I think I’ve messed about with it before, so I’m not sure if that’s the default. Just echo the variable to find your current settings.

HISTSIZE:

The next variable is going to be  HISTSIZE which is how many lines your shell should retain in memory. If the HISTSIZE is set to 20, you’ll have 20 lines of history to scroll back to visit. You can get the HISTSIZE settings with this command:

An example output might look like this:

NOTE: This can sort of be overridden by your terminal client. If you have a $HISTSIZE of 1000 and your terminal preferences (some terminal emulator clients have this setting) are set to 500, you’ll only have 500 lines kept in the cache at any one time. However, the number of cached commands is still 1000 – but your terminal will not show them.

We can change these variables!

Change Your Bash History Size:

Now that you know the default size settings for your Bash history, you can go ahead and learn how to change the settings for your Bash history. While it’s possible to change the location of your .bash_history file, there’s no need to.

We’ll worry about our Bash history size, that is how many lines the history file will hold. Anything else is superfluous so we’ll skip it.

The first variable you might want to change is the total number of lines that will be stored in your history file. That’s done like so:

If you want your Bash history to hold 5000 lines, the command would look like the following command:

That won’t take effect immediately. You’d have to reboot or close all the terminals before opening a new terminal for the new settings (reloading what is normally called .bashrc) to take effect. However, you can force the issue with the following command:

If you want to change the value for the maximum number of cached commands a shell can retain in any one setting, you can use the following command:

If you wanted to match the HISTSIZE with the new HISTFILESIZE, that’s easy enough to do. Just enter the following command to change the value for HISTSIZE:

Just like before, you’ll have to tell Bash to reload your settings because they’ve changed. Rather than close things, log out, or reboot, just enter the following command for the HISTSIZE change to take effect immediately:

Note that none of these commands require sudo. If you are having to use elevated permissions, you’re doing it wrong. Well,  you could be modifying the settings for another user but that’d take direct editing of the .bashrc file and you’re better off modifying that file when logged in as the user.

Closure:

Well, that was a pain in the butt to write and format. I hope that it’s not too confusing. I kept typing the variables wrong and this article about changing your Bash history settings required quite a bit of advanced formatting. That takes time, which means this article took time. Still, I wanted to cover the Bash history configuration choices and I wanted to do them all in a single article.

This article is much longer than my normal articles. I dare say that I’ve changed my writing style – again. I’ve been doing longer format articles. Previously, I’d have only covered the $HISTFILESIZE variable and left it at that, without adding many links or much additional information. I do welcome feedback and suggestions.

If you don’t like the longer format, say so. If you do like the longer format, say so. Hell, if you read the closure section say so! I don’t know if I’ll change much based on the feedback, but it’s good to know. Lately, I’ve been pulling down quite a bit more traffic, so something must be working. I’m no SEO expert, so I do what I can and follow directions from people who have had more success. But, the site is coming along nicely.

Amusingly, I’ve had almost no emails on the advertising subject since I added the Sponsorship link. I should mention that it’s possible to sponsor an article even if you’re not a business. I’d just put in a ‘thank you’ notice and link to pretty much anything you want if you did indeed want a link. This site has a solid reputation, but it’s still growing – and growing pretty quickly as of late.

Thanks for reading! If you want to help, or if the site has helped you, you can donate, register to help, write an article, or buy inexpensive hosting to start your site. If you scroll down, you can sign up for the newsletter, vote for the article, and comment.

Automatically Enable Num Lock In Linux Mint

Sometimes I write articles that scratch my own and this time around it’s how to automatically enable Num Lock in Linux Mint. If you’re using a full-size keyboard and want to automatically enable Num Lock, this just might be the article for you. This article shouldn’t be all that long – and it won’t be very complicated. 

I should explain…

So, I misfired a dd command and hosed my root partition. I then decided to do something I’ve not done in a long time. For a change of pace and a fresh start, I decided not to restore (much of my) data from backups. Sure, I imported passwords, Thunderbird, ~/bash_aliases, and remained logged into browsers, but I didn’t import all my settings, my million browser tabs, or anything like that.

It has been fun! I haven’t done this in a long time. If I hose an OS, I just install and copy my /home directory into the freshly installed OS and I’m good to go.

As an aside, I’m quite grateful that I’ve written these articles. They’ve come in handy while rebuilding my system. I find myself referring to this site quite often. After all, I tend to write about what I know. These are often articles of things I do. This time around, it’s simply how you can automatically enable Num Lock in Linux Mint. This shouldn’t take long.

If you’re interested in this article, you might be interested in this other article:

Disable The Caps Lock Key In Linux Mint

Automatically Enable Num Lock In Linux Mint:

You don’t need an open terminal for this, but we’ll use the terminal because it’s easier for me to do this in the terminal. You can start by pressing CTRL + ALT + T to open your terminal.

With your terminal now open, we’re going to install an application called numlockx.  This is required if you want to use this method of enabling Num Lock automatically. 

If you check the man page, you’ll see that this is the tool we want for this task.

numlockx – Control the state of NumLock

Sure enough, that’s what we want to do! The rest is all in the GUI.

Open your menu and search for “login”. You’ll see an application called Login Window. Open that and then click on the Settings tab. With that Settings tab open, tick the slider to automatically enable Num Lock when you log into the system. It looks like this:

it's easy to automatically enable num lock in Linux Mint
That’s really all there is to it, so long as you first install numlockx. See? I told you it was easy!

That is what your screen should look like to enable Num Lock. This is it at the login window portion of the boot. This means you’ll have the Num Lock enabled and won’t have to remember to press the button when you use it.

Closure:

See? I told you this one would be quick and easy. Like I said, I’m just scratching my own itch. I prefer the Num Lock key to be enabled all the time. It’s just a habit for me and I do use the number pad fairly often. I figured I’d share it, seeing as it was something that was on my mind.

Thanks for reading! If you want to help, or if the site has helped you, you can donate, register to help, write an article, or buy inexpensive hosting to start your site. If you scroll down, you can sign up for the newsletter, vote for the article, and comment.

Disable A PPA The Hard Way

Today’s article is just for fun, as there’s usually a handy graphical way because we’ll be discussing how to disable a PPA the hard way. This is mostly an exercise in fun and education. It’s something you can do, but you do not need to do. We’ll be learning how to disable a PPA the hard way, specifically through the terminal.

If you’re interested in doing things the hard way, read on! We’ll have fun with this one, and having fun is essential.

There’s an easy way to manage your PPAs, and this is not that. In your application menu, look for ‘Software Sources’ and do that. Do not do this – unless you have no graphical environment.

A PPA is something used by Ubuntu, but is also used in Mint and is possible to use in others – like Debian which strongly suggests against it. PPA stands for Personal Package Archive and is meant to be exactly that. It’s us that abuse the idea, which is kind of how we ended up with Ubuntu Snaps and other similar package formats.

We use PPAs for all sorts of things, like adding entire other repositories to install custom software. It’s meant to be your personal package archive – meaning personal. We’ve decided it’s a fine way to add repositories to install software not included by default. Oops!

So, we’re going to disable a PPA, and we’re going to do it the hard way. We have no reason to do it this way, at least on desktop Linux, but we can. And so, just because we can, we have this article.

Disable A PPA The Hard Way:

Yeah, we’re doing this the hard way. So, that means we’re going to need an open terminal. If you don’t know how to open a terminal, you probably shouldn’t be doing this. But, just in case, you can normally press CTRL + ALT + T and your default terminal will open. Otherwise, you can open the terminal from your application menu.

With your terminal open, you need to first know what repositories you have available to you. You need to know the added PPAs. That’s easy enough, just enter the following commands:

That will change you to the correct directory. We’ll now list the files like this:

That will show you an output similar to this:

Find the PPA you want to remove. In our case, we’ll use teamviewer.list as the PPA (or ‘regular’ repository) we wish to remove. This works for both PPAs from LaunchPad or other repositories you may have added.

So, you’ll want to use Nano for this. Odds are that Nano is installed by default these days, but this is not always true. So, read the following page before moving on.

Let’s Install Nano (With Some Bonus Information)

So, we want to edit the teamviewer.list to disable the TeamViewer repository. That’s done with Nano and the command looks like this:

You’ll then be faced with a text file. Look for the line that starts with deb and is not commented out, that is not starting with a #  symbol. For example:

Find the correct line to edit when trying to remove a PPA.
This should be fairly easy for anyone to follow. It’ll be the line without the pound sign.

So, in my case, I’d take the line that looks like this:

And I’d comment out that line. More specifically, I’d add a # sign at the front of that line. So, it’d look like this:

You’ll then need to tell Nano to save the file. That’s easily done. You can just press CTRL + X, then Y, and then ENTER to save a file with Nano.

Next, you do this for any repositories (not just PPAs) that you wish to remove. Be aware that the software installed from those repositories will no longer update (which can be a bad thing). If you remove a PPA and still have the software installed, it should be temporary so that you can troubleshoot something.

Otherwise, you can now verify this. You simply need to update the available software again. You do that with this command:

When you do that, you should find that you no longer have that PPA (or just regular ol’ repository) enabled. It will no longer update, thus no longer offer you new versions of that software.

The latter part of that previous paragraph should be considered essential.

So, choose carefully. If the repository has software that you plan on using, you should probably keep updating it. Many of the updates aren’t just bug fixes. Oftentimes, they’re legitimate security fixes. Software is software, regardless of the operating system. It has bugs and sometimes those bugs are security issues. It’s best to keep your system updated and doing so makes you a good Netizen.

Closure:

So, yeah… We’ve discussed how to disable a PPA the hard way. You can disable any repository this way, I suppose. I’m not sure that I’d suggest doing it this way – unless you need to do it this way. If that’s the case, you should do it this way. Most of the time, there are nice handy graphical tools to manage that sort of stuff.

Thanks for reading! If you want to help, or if the site has helped you, you can donate, register to help, write an article, or buy inexpensive hosting to start your site. If you scroll down, you can sign up for the newsletter, vote for the article, and comment.

Let’s Make The rm Command Even Safer

Today’s article is one I don’t expect most folks to follow, but it’ll be a fun way to make the rm command even safer. If this article sounds familiar, then you remember a recent article. Well, this article takes it a step further and we’re making the rm command even safer!

See, in the last article you learned how to:

Let’s Make The rm Command A Little Safer

Despite the naysayers not seeing the value, that article will help you make the rm command a little safer. It adds a sanity check. If you followed the directions, you’d get the chance to tell the rm command to ‘never mind’ and to ignore your command prompt. This can stop you from removing files accidentally.

While I wrote that article, I already had this one planned, but didn’t want to publish the two back-to-back. I try to mix things up a little.

NOTE: If you followed the directions in the first article and decide you’d rather go this route, you’ll have to undo the actions you took. These two things can not work together at the same time. It’s a one or the other kind of thing.

What will we be doing in this article?

Well, simply put, we’re going to use an alias like we did in the previous article about making the rm command safer – except we’re also going to define a function and alias the rm command to that function instead.

What will that function do? Well, in short, it will take the results of the rm command and stick the files in your trash (recycle) bin. It makes the rm command work similarly to your regular delete (depending on the distro). Instead of deleting files, it happily sends them to the trash bin instead. So, if you screw up you can restore the files nice and easily with your GUI (by going into the trash bin and restoring the files, of course).

This is a bit more complicated. That’s why I went with the previous rm command modifications earlier. This still isn’t all that complicated. I realize this is something new to most of my readers, so I’ll make it as clear as humanly possible. (Wish me luck!)

In the previous article, we made the rm command a little safer. This time around, we’re going to try to …

Make The rm Command Even Safer:

Yes, you’ll need an open terminal. You can likely press CTRL + ALT + T and your default terminal should open. Otherwise, open it from your application menu.

These directions will assume you’re using Nano. If you are not using Nano, please adjust the directions to suit your text editor of choice.

With your terminal open, I want you to enter the following command:

Then, and this may be confusing, I want you to copy and paste all of the following text at the very bottom of that file:

Next, you need to save the file. As we’re using Nano, you save the file by pressing CTRL + X, then Y, and then ENTER.

Next, you need to tell your system to reload the ~/.bashrc file. You can log out and back in, you can close all the terminals and open a new one, or you can simply type the following:

NOTE: In the second code block you’ll see ~/.local/share/Trash/files. This should be the correct path to your trash bin. You should verify this and change the path accordingly. This directory ONLY exists if you’ve previously moved something to the trash. You’ll need to create a file and move it to the trash or you’ll have to make the directory manually.

Testing This New rm Command:

Leave your terminal open and open your GUI file editor. With your GUI file editor open, navigate to ~/.local/share/Trash/files.  You may not see it by default, so change your GUI file manager’s options to show hidden files and directories. (You can often use CTRL + H to show hidden files.)

Now that you’ve navigated to the directory with your GUI file manager, return to your terminal emulator. Once there, type the following:

You can then run ls to ensure the file foo.txt exists. Next, you’re going to delete it with the rm command:

Again, you can then run ls to ensure the foo.txt file has disappeared. It should certainly be gone from the directory you were in and removed by the rm command.

Except, it wasn’t!

Go back to your GUI file manager and (you might need to refresh it, depending on the file manager) check the list of files. Sure enough, you should see a foo.txt in the trash bin. It’ll remain there until you restore it or until you empty the trash.

Pretty neat, huh? 

Closure:

The first article made the rm command safer. This article will help you make the rm command even safer! You can’t do both (easily), but you can do one or the other. I mean, I’m sure it’s possible but I’ve never thought of a way to do so. I haven’t tried to think of a way to do so. So, there’s that…

If you follow this article, your rm command will send the files deleted by rm to the trash bin. If you follow the first article, you get the chance to view your command’s outcome and decide to back out of the file removal process. You can pick whichever one works best for you.

You can also completely ignore these things and just keep on doing what you have been doing. This being Linux, you can make all sorts of choices – including this one. Though, I think it was Rush who said, “If you choose not to decide you still have made a choice.”

Thanks for reading! If you want to help, or if the site has helped you, you can donate, register to help, write an article, or buy inexpensive hosting to start your site. If you scroll down, you can sign up for the newsletter, vote for the article, and comment.

Subscribe To Our Newsletter
Get notified when new articles are published! It's free and I won't send you any spam.
Linux Tips
Creative Commons License
This work is licensed under a Creative Commons Attribution 4.0 International License.