It can be a little confusing if you want to remove the default music player in Elementary OS. It isn’t really all that clear immediately, so here’s an article explaining how to remove the default music player in Elementary OS.
The default music player in Elementary OS (eOS from here out) is kinda lame. There are many better choices out there. Once you’ve chosen a replacement music player, this is how you remove the default music player in eOS.
This was first asked on a forum that I frequent and I took the time to find the answer. I figured that I’d not been able to easily find the answer with a search engine, so I might as well turn it into an article. It’s actually pretty simple.
eOS lacks any handy GUI system monitor that I could find, so I installed one. You might as well do the same. With eOS, you’re eventually going to want it – though top or htop or even atop do the job just as well.
Anyhow, I installed one and found that closing the “io.elementary.music” process closed the music player. Obviously, you can’t uninstall that. It’s part of some bigger package and eOS does things in unusual ways.
With further digging, I finally noticed an application called ‘noise’ in the list of running processes. Killing it would kill the music player, just like killing the io.elementary.music process would. Finding this out pleased me, as that was the answer.
Remove Default Music Player:
With that information in hand and properly tested, I was able to give the answer. The answer began with telling them to open their terminal, which you can do easily enough. Just press CTRL + ALT + T and your default terminal should open.
With the terminal open, it’s just one single command:
1
sudo apt remove noise
It’s so intertwined with eOS that you might want to reboot after you’re done. You can do that with the following command:
1
sudo reboot
And there you have it. That’s all you need to do. I’m not sure why eOS makes it so difficult to find this. I’m also not sure why it wasn’t widely published, but it’s online now. Technically, it was online before now -at my old site. This is actually an old article that was redone to suit this site.
Closure:
We are getting closer to the one year mark. It’s less than a month away. I’m probably going to take a day or two off and then get back to the regular schedule – though with maybe a little less pressure to get it done every other day. It’s great when I have a half dozen articles done and ready to publish, but not so much when I’ve run out of ideas and I need an article for tomorrow. Ah well…
Thanks for reading! If you want to help, or if the site has helped you, you can donate, register to help, write an article, or buy inexpensive hosting to start your own site. If you scroll down, you can sign up for the newsletter, vote for the article, and comment.
Today’s article is about one of my favorite terminal emulators, Terminator.Terminator is one of my favorite terminal emulators, and I’d like to use this opportunity to expose more users to it. For lack of a better category, we’ll say this is a review. Why not? It’s my site, I’ll call it a review if I wanna! I’ll make it a review!
So, we call it a terminal emulator because it emulates the terminals of old, back when terminals were the main way for a person to interface with their computer. They are not true terminals, but they perform similar functions. Long gone are the days of just green-screens. Today, we have graphical user environments and there’s less focus on the terminal for some folks. From here on out, I’ll just be calling it ‘terminal’ for simplicity and brevity sake.
There are some die-hard folks who still cling to the terminal – and I’m one of them, at least for certain tasks. At any given moment, I have at least two terminal instances open, each a different piece of software. One of those is usually Xfce4 and the other is often Terminator. Today’s article is about the latter.
Chances are good that you can install Terminator with ease. It’s likely in your default repositories. For example, on Ubuntu you’d install it with this command:
1
sudo apt install terminator
Go ahead, give it a shot… If not immediately available, you can look here for more information. If you’re really energetic, you can read the documentation. In this case, it’s going to be a positive review (obviously), so I’d not recommend it (such as I am) if I wasn’t a fan… So…
Why Terminator:
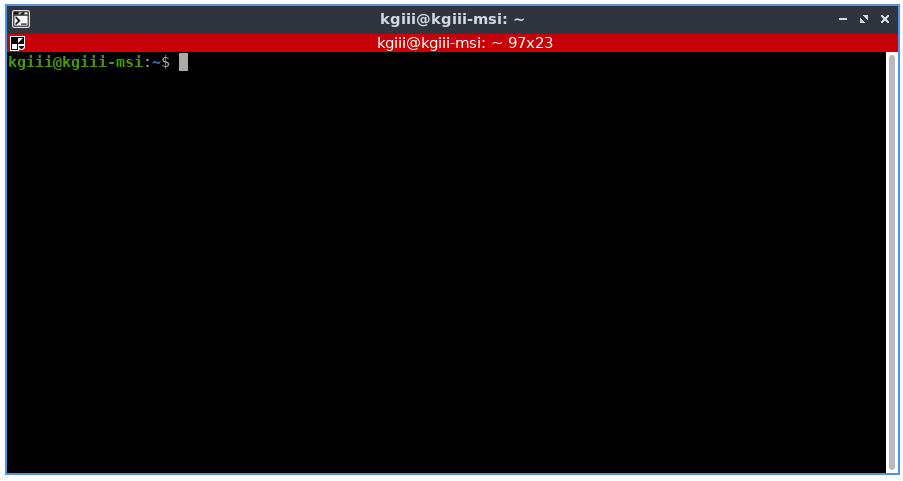
You’ll not be even remotely surprised when you open Terminator for the first time, and that’s a good thing. You’ll see your standard terminal looking thing, complete with a title bar. Truthfully, it’s kinda ugly looking until you make it your own (more on that in a minute). It looks like this:
Terminal (terminal emulator) without any customizations.
What you’re looking for is in the right mouse-button click – the preferences menu. Once you open that, you’ll see all sorts of options.
Once in the options, you’ll start to understand why I like Terminator. You can make it visually appealing, use multiple tabs, group tabs, auto-run commands when opened, and have all the various profiles you could possibly want. If you’re working on multiple servers at the same time, this is definitely a great help.
You have infinite theme options, but there are a number of them that are built in – the standard types like solarized dark or light. If I’m not taking screenshots, I like mine to look like this:
As I’m often in a dark room, this is excellent for my eyes.
That is so much nicer on my eyes. And, if the Terminator theme didn’t clue you in, yes I am using a computer that I don’t normally use. It’s a long story, but nothing is broken beyond my ‘net connection. But, that’s why the screenshots look different. I am also using Flameshot instead of my beloved Shutter.
So, that’s not enough? Seriously – go through and check the preferences. You have global options and then you have all sorts of preferences that you can pick – each contained in their own distinct profiles. When you get to the profiles, you’ll see how much customization is really possible. Allow me to show you:
As you can see, there are a whole lot of options with Terminator.
What does Terminator offer? A whole lot… Not only are there tabs, you can set it up in a more traditional grid fashion. These layouts can be moved with drag-and-drop. The list of keyboard shortcuts is extensive – and you can probable tell I’m just reciting the documentation. Layouts are even saved from session to session.
But Wait, there’s more!
Anyhow, all those preferences, not just layouts, can be saved from session to session. Once you get it configured the way you want, it’ll let you retain those settings. Many of these are all extensions of the profiles feature, so it’s highly customized if you want it to be.
I especially like the individual profiles – not seen on this computer’s screenshot. If I paid a bit more attention, I could just copy the config from ~/.config/terminator, but I’m slacking and this situation is temporary. (I’m amazed that I’ve still been able to keep up my publication schedule!) I did not, so you get a different set of screenshots.
If you want, you can even find plugins for Terminator. You can write your own, if such is your desire. If you click here, you’ll see a bunch of plugins that you can use to extend Terminator even further. (Quite a few plugins exist, so do check the link.)
As I said, there are quite a few plugins and some of them are quite useful – especially for system admins and programmers, or DevOps folks I guess. They’re universally free, in every sense of the word. They’re also easy to install – just drop them into ~/.config/terminator/plugins/ and they’ll be available to enable from the preferences menu.
If nothing else, go ahead and install Terminator to see if you like it. I dare say that you won’t be disappointed, unless you’ve got some weird edge-case and even then it’s about the best you’re going to get.
Rating Terminator:
Terminator does everything you can want in a terminal, more or less. If it doesn’t do what you want, plugins are easily developed and someone else may have scratched that itch for you already.
I honestly can’t think of anything it’s missing that I personally need or want. It can be a bit boxy and the look is dated, but it should match your theme fairly well, or better if you do some work customizing it.
I appreciate how easy it is to configure it to work with my eyesight. I’m partially colorblind (not the way you’re probably thinking) and have difficulties with the spaces between the primary colors. I can see green, but yellow-green may appear as either yellow or green to me. So, some of the themes (again, you can customize them as much as you desire) are wonderful for my eyes.
Yeah, try as I might, I just can’t think of anything bad to say about it. I’m reluctant to give anything a 10/10, but this is really close to being the perfect application for the task it is designed for. I’d even go so far as saying that it’s feature-complete, but some folks must not agree ’cause they keep writing plugins and that means they want more features.
So, I’m going to give this a 9.5 out of 10. That’s the highest I’ve ever rated anything on this site and I’d not expect to see that score for anything else. I knock the 0.5 because obviously people expect more from it – options they feel should be defaults. A few of the plugins are indeed handy (even to me, a simplistic user). Yeah, I’ll knock off the points for that. That sounds good. It gets a 9.5/10. That’s pretty much a gold medal winner, right there!
Closure:
And there you have it… You have another article – this one a review, and a review of not just one of my favorite pieces of software but of a piece of software I use many, many times a day. Even if you have a favorite terminal, give Terminator a try. You won’t be disappointed – probably… If you are, you’re just weird!
Thanks for reading! If you want to help, or if the site has helped you, you can donate, register to help, write an article, or buy inexpensive hosting to start your own site. If you scroll down, you can sign up for the newsletter, vote for the article, and comment.
Today’s article is going to tell you how to unzip a .zip file in the Linux terminal. It shouldn’t be too complex, nor will it take a great deal of time to learn how to unzip a file.
In the Linux world, we don’t really see the .zip files all that often. We have other ways to compress files, but .zip is still there and you’ll sometimes come across them in your travels.
If you’re unaware, the .zip form of data-compression is actually a ratified standard. The format has been around since the late 80s and is one of the compression methods that supports loss-less compression. There are all sorts of compression formats and methods, but .zip has been around since forever and will probably exist long into the future.
If you want to unzip a .zip in a GUI, I’d say that you need look no further than PeaZip. It’s easy enough to compile from source, or you can find pre-built PeaZip packages for most distros. This article, on the other hand, is how to unzip a zip in the Linux terminal.
It’s not all that daunting and should be a pretty easy article for even a beginner to follow. Though, I suppose, any well-written article should be easy enough for a beginner to follow. Were I something other than a basic keyboard smasher, I’d probably be able to do that!
The headline clearly mentions doing this in the terminal, so you’re going to need an open terminal to continue. That’s relatively simple. Just press CTRL + ALT + T and your default terminal should open.
With your now-open terminal, let’s first make sure you have the ability to unzip a .zip file. To do that, let’s use:
1
which unzip
That should return something akin to:
1
2
which unzip
/usr/bin/unzip
If you do not get a result, you’ll need to install unzip from your system’s repositories. Trust me, it’s in there – unless you’re using a really, really basic distro.
Assuming you get results indicating that you have unzip, it’s actually easy to unzip a .zip in the Linux terminal. You just navigate to the correct directory and run:
1
unzip <file_name>
Which, I suppose, is mostly all you’re going to need. I should also mention that when you’re attempting to run this command, you can generally type the first few letters of the file name, and then press TAB to auto-complete the file name, saving you some typing time and just generally making the whole thing easier.
Obviously, there’s more to the unzip command. You can check the man unzip page, but the more useful flags will get covered here. Seriously, check the man page. The command is absurdly complex, with tons of options for obscure uses.
For example, to unzip a .zip to a different directory, you just use the -d flag, like so:
1
unzip <file_name> -d /desired/path
If you need to enter the password, you can just use:
1
unzip -P <password> <file_name>
When you want to list the files without decompressing them, you just use the -l flag, like this:
1
unzip -l <file_name>
If you want to test the ,zip file to see if it’s corrupted, you can use the -t flag.
1
unzip -t <file_name>
Normally, it’ll extract the files and overwrite the existing files (if any). You can avoid that with -n flag:
1
unzip -n <file_name>
When you unzip a .zip, you will find out that it happily creates new directories. You can avoid that with the -j flag, like this:
1
unzip -j <file_name>
Do read the man page! There’s a zillion options.
Closure:
Seriously, read the man page. Learn how to unzip a .zip file – and then all the many, many options included. Of all the man pages out there, this one is one of the most complex ’cause this one little application has a ton of options. Even if you don’t intend to learn it all, read the man page!
Thanks for reading! If you want to help, or if the site has helped you, you can donate, register to help, write an article, or buy inexpensive hosting to start your own site. If you scroll down, you can sign up for the newsletter, vote for the article, and comment.
Linux is an operating system and, like every operating system, you sometimes need to kill frozen applications. Computers are not now, nor will they ever be, perfect devices with perfect software. Sometimes, crap happens and you find yourself in a situation where you need to kill a frozen application or two. (Even if it were perfect, your RAM is bombarded with EMR and will eventually knock a bit loose, even with ECC RAM.)
There are all sorts of ways to deal with frozen applications. You can do everything from sigterm to pkill. Worst case scenario, you always have RIESUB to fall back on – for a completely frozen system. All of those are great and have their place, as does this method.
As this is meant to be quick and simple, so we’re just going to jump into it – and have a relatively brief article today.,,
Kill Frozen Applications:
Let’s say you’ve somehow managed to make your browser freeze. It is unresponsive, though the rest of the system seems to work just fine. You could open a terminal and try the pkill and sigterm types of resolutions or you can use xkill. It’s literally point and click!
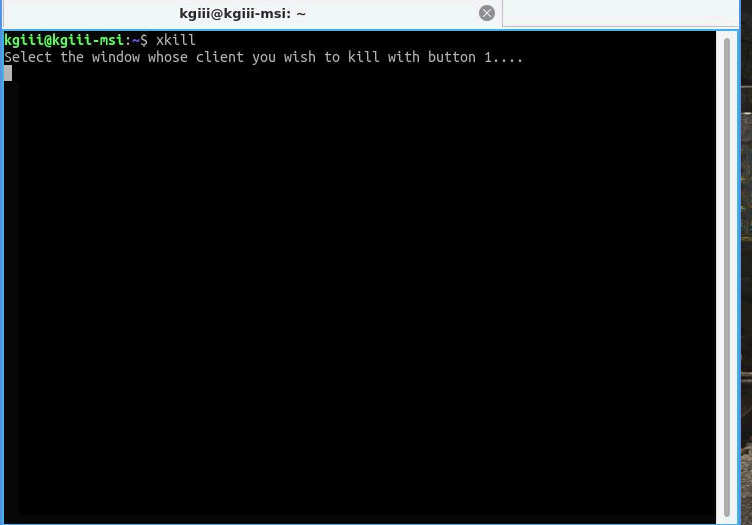
So, open your terminal and enter the following (read the rest before doing this):
1
xkill
When you do, your terminal will look a little like this:
The icon will change as well, but I can’t seem to capture that.
Your cursor might also change. In one test my cursor is an X and on another test, with a different OS, it’s a red skull and crossbones. I couldn’t caputer either in a screenshot, so you get what you get.
NOTE: If you change your mind and don’t want to click-to-close, you can still type in the terminal. You can use sudo pkill <terminal-name> to get back to normal.
Anyhow, take that cursor and click on the application you want to close. This sends a shutdown command to the frozen process and things should go back to normal after the frozen application closes. Of course, sending the shutdown command to a process in no way indicates a certainty of it listening, it may still fail and stay frozen – perhaps depending on how exactly frozen the application is.
NOTE: It has come to my attention that I should warn you. If you click on it after typing xkill, it WILL close it. It’s pretty indiscriminate. It doesn’t care if you’ve saved. It will kill it. I’m also told that CTRL + ALT + ESC is a shortcut in Mint for this, but I can’t seem to make it work.
Closure:
See? I told you that it’d be a quick and easy article. This one is about you you can kill frozen applications – but there are all sorts of ways to do that. You can expect future articles to cover this very subject, but with different methods. I just figured this would be quick and easy for everyone.
Thanks for reading! If you want to help, or if the site has helped you, you can donate, register to help, write an article, or buy inexpensive hosting to start your own site. If you scroll down, you can sign up for the newsletter, vote for the article, and comment.
You’ll hear the phrase “Linux distro” tossed around quite a lot and this article will explain what exactly is a Linux distro. It’s not overly complicated and this article shouldn’t take a whole lot of time.
You should also be aware that I’m writing this article in a way that is aimed at the lowest common denominator. I’ll be trying hard to make it simple to read and easy to understand. I don’t want to overwhelm folks with details. I want folks to understand the general concepts.
On to the article…
What Is Linux:
The term ‘Linux Distro’ is short for ‘Linux distribution’.
I don’t suppose that’s all that helpful…
So, what is Linux? We use the term loosely, but Linux is just the kernel. That’s all Linux is – by itself.
Again, that’s probably not all that helpful.
Then, well, what is a kernel? The kernel is an interface between hardware and software. It also schedules tasks, such allocating memory and keeping track of the memory space where things are stored. It manages processes, memory, and device drivers – interfacing hardware with software.
You really shouldn’t need to interact with the kernel at a personal level, at least not directly. At the same time, everything you do requires kernel participation. Without it, hardware would be useless.
Okay, so now we know what the kernel is – and we know that it is called Linux. Well, that’s all Linux is – and, by itself, the kernel is not all that useful.
Introducing GNU:
Instead, we have some tools around the kernel that make the kernel useful. These tools are often from GNU. Many of these tools existed before the kernel was invented, actually. They’re (many of them) clean-room implementations of Unix tools that were just waiting for the right kernel to come along.
In 1991, Linus Torvalds released his kernel to the world at large. The GNU tools already existed. People put the two together and we started to have the basics of a working operating system.
See, an operating system is much more than just the kernel. At bare minimum, it must have some tools to interact with the kernel. The GNU tools will let you do that *(and more). As GNU tools predated the kernel and because the kernel is newer, many advocate calling it “GNU/Linux”.
That is not an argument without merit as all the major Linux distros make use of tools from the GNU Project. Without one, the other is useless. While there was an expected GNU kernel (for GNU Hurd), that has not had much attention and success.
And Now, A Linux Distro:
You could actually accomplish quite a bit with just GNU/Linux but it still didn’t have tools like a useful browser, a graphical text editor, a graphical desktop, or anything like that. By itself, it’d have limited appeal and you’d need to write any software you needed that wasn’t already included. A lot of what people expect would not have been included with just the GNU tools.
And so the concept of a ‘distro’ is born.
Enterprising people, people who’d join others with their efforts, would combine GNU/Linux with a bunch of other tools – creating a concept of a set of tools fit for a purpose. You’d have distros meant to be used for running servers, distros for home use, distros for security purposes, distros for privacy reasons, etc…
And those distros would all be built around the GNU/Linux tools.
Each Linux distro out there was made for a reason. If there were already distros that filled that roll, then the distro author’s reasons were that they could do it better or in a different way.
Today, there are like 500 active Linux distributions out there. Each one of them fills a niche, scratches an itch, performs a task (or set of tasks), at least a little bit different from the others. So, finding a Linux distro that suits your needs can be either easy or hard. It all depends on what you need.
Why Call It Linux:
Well, we call it Linux because that’s the most important bit. Without it, none of the rest of the system works. Without the Linux kernel, you’re stuck looking for a different kernel. (Note: Other kernels do exist.)
There’s absolutely some merit in calling it GNU/Linux. The GNU tools are in most every distro and without the GNU tools the kernel is pretty useless. At the same time, the GNU tools are older than the kernel. Combined, the provide a great deal of the functionality that is an operating system.
I don’t call it GNU/Linux because it’s unwieldy and everyone who needs to know that GNU is involved already knows that GNU is in there. I find those that insist on it are mostly okay people, they’re just pedantic and want to highlight the distinction. They’re not bad people, they just want to make sure GNU is recognized.
When important, I’ve been known to refer to Linux as GNU/Linux. I just don’t make a habit of it. Also, really, not too many people care. Though, I suppose calling it GNU/Linux can be confusing for some new folks. Not my readers though, they’re witty, intelligent, and eager to learn!
Closure:
Well, it’s an article… This one tells you about the Linux distro. It explains what a Linux distro is and why we call it that. Hopefully this is enough information for a layperson. If not, you can always ask for more information and I’ll do what I can to oblige. Like I said, this is written for the lowest common denominator. It’s not written for the folks who have used Linux for a decade. Those people have been using Linux for a decade, they should darned well know what the Linux kernel is!
Thanks for reading! If you want to help, or if the site has helped you, you can donate, register to help, write an article, or buy inexpensive hosting to start your own site. If you scroll down, you can sign up for the newsletter, vote for the article, and comment.