Sometimes old tools are the best, or at least adequate. In this case, we’re talking about HardInfo – a tool that hasn’t been updated in about 7 years, but still does a great job.
This is Linux. There are a ton of great applications to detect and list your hardware. Most of them are CLI. HardInfo is one application that lets you graphically detect and show your computer’s hardware. It’s rather out of date, but that doesn’t seem to hinder it any.
Welcome to HardInfo!
HardInfo used to be installed by default with Lubuntu. As near as I can tell, the last time it was included by default was in Bionic (18.04) and it has now been left aside as an old relic and with nothing replacing it.
You may remember it, but you may remember it with a different name. In your menu, it showed up as “System Profiler and Benchmark” and may well have been overlooked by many. Not me, I use it every time I get a new computer and want to check out the performance.
Allow me to explain…
See, it doesn’t just list the hardware that it finds, it also (as the menu entry implies) lets you run a bunch of pretty neat benchmarks. If your computer is fairly modern, then it will likely exceed all the default benchmarks listed in the program. It has been a long time since it has been updated, after all. Still, it’s great to see what your computer is capable of.
The great thing about it is that it’s simple and self-explanatory. I don’t really have to tell you how to use it. You can figure it out easily enough on your own. I only need to make you aware of it!
Installing it is easy enough. If you’re using a Debian/Ubuntu distro, or a derivative, you can install it right from your default repositories. This is true for most other distros, I suspect. I confess, I made absolutely no effort to look this up! Still, to install it in Ubuntu, you’d start by opening your terminal. Use your keyboard to open your default terminal by pressing
Then, just run the following command:
1 | sudo apt install hardinfo |
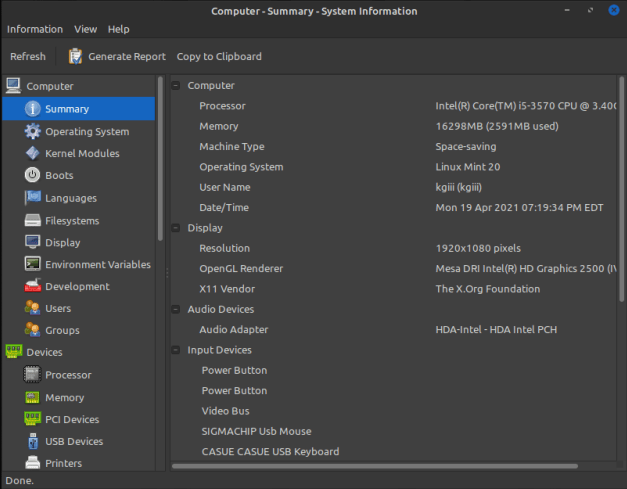
Then, just open it from your menu – somewhere under system tools and by the name mentioned above. It should look a little like this:

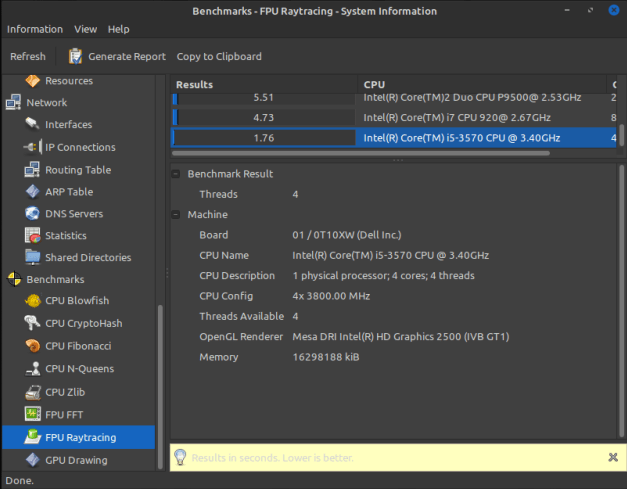
Scroll down and you can run a bunch of different benchmarks! Once again, this is entirely self-explanatory. If you use a more modern device, you’ll shatter the records listed for other computers – which is a nice boost of endorphins – like so!

And, there you have it. HardInfo is still a pretty wonderful tool. I like it for all the benchmarks it offers. They’re a great way to get a rough estimate of performance. It’d be great if that section was updated with more modern devices, but I am not a very good programmer. Maybe one of you will download the source, fork it, update it, and maintain it? It’d be a great asset to the community!
Bonus: CPU-X
If you want something more modern, that gives the same information but has fewer benchmark choices, then you can always take a look at CPU-X. CPU-X is from the folks at X0rg (not to be confused with X.org) and has been updated much more recently. It’s a great GUI way to check your hardware. Once again, you can install it from your default repositories. Once again, that looks like this for Debian/Ubuntu/apt using distros:
1 | sudo apt install cpu-x |
It too is fairly self-explanatory. If you need help using it, perhaps Linux is not the best choice for you! Ha! I kid… If you need help using it, just go ahead and ask. I’ll do my best to get you sorted.
If you want a more modern version, you can download it. It’s a little complex, but not very. First stop, visit the CPU-X GitHub page and click on the latest release – on the right.
Once you’re there, you can download the AppImage, which is probably easiest. If you want, you can grab the package for your OS, it’ll be in tar.gz format. Open it with your archive manager.
Inside that archive, you’ll find some .deb files. You know what to do with those. First, extract the CPU-X .deb and then extract the ‘libcpuid’ file – not the one with dev in the title.
Once you have them both extracted, you need to install the appropriate library file before you install the CPU-X .deb. The library is a required dependency and the one in the default repositories is not new enough to work with the newer CPU-X.
You’ll also possibly get a warning that says you have an older version available in the repositories and that you should install that version instead of the newest version. You can skip that warning and install the newer version just fine. It shouldn’t break anything!
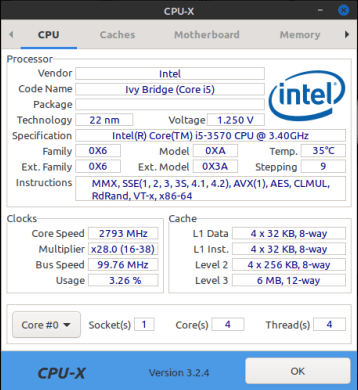
When you start CPU-X, it will ask you to run as root. To get all the information, you will need to run it as root. So, go ahead and either select “Run as Root” in the menu or go ahead and choose to run it as root when prompted. It will, of course, ask you for your password. If you’ve done it correctly, it will look a little like this:

If you use the right arrow near the top, you’ll see there are benchmarks available. They’re two simple benchmarks where your computer generates prime numbers. You can select the duration and the number of threads. Other than that, it’s not really all that complicated or informative. It’s there if you want to.
Anyhow, there you have it. You have a couple of ways to graphically check your hardware information. If you don’t want to use something like inxi, this is the next best thing. Thanks for reading and be sure to sign up for the newsletter.