We’ve covered this topic before, but I want to show you another way that you can show mounted filesystems. As previously covered, you have multiple filesystems mounted at any one time. So, let’s examine them, shall we?
If you use Linux, you use multiple filesystems. There are real and virtual filesystems created and used by the operating system. A real filesystem would be something like a partition on your storage device (one filesystem per partition, of course). A virtual filesystem would be things like your temporary files or cached files, among other filesystems used by the system.
We’ve covered this before and this is just another way to show your mounted filesystems. This is good information to have, as it’s handy to know the path for those things so that you don’t do something silly like misfire a dd command and hosing your OS partition. (Ask me how easy that is.)
Show Your Filesystem In The Linux Terminal
Another Way To View Attached Storage Devices
Another Way To View Attached Storage Devices
(And there are more! This is an oft-covered subject on Linux-Tips!)
So, what will we be using?
findmnt:
You shouldn’t need to install anything for this article. The findmnt tool should be installed by default. You can verify that findmnt is installed by running the following command:
1 | which findmnt |
The output of that command should probably match this one:
1 2 | $ which findmnt /usr/bin/findmnt |
You check the man page with this command:
1 | man findmnt |
There’s additional information available in this application. Run this command:
1 | findmnt -help |
But, if you check the man page, you’ll see that this is indeed one of the correct tools for the job. This being a basic task, there are many ways to show mounted filesystems. It’s up to you to pick a favorite – or find the most useful of commands for your particular situation.
Anyhow, the man page describes it as:
findmnt – find a filesystem
That’s what we want to do. That means that this is the correct tool for the job.
Show Mounted Filesystems:
You’ve been here long enough to know that we’re likely to use the terminal. If your hunch was that we would be using the terminal, your hunch was correct. You’ll find that findmnt is a terminal-based application so open your default terminal emulator by finding it in your application menu or pressing
With your terminal open, you can show mounted filesystems with this command:
1 | findmnt |
You’ll see that it even has a nice tree output. You’ll find things like Snaps have their own filesystem if you’re using a system that uses Snaps. Other jailed applications may also use their own filesystem as a way to keep things separate from the system as a whole.
Here’s an example truncated output from Lubuntu:
1 2 3 4 5 6 7 8 9 10 11 12 13 14 15 16 17 18 19 20 21 22 23 24 25 26 27 28 29 30 31 32 33 34 35 36 37 38 39 40 41 42 43 44 45 46 47 48 49 50 51 52 53 54 | $ findmnt TARGET SOURCE FSTYPE OPTIONS / /dev/nvme0n1p1 ext4 rw,relatime,discard ├─/sys sysfs sysfs rw,nosuid,nodev,noexec,relatime │ ├─/sys/kernel/security securityfs securityfs rw,nosuid,nodev,noexec,relatime │ ├─/sys/fs/cgroup cgroup2 cgroup2 rw,nosuid,nodev,noexec,relatime,nsdelegate,memory_recursiveprot │ ├─/sys/fs/pstore pstore pstore rw,nosuid,nodev,noexec,relatime │ ├─/sys/fs/bpf bpf bpf rw,nosuid,nodev,noexec,relatime,mode=700 │ ├─/sys/kernel/debug debugfs debugfs rw,nosuid,nodev,noexec,relatime │ ├─/sys/kernel/tracing tracefs tracefs rw,nosuid,nodev,noexec,relatime │ ├─/sys/fs/fuse/connections fusectl fusectl rw,nosuid,nodev,noexec,relatime │ └─/sys/kernel/config configfs configfs rw,nosuid,nodev,noexec,relatime ├─/proc proc proc rw,nosuid,nodev,noexec,relatime │ └─/proc/sys/fs/binfmt_misc systemd-1 autofs rw,relatime,fd=29,pgrp=1,timeout=0,minproto=5,maxproto=5,direct,pipe_in │ └─/proc/sys/fs/binfmt_misc binfmt_misc binfmt_misc rw,nosuid,nodev,noexec,relatime ├─/dev udev devtmpfs rw,nosuid,relatime,size=16283764k,nr_inodes=4070941,mode=755,inode64 │ ├─/dev/pts devpts devpts rw,nosuid,noexec,relatime,gid=5,mode=620,ptmxmode=000 │ ├─/dev/shm tmpfs tmpfs rw,nosuid,nodev,inode64 │ ├─/dev/mqueue mqueue mqueue rw,nosuid,nodev,noexec,relatime │ └─/dev/hugepages hugetlbfs hugetlbfs rw,relatime,pagesize=2M ├─/run tmpfs tmpfs rw,nosuid,nodev,noexec,relatime,size=3269160k,mode=755,inode64 │ ├─/run/lock tmpfs tmpfs rw,nosuid,nodev,noexec,relatime,size=5120k,inode64 │ ├─/run/credentials/systemd-sysusers.service │ │ none ramfs ro,nosuid,nodev,noexec,relatime,mode=700 │ ├─/run/snapd/ns tmpfs[/snapd/ns] tmpfs rw,nosuid,nodev,noexec,relatime,size=3269160k,mode=755,inode64 │ │ ├─/run/snapd/ns/canonical-livepatch.mnt │ │ │ nsfs[mnt:[4026532774]] │ │ │ nsfs rw │ │ └─/run/snapd/ns/firefox.mnt nsfs[mnt:[4026532211]] │ │ nsfs rw │ └─/run/user/1000 tmpfs tmpfs rw,nosuid,nodev,relatime,size=3269156k,nr_inodes=817289,mode=700,uid=10 ├─/snap/bare/5 /dev/loop1 squashfs ro,nodev,relatime,errors=continue ├─/snap/canonical-livepatch/264 /dev/loop2 squashfs ro,nodev,relatime,errors=continue ├─/snap/canonical-livepatch/246 /dev/loop0 squashfs ro,nodev,relatime,errors=continue ├─/snap/core/16574 /dev/loop4 squashfs ro,nodev,relatime,errors=continue ├─/snap/firefox/4090 /dev/loop3 squashfs ro,nodev,relatime,errors=continue ├─/snap/core20/2182 /dev/loop6 squashfs ro,nodev,relatime,errors=continue ├─/snap/core20/2105 /dev/loop5 squashfs ro,nodev,relatime,errors=continue ├─/snap/core22/1033 /dev/loop7 squashfs ro,nodev,relatime,errors=continue ├─/snap/core22/1122 /dev/loop8 squashfs ro,nodev,relatime,errors=continue ├─/snap/firefox/4033 /dev/loop10 squashfs ro,nodev,relatime,errors=continue ├─/snap/gnome-3-38-2004/140 /dev/loop11 squashfs ro,nodev,relatime,errors=continue ├─/snap/gnome-3-38-2004/143 /dev/loop12 squashfs ro,nodev,relatime,errors=continue ├─/snap/snapd/20671 /dev/loop17 squashfs ro,nodev,relatime,errors=continue ├─/snap/gtk-common-themes/1535 /dev/loop15 squashfs ro,nodev,relatime,errors=continue ├─/tmp tmpfs tmpfs rw,noatime,inode64 ├─/snap/ttyd/325 /dev/loop19 squashfs ro,nodev,relatime,errors=continue ├─/snap/ttyd/302 /dev/loop18 squashfs ro,nodev,relatime,errors=continue ├─/var/snap/firefox/common/host-hunspell /dev/nvme0n1p1[/usr/share/hunspell] │ ext4 ro,noexec,noatime,discard ├─/snap/core/16928 /dev/loop16 squashfs ro,nodev,relatime,errors=continue ├─/snap/snapd/21184 /dev/loop20 squashfs ro,nodev,relatime,errors=continue ├─/snap/gnome-42-2204/172 /dev/loop21 squashfs ro,nodev,relatime,errors=continue └─/snap/gnome-42-2204/176 /dev/loop13 squashfs ro,nodev,relatime,errors=continue |
That’s not nearly as complicated as it looks, once you get used to it.
Now, you can trim all that down. You can opt to show only the ‘real’ filesystems. That’s done with the --real flag.
This is an example of that command on that same Lubuntu system used above (Snap applications are seen as ‘real’ filesystems as a part of their separation from the system):
1 2 3 4 5 6 7 8 9 10 11 12 13 14 15 16 17 18 19 20 21 22 23 24 | $ findmnt --real TARGET SOURCE FSTYPE OPTIONS / /dev/nvme0n1p1 ext4 rw,relatime,discard ├─/snap/bare/5 /dev/loop1 squashfs ro,nodev,relatime,errors=continue ├─/snap/canonical-livepatch/264 /dev/loop2 squashfs ro,nodev,relatime,errors=continue ├─/snap/canonical-livepatch/246 /dev/loop0 squashfs ro,nodev,relatime,errors=continue ├─/snap/core/16574 /dev/loop4 squashfs ro,nodev,relatime,errors=continue ├─/snap/firefox/4090 /dev/loop3 squashfs ro,nodev,relatime,errors=continue ├─/snap/core20/2182 /dev/loop6 squashfs ro,nodev,relatime,errors=continue ├─/snap/core20/2105 /dev/loop5 squashfs ro,nodev,relatime,errors=continue ├─/snap/core22/1033 /dev/loop7 squashfs ro,nodev,relatime,errors=continue ├─/snap/core22/1122 /dev/loop8 squashfs ro,nodev,relatime,errors=continue ├─/snap/firefox/4033 /dev/loop10 squashfs ro,nodev,relatime,errors=continue ├─/snap/gnome-3-38-2004/140 /dev/loop11 squashfs ro,nodev,relatime,errors=continue ├─/snap/gnome-3-38-2004/143 /dev/loop12 squashfs ro,nodev,relatime,errors=continue ├─/snap/snapd/20671 /dev/loop17 squashfs ro,nodev,relatime,errors=continue ├─/snap/gtk-common-themes/1535 /dev/loop15 squashfs ro,nodev,relatime,errors=continue ├─/snap/ttyd/325 /dev/loop19 squashfs ro,nodev,relatime,errors=continue ├─/snap/ttyd/302 /dev/loop18 squashfs ro,nodev,relatime,errors=continue ├─/var/snap/firefox/common/host-hunspell /dev/nvme0n1p1[/usr/share/hunspell] ext4 ro,noexec,noatime,discard ├─/snap/core/16928 /dev/loop16 squashfs ro,nodev,relatime,errors=continue ├─/snap/snapd/21184 /dev/loop20 squashfs ro,nodev,relatime,errors=continue ├─/snap/gnome-42-2204/172 /dev/loop21 squashfs ro,nodev,relatime,errors=continue └─/snap/gnome-42-2204/176 /dev/loop13 squashfs ro,nodev,relatime,errors=continue |
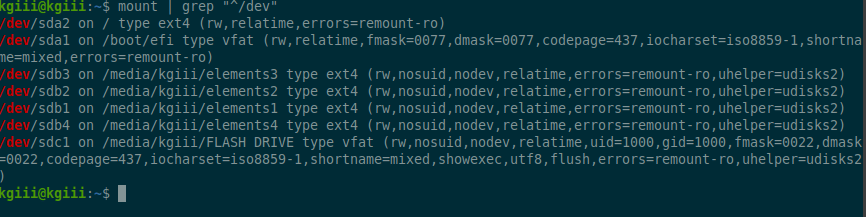
Here’s an example output from a Linux Mint system that does not use Snaps:
1 2 3 4 5 6 7 8 9 10 | $ findmnt --real TARGET SOURCE FSTYPE OPTIONS / /dev/sda2 ext4 rw,relatime,errors=remount-ro ├─/run/user/1000/doc portal fuse.portal rw,nosuid,nodev,relatime,user_id=1000,group_id=1000 ├─/boot/efi /dev/sda1 vfat rw,relatime,fmask=0077,dmask=0077,codepage=437,iocharset=iso8859-1,shortname=mixed,errors=rem ├─/media/kgiii/elements2 /dev/sdb2 ext4 rw,nosuid,nodev,relatime,errors=remount-ro ├─/media/kgiii/elements4 /dev/sdb4 ext4 rw,nosuid,nodev,relatime,errors=remount-ro ├─/media/kgiii/elements1 /dev/sdb1 ext4 rw,nosuid,nodev,relatime,errors=remount-ro ├─/media/kgiii/FLASH DRIVE /dev/sdc1 vfat rw,nosuid,nodev,relatime,uid=1000,gid=1000,fmask=0022,dmask=0022,codepage=437,iocharset=iso88 └─/media/kgiii/elements3 /dev/sdb3 ext4 rw,nosuid,nodev,relatime,errors=remount-ro |
You can do more with the findmnt command, such as select the columns you want in your output, so be sure to check the man page. This is just a quick overview because the vast majority of you will never need more than just the basic command.
As I said, it’s a useful command for when you want to verify the path to a filesystem. Beyond that, the usage is up to you. That’s what I use it for when I don’t bother with any one of several other commands.
Closure:
You might see no reason to add this to your list of commands, but it is useful when you want to see all the mounted filesystems on your system. If you need the path for a filesystem, this is a good command. It’s also useful for finding out some attributes of your mounted filesystems.
This is one of those commands you really could keep in your back pocket. You might first lean on a command like lsblk but that only lists block devices – that is, storage devices, and doesn’t include the many other mounted filesystems. If you don’t need this command today, that’s fine. You might need this command in the future, and now you know it exists.
Thanks for reading! If you want to help, or if the site has helped you, you can donate, register to help, write an article, or buy inexpensive hosting to start your site. If you scroll down, you can sign up for the newsletter, vote for the article, and comment.