In today’s article, we’re going to learn how to remove a swap file. This isn’t something I recommend, for reasons I’ll explain, but I have no ethical qualms about telling you how to do so. After all, it’s your computer. You get to decide what it does!
There are some folks who will tell you that if you have enough RAM you don’t need swap. Well, I am not one of those people. I tend to have swap enabled regardless of how much RAM I have. I have a good reason and I’ll explain it to you as best as I can. I mean, the actual inner workings of the kernel are above my head, but I’ll explain it – or let other people explain it.
See, contrary to popular opinion, swap isn’t just a place the kernel sticks stuff when you’re running low on RAM. For example, check out the picture below:
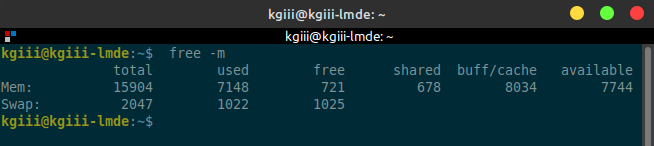
Here’s more information about the free command.
Now, do me a favor and go Google Linux and swap. You’ll find plenty of pages that briefly have this to say (and barely this to say):
Swap space in Linux is used when the amount of physical memory (RAM) is full. If the system needs more memory resources and the RAM is full …
That’s from MIT!
That’s only about half the story… There’s more to it, and that is kinda important.
Some More About Swap:
So, is it really that simple? Of course it isn’t! If it was really that simple, the intro to this would have been so much easier to write. No, it’s slightly more, a bit more, complicated than that. See, let’s quote a more thorough (and accurate) Linux.com:
Swapping is necessary for two important reasons. First, when the system requires more memory than is physically available, the kernel swaps out less used pages and gives memory to the current application (process) that needs the memory immediately. Second, a significant number of the pages used by an application during its startup phase may only be used for initialization and then never used again. The system can swap out those pages and free the memory for other applications or even for the disk cache.
–Emphasis Mine.
What can we take from that? Well, it’s not just a place where the kernel stuffs things when there’s no RAM left – it’s also a place the kernel sticks things to avoid wasting RAM. This is very different than swap is just a place where the kernel stuffs things when RAM is low. It avoids using some RAM that’s best used elsewhere. That seems kinda valuable and important to me. Again, the inner workings of the kernel are pretty much witchcraft to me, but swap seems like a good thing to me.
The kernel is pretty smart about this, from what I’ve observed. It’s good at its job. It’s better at its job than you are. It is better at its job than I am. I highly encourage you to use swap, saving your RAM for more useful things. With disk space as large as it is, you’re not going to miss a couple of gigabytes. Let the kernel do its job, managing RAM as best as it can. They’ve put thousands of hours into making the kernel smartly deal with RAM, there’s no reason to hobble it.
Of course, ain’t nobody gonna listen to me… So, with that said, I might just as well go ahead and tell you how to remove a swap file… You’re gonna do what you want anyhow!
Remove A Swap File:
This article requires an open terminal, like many other articles on this site. If you don’t know how to open the terminal, you can do so with your keyboard – just press
The first thing we’re going to do is verify that you actually have a swap file…
1 | sudo swapon --show |
If that mentions a swap file, only calling it a ‘swapfile’ (a single word), then your next step is to turn your swap off.
1 | sudo swapoff -v /swapfile |
Now, for your next step you will want to remove the swap information from fstab, so let’s go like this to do that:
1 | sudo nano /etc/fstab |
Find the line that starts with /swapfile and delete the entire line. All of it. Leave nothing behind. If you screw this up, your next boot may be an interesting exercise. The line is probably longer than it looks unless you’re using a terminal in full screen! Be sure to remove all of it. It should end with a 0, actually a 0 and then a tab and another 0.
Be doubly sure to remove the full line and then save your work. Then save it with nano. To do that, just press
Finally, remove the swap file itself. That one is nice and easy, you just:
1 | sudo rm /swapfile |
That should do it! If you’ve realized you’ve made a mistake and want to have a swap file, you can always add a swap file. (I’m pretty sure it should be ‘swapfile’, but the rest of the ‘net calls it ‘swap file’, so I’m going with the majority – even though the majority don’t even know what the damned thing does!)
Closure:
There you have it. You now know how to remove a swap file. If that’s what you want to do, you go right ahead and do it. Truth be told, assuming you’ve got enough RAM, it won’t necessarily break anything. You might not even notice it is gone. Still, I figure it’s better safe than sorry – and who am I to judge what the kernel wants?
Thanks for reading! If you want to help, or if the site has helped you, you can donate, register to help, write an article, or buy inexpensive hosting to start your own site. If you scroll down, you can sign up for the newsletter, vote for the article, and comment.
