Today’s article is going to tell you how to find a program’s PID. PID stands for “Process Identification” and every running process has one. It’s in numeric format and knowing the PID makes it easy to manage processes. So, today we’ll be covering that. It’s a quick and easy article, useful perhaps for a future article to reference or as just a quick note as a reminder.
We’ll mostly be using a program called ‘pidof’ and you can figure out why it is named what it is pretty easily. It defines itself as:
pidof — find the process ID of a running program.
As we will just be covering general usage, we really won’t have to be all that verbose. There’s a man page for pidof, which you can (and possibly should) reference. The usage we’ll be covering is just that of a lone admin on their bog-standard home computers. If you have anything other than that, you might want to read the man page.
So, with that in mind, let’s learn how to…
Find A Program’s PID:
This article requires an open terminal, like many other articles on this site. If you don’t know how to open the terminal, you can do so with your keyboard – just press
With that terminal now open, you can find a program’s PID with the following command:
1 | pidoff <application_name> |
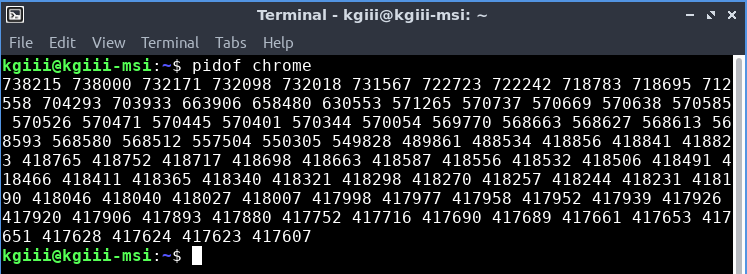
That should spit it out. It looks like this:

On the other hand, it can look like this:
Now, you can do a lot with that information – things best suited for another article perhaps. Either way, you’ve learned how to find a program’s PID. It really was that easy! You’re welcome and thanks for reading!
But wait, there’s more!
I’m not sure where I came across the gem, but it’s pretty awesome. There are some variations (I tried to find my source for this to give credit where credit is due, but it’s out there in a few places – none older than my notes on the matter) but this one is nice and easy.
Ready? Enter this into your terminal:
1 | xprop | grep PID |
That should turn your cursor into a cross-hairs. Go ahead and click on an application and then check the output in the terminal. It should, among a few other tidbits of information, help you find a program’s PID with just a simple point and click. (Useful mostly on applications that only have one or two instance running.)
By the way, if you’re looking to find a script’s PID that you have running, you just need to add the -x flag. It’d look like this:
1 | pidof -x <script_name> |
Which is pretty much all a basic home-user is ever going to need to know. Again, check the man page if it’s more complicated than that.
Closure:
Congratulations! You now know how to find a program’s PID. From there you can do stuff like kill it! I’d expect an article in the future that reaches back to this one, using it as a reference, that makes it all come together a little better. Until then…
Thanks for reading! If you want to help, or if the site has helped you, you can donate, register to help, write an article, or buy inexpensive hosting to start your own site. If you scroll down, you can sign up for the newsletter, vote for the article, and comment.