Today’s article is going to be about my latest favorite VNC alternative, TeamViewer. It’s a surprisingly handy application that just works. Read on to learn more about it!
I’m a pretty big fan of VNC (Virtual Network Computing, from RealVNC). Actually, it’d be a bit more accurate to say that I’m a pretty big fan of remotely managing devices. Among the ways I do this, VNC is a nice way to do so graphically.
Basically, remote administration software such as this forwards the remote desktop to a window on my local desktop and allows me the control as though I was physically seated at the device. I have quite a few devices, and remotely manage the majority of them. I have computers in my house that I seldom physically use, I manage them all remotely.
SSH is often adequate for anything I want to do, but not always. I can even forward SSH but not all applications work well with that. Sometimes I just want a GUI, as some things are best done in a GUI.
Besides, TeamViewer is free for personal use, and I like TeamViewer because it just works, even over the world wide web without knowing an IP address. I can use it to help friends and relatives by just talking to them long enough to get started.
Frankly, VNC can be a pain in the butt to configure and my favorite VNC client (RealVNC) is proprietary. So, using the proprietary TeamViewer doesn’t bother me.
If you insist on opensource, this isn’t the tool for you. If you want something that is easy and just works, read on:
Getting and Using TeamViewer:
I’ll explain how to install it with Debian/Ubuntu/etc, but you can easily install TeamViewer for other Linux package management systems. Start by opening your terminal by pressing
Once open, let’s grab the latest .deb with wget and install it. If you don’t have wget installed, you can do that with sudo apt install wget and then proceed with:
1 2 3 | cd Downloads wget https://download.teamviewer.com/download/linux/teamviewer_amd64.deb sudo apt install ./teamviewer_amd64.deb |
Copy and paste all three of those lines individually, of course. Press
1 | teamviewer |
That should pop up a window where can accept the license and keep on trucking.
Now, you’ll have to install TeamViewer on each device you want to manage and it’ll need to be installed on any device you wish to use to control the rest. Just be careful and read the prompts. It installs and works like a champ.
You’ll need to configure it on each device as well, allowing remote connections and setting up passwords as needed. It can check a centralized server, so the host doesn’t need to know things like ports and passwords.
It’s easily configured the first time, and once you’re done it a remote connection will hopefully look a bit like this:
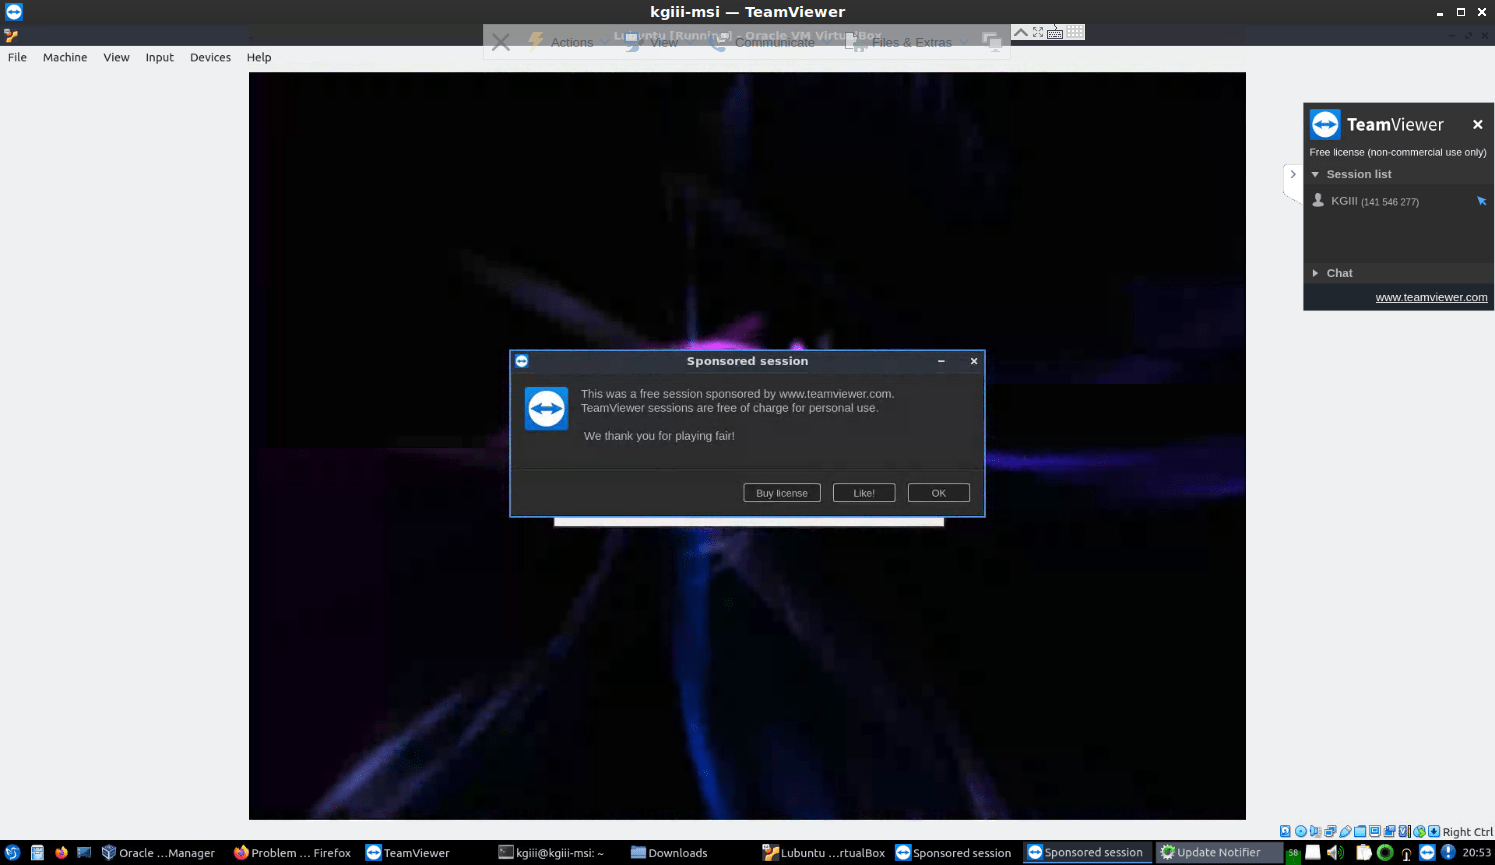
You can use this as a single instance or you can configure an account online with the management console to keep track of all your connections from a single point. You’ll spend a confusing amount of time making your browsers and devices ‘trusted’ status. All of this, of course, has obvious privacy implications.
Privacy & Security Concerns:
Again, they’re absolutely going to track your usage. They’ll know your IP addresses and the names of the devices you’re connecting to. They will know when you connect, how long you stay connected, and more. On top of that, they’ll know your email address, if you give it to them.
Having used them for a while, I see no spam from them and they’ve been nothing but acceptably and professionally behaved from my perspective. I don’t even get any regular newsletter emails from them. I think it’s safe to assume they’re currently not doing so. They do a whole lot of email verification steps if you want to trust devices.
Being proprietary, we have no idea what the source code looks like. We have no way to be sure that they’re not being malicious. They’re a business and they’d do poorly if it turned out they were malicious and using this information for spying or anything of that nature.
If you’re running from an oppressive government, I’d probably not use them. They’re a business and that means they’re likely to respond to lawful requests – and laws around the globe can be pretty terrible.
In fact, if you’re doing anything that’s even remotely secure, I’d suggest not doing so over TeamViewer. Sure, when the application is terminated you can verify that it’s down, but at the same time don’t connect to your remote device to do your banking. That’d just be silly regardless.
As I stated above, I’m quite okay with the potential privacy and security implications. I don’t use Linux because of any philosophical reasons, I use Linux because it just works. If you’re different and object in some way, you should probably just move on and use alternative software to remotely manage your devices.
Closure:
And there you have it! It’s yet another article in the books, another article in the records. Traffic has been high lately, and that’s great. Things are growing in a linear feature and I’m okay with that. Even my Reddit sub is growing – at 50 viewers, up from just a few when I first took the sub over. So, things are going great.
Thanks for reading! If you want to help, or if the site has helped you, you can donate, register to help, write an article, or buy inexpensive hosting to start your own site. If you scroll down, you can sign up for the newsletter, vote for the article, and comment.