How To: (More or Less) Learn if Your Hardware Will Work With Linux

One of the most frequently asked questions from new people is them wondering if their hardware will work with Linux. This article will help you find out if your hardware will work with Linux.

That’s right, this article aims to tackle a frequently asked question – but there’s some limitations and wiggle-room. That’s why the title of the article contains (More or Less). It’s not 100% accurate.

The usual, and most basic way to find out if your hardware will work with Linux is to simply download the .iso you intend to use, boot to it, and test it. If it works in a live environment, it probably will work when you install it. If you needed to add additional boot parameters (like nomodeset) to run the live instance, you’re probably going to need to do the same thing when you install Linux.

That works well enough, but it doesn’t tell you anything about long-term problems. It doesn’t tell you if there’s going to be an IRQ issue many hours after booting, it doesn’t tell you if there will be some obscure ACPI errors, and it doesn’t tell you exactly how well your hardware will work with Linux.

You can do better than that. With a little effort, you can learn all about your hardware and how well your hardware will work with Linux. It’s pretty painless and easy.

Learn If Your Hardware Work With Linux:

So, the first thing you need to do is download the .iso and write it to USB or to DVD. You can also do this after the fact, with an already-installed Linux. This article assumes you’ve got a running Linux and you’re connected to the Internet. 

It also assumes that you have a terminal window open. If you don’t have one open, you can probably open one by using your keyboard. Just press CTRL + ALT + T and up should open your default terminal emulator. Yes, this should work just fine even in a live environment.

The tool we want for this is ‘hw-probe’, put out by the good people behind linux-hardware.org. It is almost certainly in your default repositories and can be installed in the usual manner. For example, if you’re using a distro with apt, then it’d be installed with:

You’ll have to adjust the installation command for the distro you’re using. You may also need to use a root password, which will vary based on the distro.

You can also find it in Snap, AppImage, and Flatpak versions here.

Once you have it installed, you will want to run the following command (and know that you will be sharing this data with the linux-hardware.org project):

That will take a little while to run, but not terribly long. It will output some text similar to this:

The important bit is the “Probe URL”. For this particular run, you’ll see the URL is: https://linux-hardware.org/?probe=23182c745b

If you follow my example URL, you’ll see that everything more or less works – but that some of the hardware has some known problems. You can click through those to learn about what sort of problems you’ll have getting your hardware to work with Linux.

NOTE: Just because there are known problems doesn’t mean that the hardware doesn’t work. You need to click through and read the results to learn what sort of problems you’re potentially going to face. In some cases, the problems only exist with certain kernels (for example) and are resolved with newer kernels. Again, you’ll need to read through and verify the data. The data is pretty accurate, but the human element means it is not infallible. 

As you can now surmise, this isn’t 100% accurate. Quite often, there will be known problems but your hardware will work with Linux just fine – but maybe not at peak functionality due to an inferior driver. Be on the lookout for things like that.

What it does do is it gives you some more fine-grained information so that you can make a more informed decisions. It’s a guide, not a rule-book. At the end of the day, if Linux is up and working on your live instance, it’s probably going to work just fine when it has been installed.

Closure:

And there you have it. Another article in the books. This one helps you find out if your hardware works with Linux. If you have any ideas for articles, be sure to let me know. Don’t forget to share this article with your friends!

If you want, you can unblock ads, donate, sign up to contribute, write an article, or sign up for the newsletter below. (I should move that to the top. I’ll do that when I’ve given it enough time to see if folks respond.) Thanks for reading and there will be another article in a couple of days!

How To: Generate a List of Installed Applications in Linux

Before making this site, I had a similar article that explained how to list installed applications in Linux, but it was only relevant to those that used distros with ‘dpkg’. This expanded article will explain how to generate a list of installed applications for multiple distros, in order to be more complete.

There are any number of reasons why you might want a list like this. Maybe it’s for compliance reasons, needing to know everything installed on the machine. Maybe it’s for making a manifest to establish a baseline for future installs. You could also just be curious, need a list for support questions, or want a list for backup purposes.

Whatever your reason, you can generate a list of installed applications fairly easily. You can also do a couple of other neat things that I’ll explain below.

Generate a List of Installed Applications:

For all of these commands, you’ll want a terminal. You can probably open your default terminal by using your keyboard to press CTRL + ALT + T. If that doesn’t work, you can just open it from a menu or whatever shortcut you’ve set up for yourself. (I’m looking at you, you people with strange window managers!)

The command you’ll use will vary depending on your distro. I’ve got a few of them covered below. In some cases, you may need elevated permissions, so a ‘sudo’ in the front of the commands should do the trick for you.

Debian (& dpkg using distros):

If you’re using Ubuntu, or a distro with snaps, you can list those with:

If you’re using flatpak applications with any distro:

Arch (& Mandriva, etc.):

RHEL (& Fedora, etc.):

OpenSUSE (& derivatives):

Those are the major distros. There are smaller distros, independent distros, and they’ll have their own package management systems and ways to make a list of installed applications.

Bonus:

You can actually do a few things with this listing. Two immediately come to mind and I’ll share them.

First, you can count them. At the end of each of these commands, you can pipe it and count the lines. It may not be a 100% accurate number, but it will be pretty close. (Some of the commands output more than just a list of installed applications.)

That’ll give you an output similar to:

You can also write the list of installed applications to a text file, to save for archiving or whatever. I like to make a list now and then and check against it when I do a new installation. Your reasons are your own, but here’s how:

The .txt isn’t mandatory and you can write the file to anywhere you want, assuming you have the correct permissions. It’s your list, you can do anything you want with it!

Closure:

And, there you have it. You can now make a list of all applications that you’ve installed. You can even count the list, and you can write the list to a file for storage. If you want, you can generate a list of installed applications on one computer, generate a list of all applications on a second computer, and then use ‘diff’ to see what the differences between them are. There’s all sorts of things you can do with this list.

As always, thanks for reading. Your reading and feedback help me stay motivated. My goal is to keep up this publication rate for a year, though we’ll see where we are when that year ends. I have enough notes for that, and more. 

If you’d like to contribute, you can unblock ads, you can sign up for the newsletter, you can write an article, you can donate, and you can register for the site to regularly contribute. You can also comment, vote for articles you do like, and share this site/page with others via social media! You can even buy inexpensive Linux hosting! Alternatively, you can even just enjoy the articles. It’s all good!

What is my Hostname in Linux?

For most of you, your hostname in Linux is going to be the same as your username. This article will help you figure out your hostname in Linux, and it should be a relatively short article. If this article looks familiar, it’s because it existed at the old site, but with far less information.

Let’s start at the beginning, by learning what a hostname is.

A hostname is generally meant to be a human-readable way to identify a computer. Yes, the computer is truly identified by the associated IP address, but the hostname resolves to that computer. It is meant to be easily remembered instead of having to remember a bunch of IP addresses. Without it, the web (and your own local networks) would be more difficult to navagate.

In many instances, it’s a FQDN (Fully Qualified Domain Name), such as a domain name like linux-tips.us. However, this site doesn’t have a dedicated IP address, so it’s known by a virtual hostname as a FQDN. If the site had been constructed differently, you’d be able to access it with the IP address. For example, https://172.217.10.14 will take you to Google (after some warnings).

So, your hostname in Linux isn’t always going to be the same as your username. For most of the readers here on L-T.us, it will be. You probably don’t really need to worry a whole lot about things like virtual hosts and stuff like that. But, even as a home user, you can make use of this information.

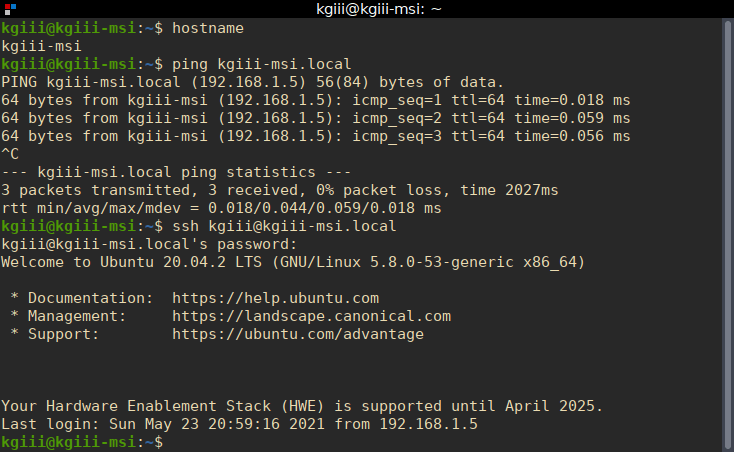
How is it useful? Well, if I want to SSH into my MSI laptop, I don’t have to use the IP address. Not only that, if the IP address changes then I don’t need to look it up. I just connect with something like:

You may notice that I added the .local. You too can just add .local with many distros, in others the default might be something like .localdomain – which you can keep as the default or change it easily enough.

So, let’s figure out how to find your hostname in Linux.

Find your hostname:

Let’s start by cracking open the terminal. You can use your keyboard to do this, just press CTRL + ALT + T and your default terminal should open up.

Now, we can try the following:

Or you can try:

Or you can also try:

As near as I can tell, one of those should work on all major distros. If it none of them work for you, please leave a comment letting me know what does work – helping those who come behind you.

Using Your hostname in Linux:

There are a number of ways that this information can be used. With many distros, as mentioned above, you can add .local to the hostname and just use that instead of IP addresses. Here’s a picture that shows a few examples:

using hostname in Linux
Instead of using the IP address, use the hostname. It’s a pretty handy feature.

There are, of course, other things you can do with this information. Those are just a few examples. The great thing about using a hostname in Linux is that you’ll not have to recall IP addresses. You’ll only need to recall a name – a name that you picked.

You can change your hostname, but that goes beyond the scope of this article. I’d expect to see an article about that in the future! In the meantime, if you can think of any ways that you’d use the hostname, please leave a comment.

Closure:

Thank you, my dear reader, for your viewership. Your comments and feedback keep me motivated and your feedback helps to improve this site. For those who have been keeping track, you can actually now click on large images to see the larger versions. This will only be for future articles, as I’m unlikely to go back through every previous article and change it. But, it was direct feedback that resulted in the change.

If you’d like to contribute, there are a number of ways. You can donate, write an article, unblock ads, buy hosting, and sign up for the newsletter. I promise, I’ll never share your email address with anyone and I won’t send you any spam. Until next time…

A Few Ways To Visualize Disk Usage In Linux

I woke up this morning, took care of things like showering and eating, and then meandered to my computer. Swishing the mouse back and forth brought the screen to life, where I was greeted by a message that my computer was out of space.

It turns out that a backup cron job seems to have gone haywire and I had nested backups on my internal disk drive that occupied a great deal of space. However, I had only a hunch and couldn’t see where the problem was.

The problem was, as it turned out, a folder in /home/kgiii – and it was helpfully named as a backup should – meaning the errant directory was /home/kgiii/kgiii.

Of course I’m not going to notice that! The directory name doesn’t look out of place! It looks like it belongs there, it looked perfectly normal, so it didn’t leap off the screen to tell me something was amiss.

Really, I’m definitely not going to notice it while catching up on everything I check daily and while still on my first cup of coffee! The directory was my username in a directory named my username. It might just as well have been microscopic.

Either way, I didn’t worry too much. I knew that I should have plenty of space and that I could probably figure it out pretty easily. After all, it’s easy to visualize disk usage in Linux. This article show you a few ways to visualize your disk space. It should also be a pretty short article.

Visualize Disk Usage:

#1 Baobab: 

Baobab is the first of the three, and the most unique of the three. It’s not that it’s particularly unique, it’s that the other two are really quite similar. It’s typically a part of the GNOME desktop, but can easily be installed most any system. If you’re using a distro with apt, it’s installed with:

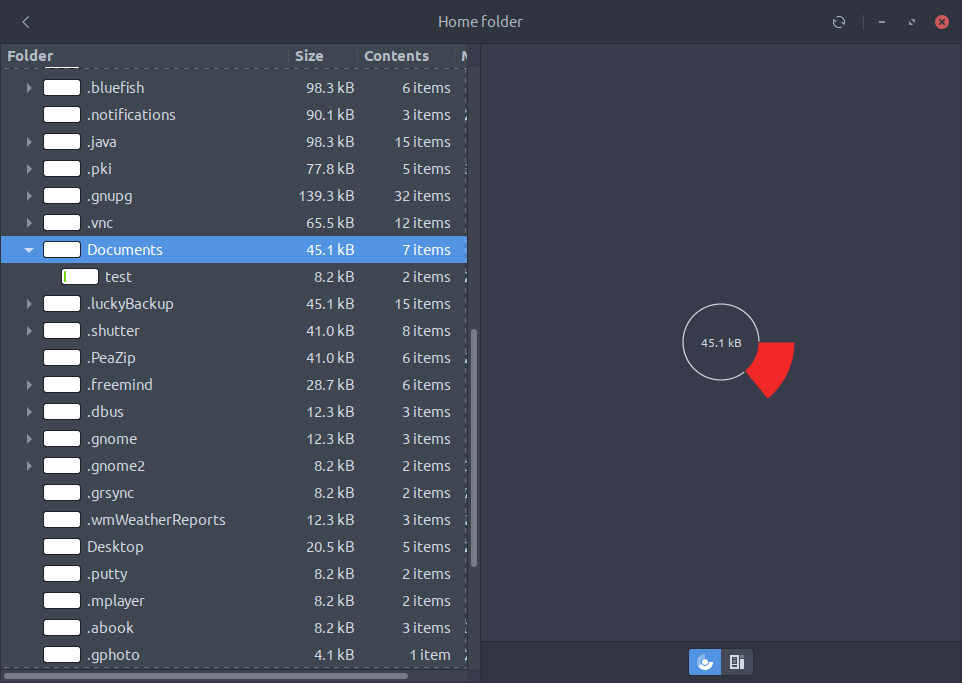
You can open it up, drill down, and graphically see how your disk is being used. You can see which files and folders are taking up the most space. It looks like this:

baobab in action
My Documents directory is nice and empty. I should have taken screenshots sooner.

It’s really self-explanatory after you’ve installed and opened it. Baobab is named after the tree, and appropriately shows the drives and directories in tree format. Imagine that!

#2 K4DirStat

K4DirStat is typically used with KDE, but can be installed on most any desktop. It’s another handy GUI way to visualize disk usage. If you’re a recent Windows user, then it may remind you of WinDirStat as the two are visually similar. It’s easy enough to install. Again, if you use apt:

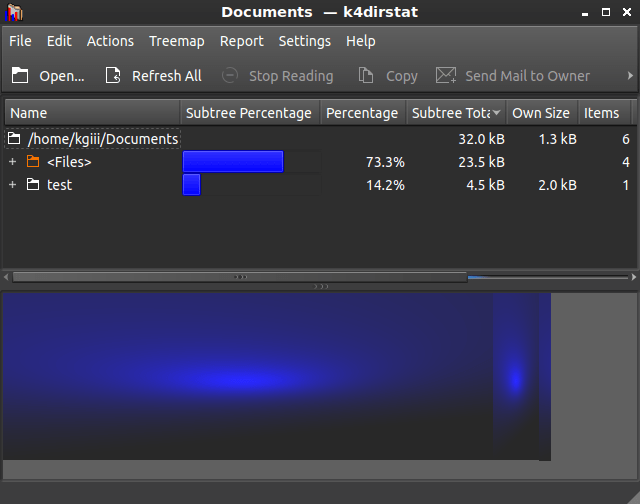
K4DirStat is pretty self-explanatory. Open it, select where you want to start investigating, and wait. Once open and/or you’ve drilled down, it looks like this:

KDirStat in action.
This one is pretty intuitive and fun to play with while viewing disk usage.

This one has been around for quite a while. You may already be familiar with it. These applications are all a little slow when opening, as they have a lot of data to load and calculate. So, you’ll need to be patient.

#3 QDirStat:

QDirStat is pretty much exactly the same thing as the above. It’s based on K4DirStat, but built with and for the Qt library. So, you’ll want to consider it as an option if you’re using something like Lubuntu which is now using LXQt. But, most modern Linux distros support Qt out of the box and you can install it with:

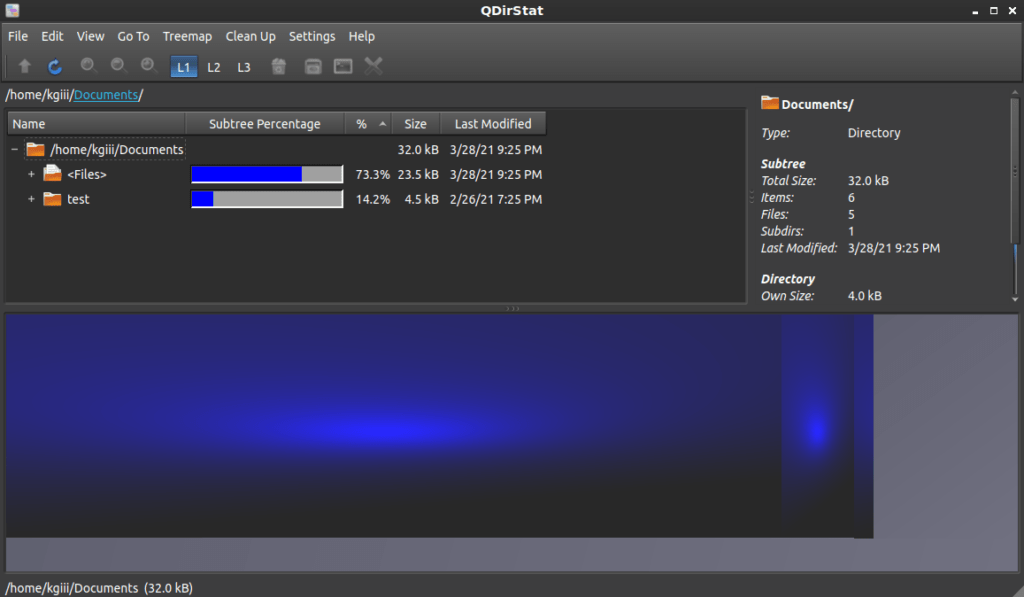
Visually, it looks much like K4DirStat. It’s a simple block view that shows you the file sizes in comparison with the files around it. It will also helpfully color-code files. It looks like this:

QDirStat in action.
As you can see, it looks a lot like the previous option. Not a whole lot going on there.

It’s pretty similar to a few other applications that do much the same thing. The main benefit for this option is that it is Qt and that’s fairly universal these days.

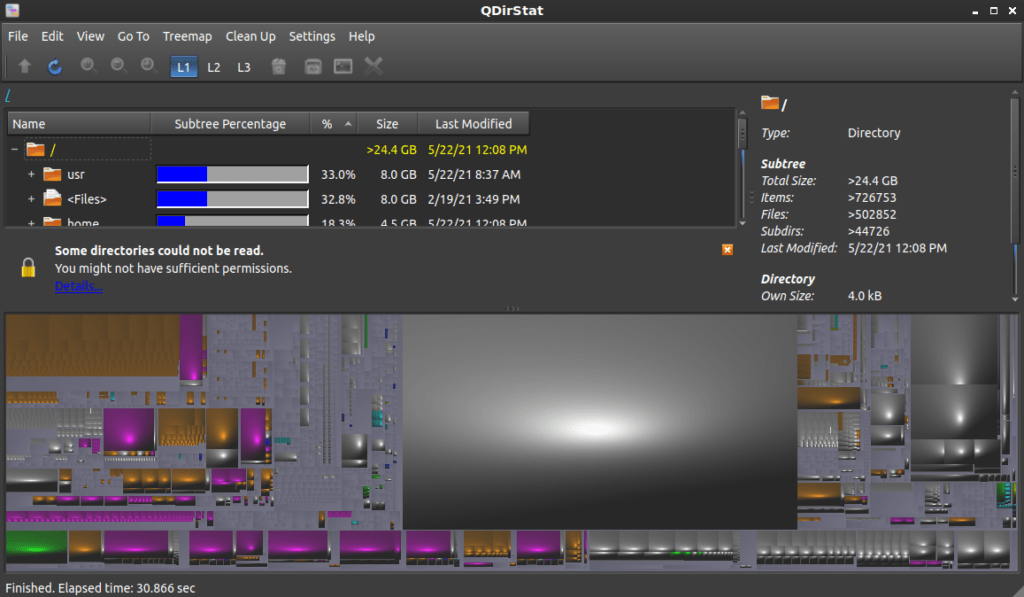
Also, it looks pretty cool if you’re looking at the entire drive with it. This picture isn’t really of any value, it’s just because it looks neat. Call it a bonus picture!

Full drive view with QDirStat
This picture serves no purpose, but the colors are pretty!

Closure:

If you’re curious, I used the QDirStat because that was what I had installed and ready to go. It didn’t take very long to figure out where the problem was. Once I knew where it was, I cracked open the terminal and removed the offending directory and the contents within. I then removed the offending cron job, with a note to myself to fix it later today. This resolved my problem quickly.

Had I tried to find it visually through the file manager, I’m quite certain that it’d have taken quite a bit longer. The name of the directory didn’t make it seem out of place. In fact, I’ve had a ‘kgiii’ directory right there in my home directory in the past. I stopped doing that when it got confusing, so now it’s a ‘tmp’ folder, though I digress. The point is, I’d have taken quite a while to figure this out had I not had the tools to hand and known how to use them.

Finally, I have a ton of notes from which to write articles, but sometimes real life gives me an idea for a different article, such as this one. If you have an idea for an article, you can go ahead and write it. You can also unblock ads, donate, sign up for the newsletter below, leave a comment, and more! Thanks for reading!

What it’s Like To Beta-test Linux, Specifically Lubuntu

You may not think so, but everyone can meaningfully help their favorite distro. Someone has to beta-test Linux, and most everyone can do so. Here’s one way that you can help.

You don’t have to be a programmer, being able to code isn’t mandatory. It’s not even a requirement that you have spare hardware to test with. Going gung-ho and testing daily isn’t even a requirement. You just need to have some time that you’re willing to give back to the projects that have given you so much.

I don’t tend to do half-measures, so I’ve thrown myself into the task. The amount of learning I’ve done since starting is probably the most I’ve done since I was just a Linux beginner. If you like learning, then your ability to help knows no bounds.

Why I Beta-test Linux:

About a year ago, I learned why Ubuntu stopped offering 32 bit versions. It wasn’t because 32 bit was old, nor was it because the devs hate 32 bit systems. The reason they stopped supporting 32 bit systems was because there were too few people willing to test on 32 bit systems.

Now, I don’t actually use any 32 bit hardware. In fact, I haven’t used 32 bit hardware since pretty much the first day 64 bit hardware hit the market. I had empathy for those who had to move to a shrinking pool of distro choices. I also realized that it could happen again, for other hardware or software.

That’s when I realized that I could do my part. It is when I decided that I’d look into the process. After some investigation, I made it known publicly that I’d be testing. By making the claim that I’d do so, it forced my hand into actually following through. The claim was made to them as much for their sake as it was for mine.

I’ve done it ever since. It takes maybe an hour per day to do it, and to do it well. I test on at least two different pieces of hardware, file my reports, and go on about my day. Sometimes I get more involved and test other things, but my usual activities are just testing the daily build.

How I Beta-test Linux:

This will, of course, be different for you – unless you want to beta test Lubuntu. In which case, this is pretty much how you’d do it. Though your method may still be different. My testing is “just” the live instances of Lubuntu.

The live testing is actually the longer of the two types of tests. If you’re doing the installation tests, you basically just install and make sure it reboots, perhaps ensuring internet connectivity works out of the box. If nothing breaks, you’re done.

Every day, at about 13:30 my time, I start refreshing the testing tracker URL. (That link is time sensitive. It won’t be the same for the next cycle. It’s largely for illustration anyhow.) What I’m looking for is the date to change on the download. When that changes, I know there’s a new daily build for me to test.

You don’t actually have to do this every day. You can do it when you have time, or closer to the end of the release cycle. You set the time and schedule.

When the date changes and there’s a new daily build, I use the zsync option to save bandwidth. Using zsync means I’m only downloading the parts of the image that have changed. I not only do this on one computer, I do it on another computer. As mentioned above, I test twice.

While I’m there, I also download the new manifest. The manifest is a list of all the files that are in the image (.iso, of course) and I use it to ‘diff‘ against the previous manifest. This tells me what has changed and what needs more attention and testing.

It’s at this time that I start filing my reports. Those will vary and depend on what your distro of choice is using. Mine are generally pretty basic and short, unless I find something amiss. If there’s something amiss, then that requires proper testing and bug reporting. That happens with less frequency than you might imagine, but it’s essential that you follow conventions and properly report bugs in a manner that the developers can use.

Later, those reports get closed, using a process where I mark the test as ‘in progress’ while testing and then close them as passed or failed when I’m done. Each report contains a list of existing bugs and any newly found bugs.

The Actual Beta-testing Linux:

When the two files are downloaded and reports opened as in progress, I’m ready to actually begin. On one machine, I’ll start writing the daily .iso to a USB drive and on the other I’ll use it to start a fully prepared virtual machine.

The testing done on both is remarkably similar. I also undertake the live testing and, as I said near the top, that one takes the most time. You’ll see why…

As I’m testing the live instance, the first two things I check and change are the screen resolution and the keyboard layout. Those will be the first two changes people are likely to make in a live environment, and so they’re the first two things I change and check.

The next task is checking the existing bugs. For example, there’s a bug in the terminal where it won’t actually open with the presets (two horizontal or vertical terminals). Another is a wonderfully odd LibreOffice bug that appears to have existed for quite a while before I noticed it. I’ll explain the LibreOffice bug and show it to you.

To trigger the bug, open every LibreOffice application up in order. If they stop appearing in the task bar after you’ve opened Impress, then you’re likely going to be able to trigger the bug. After they’re all opened, select the “Vivid” template in Impress – and watch all of the LibreOffice applications crash one after the other.

Watch, full screen should work if needed:

This particular bug was discovered because of how I do the testing. Nobody seems to know what the cause is and it doesn’t appear in every distro – but it appears, or manifests itself in some way, in a variety of distros. (I’ve tested, of course!)

So, once I’m sure that the existing bugs are still there, I do the rest of my testing. This means I open the menu, start at the top, and open everything. I don’t open them all at once, I open them by segments. First, I open all the Accessories, then Internet, then Graphics and Video, etc. applications at once. I make sure they all open and that they all close.

When there is a change noted by the diff I mentioned earlier, I make sure to check that application even more. I also pick a half-dozen, maybe a dozen, other applications to test more thoroughly. For those, it isn’t just checking to see that they open and close, I check that they do things like open the appropriate files, their preferences work, and that the application does the job it was meant to do.

Most of the time, there’s nothing doing. It’s exactly the same as it was the day before. Those days are the easiest. You just file the reports and you’re done for the day. If there are new bugs, you have a bunch more work to do. 

In the case of a new bug, you need to file a proper bug report. More importantly, you need to make sure it’s a bug. To do this, you’ll test against everything you can think of. You’ll even test against other distros to see if the bug also exists in those distros. It is also worth installing the beta (preferably in a VM) to test to see if the bug is in both the installed and in the live instance. You want to narrow it down as much as you can, making it easier for the devs to fix.

The forms and paperwork you’ll be doing will vary. They won’t be just like the Lubuntu system, which is based on the Ubuntu system. You’ll need to connect with someone on the team, someone familiar with the process, to make sure you’re doing it right.

In my case, I call my connection my ‘mentor’, though that can sometimes be a formal term. They’ll need to be someone you get along with, because you’re going to interact with them fairly often as you learn the ropes. You’ll need to be patient, as they’re not always available and often have other tasks that they’re working on.

From my observations, you’ll really enjoy it. The people involved in these projects are all just humans. They want you to help. If you don’t want to beta-test, just let them know that you have some free time and let them know what skills you have in your toolbox. There’s always something you can do.

They may find a niche for you doing documentation, doing bug triage, answering support questions, keeping track of task-completion, or any number of things. Just contact the distro team, let them know you want to help, and they’ll find a use for you.

Closure:

You can make a meaningful difference. By taking part, you can make your favorite distro even better. It needn’t be a distro, it could just be a project you use and understand. The people writing ‘inxi’ can use your help, ‘Shutter’ too, or even ‘GIMP’ or ‘Blender’. Pick one and jump right in!

Seriously… Getting involved is easy! Even if it’s just you noticing and reporting a bug, you can meaningfully impact the software that you use every day. You can make a difference, and you can make it better.

The amount of time you donate is up to you. It needn’t be quite like the one to two hours I spend daily, it can be just a couple of hours a week. The choice is for you to make and it needs to fit your schedule.

As always, thanks for reading. Don’t forget that you can unblock ads, donate, write articles, and sign up for the newsletter. You already know that I appreciate the feedback. There will be a new article in just a couple of days.

Subscribe To Our Newsletter
Get notified when new articles are published! It's free and I won't send you any spam.
Linux Tips
Creative Commons License
This work is licensed under a Creative Commons Attribution 4.0 International License.