hardinfo Has Been Rebooted As hardinfo2

If you’ve used hardinfo in the past, it may interest you to know that hardinfo has been rebooted as hardinfo2. This is just a quick ‘news’ article and won’t take up much of your time. It’s worth reading, however!

So, I wrote this some time ago:

Graphically Examine Hardware Info With HardInfo

I assume that’s how user ‘hwspeedy’ found this site and they sent me an email letting me know that hardinfo (no caps, I guess) has been rebooted as hardinfo2. That piqued my interest.

hardinfo2:

I looked and the project appears to have a dozen or so people behind it. That many people is a good start, which made me optimistic You can view the hardinfo2 project page here at the following link:

hardinfo Home Page

The original, hardinfo, hadn’t had any recent updates. These folks rebooted it. Their goal is to get hardinfo2 into all the distros and they’re 60% of the way there. I’m impressed enough to go ahead and write about it here.

The two major changes are the theme aspect, which I found silly and it made the text impossible to read on this system. Fortunately, you can turn it off. The second major change is the ability to upload your benchmarks. You can see how your system compares to others.

They have releases for pretty much every major version of Linux. See here:

Get hardinfo For Your System

I had hardinfo installed and hardinfo2 didn’t want to install. So, I purged hardinfo from my system with the following command:

I was then able to install hardinfo2. I did so with gdebi.

With the new version installed, I was quickly able to click on View > Themes > Disable Theme. That made it so that I could make out what was going on. Otherwise, it looked like this on a Linux Mint system:
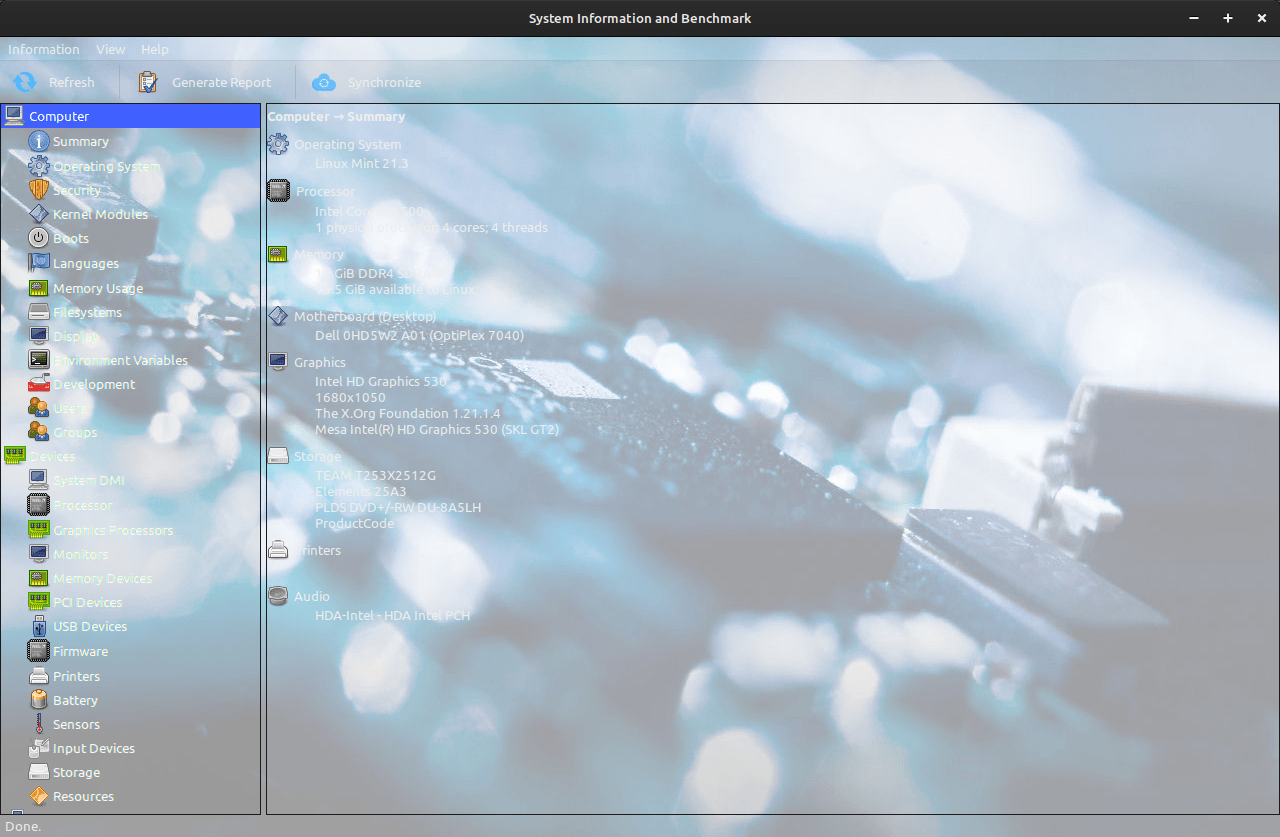
Themes don't work well here...
None of the other themes fared better than this one did. You can disable them entirely.

This is just my refurbished PC that runs Linux Mint, so it’s nothing special. Even if it was, you wouldn’t know until you disabled themes.

Here it is with the themes disabled:
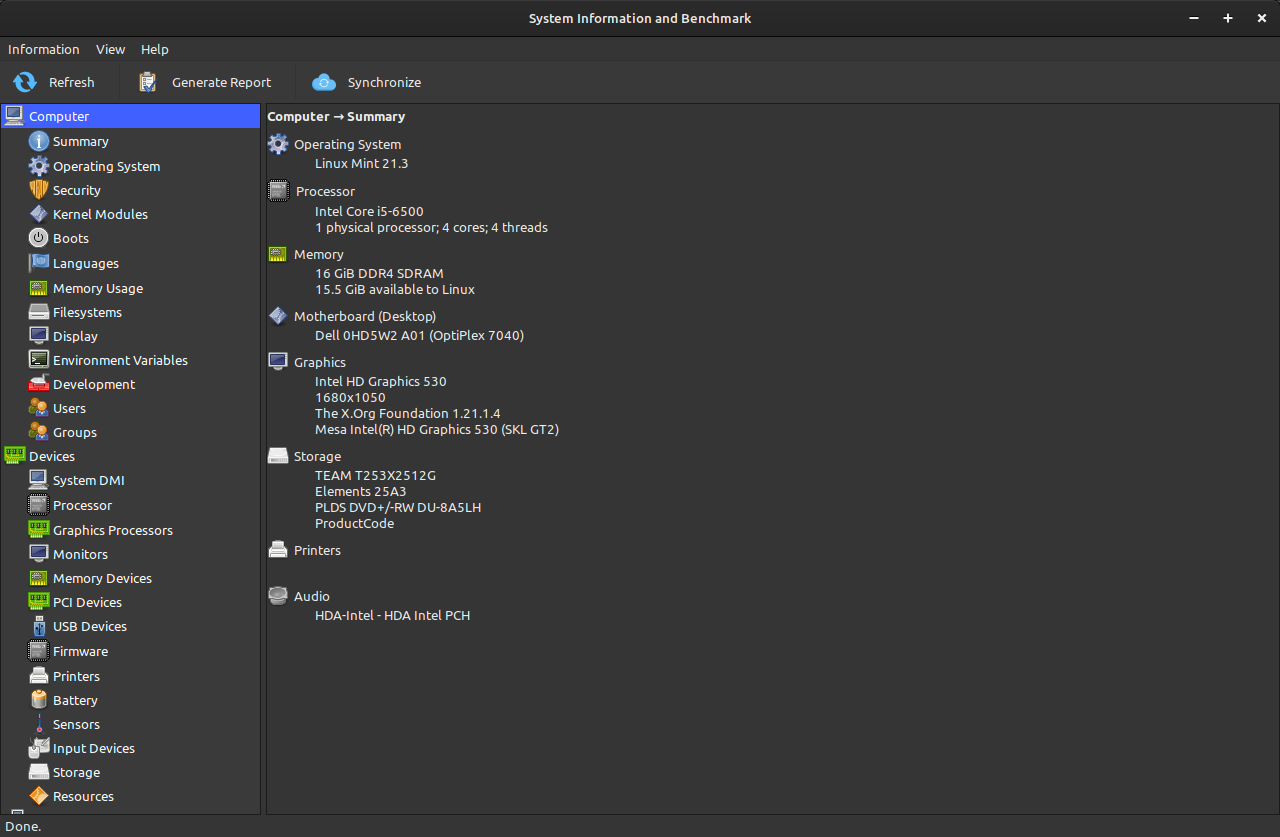
It's easy to disable themes in hardinfo2.
That’s much easier for these old eyes to make out. I’m pretty sure the themes don’t work well.

I went through the list and even did the benchmark thing. Things mostly seem to work. Some of the benchmarks didn’t show my level in the results, but that’s possibly just a teething issue.

This is useful if you need support – just click on Generate Report. You can generate a report to share with the forums when asking for support.

This is also useful for bragging rights – just click on Synchronize. You can see how you rank, and share it, against other users. As they’re now modern results, you probably won’t be dominating all the benchmarks as you did with the older hardinfo.

I have high hopes for these new developers. After I saw their email, I figured I’d share that information with you. I ignore most of that stuff but this is an application that I’ve used time and time again. It’s also an application that I’ve recommended. Seeing some people pick up and run with the task makes me happy. I wish them the best of luck.

I will point out that the sync button uploads a bunch of information. You can pick and choose what you upload; nothing nefarious is going on there. It’s simply a system-gathering (and benchmarking) tool and nothing more.

Closure:

Well, there’s not much more to cover. It still does the basic tasks as listed in the first article, it’s just now got some new features and is now being actively developed. It’s good to see some of the old tools being used and it’s good to see people acting when they see a lapse in the system. Without them, we’d not have much of an operating system.

So, thanks!

Thanks for reading! If you want to help, or if the site has helped you, you can donate, register to help, write an article, or buy inexpensive hosting to start your site. If you scroll down, you can sign up for the newsletter, vote for the article, and comment.

Count The Number Of Running Processes Per User

This won’t be as complicated as it seems because we’re just going to cover how to count the number of running processes per user. This is a fairly basic task that requires fairly basic tools. If you want to count the number of running processes per user, read on! It’s quite simple…

Your Linux system requires many running processes. A running process is an application, though some applications can have multiple running processes. The Linux kernel manages processes and a full desktop system will require hundreds of processes to be complete.

Processes are on a per-user basis. As explained before, Linux is a true multi-user operating system. Each user will have their processes and all processes will be owned by a user. It’s a pretty basic concept once you get your head around it.

You won’t need to install anything for this article. We will use some basic tools to show you how to count the number of running processes per user. This isn’t an advanced operation and you’ll almost certainly have the correct tools installed.

What tools will you need for this article?

ps:

The first tool you’re going to use is the ‘ps’ application. Don’t worry, the application is installed by default. You can confirm this with this command:

Additionally, you can check the man page with this command:

If you do that, you’ll see that this is the correct tool for listing the running processes in your Linux system. It’s described like so:

ps – report a snapshot of the current processes.

See? That’d be the correct tool for listing the currently running processes.

We’ll also use…

wc:

This too will not require any additional software. It’s a near-certainty that the wc command is included in your Linux operating system by default. You can confirm that wc exists with this command:

When it comes to counting things, the wc command is the go-to command. You can tell this by checking the man page with this command:

As you’ll see, the wc command is described like so:

wc – print newline, word, and byte counts for each file

So, wc is the correct tool. We’ll use the -l flag (count lines) to go along with the wc command, meaning this should be something you can figure out already without me needing to write the rest of the article! Linux isn’t all that difficult to work with and the terminal doesn’t have to be a complicated affair.

Count The Number Of Running Processes Per User:

Both the ps and wc commands are terminal-based commands. That means you’ll need an open terminal to count the number of running processes per user. You can usually open a terminal by pressing CTRL + ALT + T. If that doesn’t work, open one from the application menu.

With your terminal open, you can show the number of running processes with the following command:

That’s the first part of this exercise. 

Next, we’ll use a pipe. We’ll pipe the output from that command to the wc command and tell the wc command to count the lines. That’s done like this:

That will give you a count of all the running processes which is nice but not the goal of this article. This article is meant to show you how to count the number of running processes per user.

So then, let’s show you how to show the processes owned by a user…

For example, I’d find processes owned by me with this command:

Now, to count the number of running processes per user you just go ahead and pipe it to the wc command used above, like so:

Again, an example:

That command should show you all the running processes that are owned by root. It’s a pretty easy set of commands to figure out and I’m sure you can figure it out from here…

Closure:

Well, we set out to learn how to count the number of running processes per user. I’d like to think we accomplished that goal. You never know when you’ll want to see the processes owned by a user, but it could be useful when debugging things – like finding out what’s eating up your resources.

This is one of those commands that are pretty obvious once you know about it. They’re two simple commands that combine to create a pretty good result. Linux is like that. You don’t always need to know some esoteric commands. You can often combine some basic commands to get the output you’re after. You can achieve much with just a few basic commands and it’s good to get more comfortable doing so.

Thanks for reading! If you want to help, or if the site has helped you, you can donate, register to help, write an article, or buy inexpensive hosting to start your site. If you scroll down, you can sign up for the newsletter, vote for the article, and comment.

Short: Show The Groups You Belong To

Today’s article, as was indicated in the title, is a short article where we learn how to show the groups you belong to. It’s just a simple command, so we’ll toss in some extra knowledge. But, this is just a short article. You won’t have much to do in this article.

The latest article explained groups and can be read by clicking this link:

List All The Groups In Linux

The last article explained how to list all the available groups in Linux. This one will explain all the groups your user account belongs to. If you want to know the groups you belong to, it’s simple enough.

If you didn’t read the article, Linux is a multi-user operating system. There are also groups. A user can belong to multiple groups and have permissions matching those groups. The example I gave in the previous article was the sudoers group. You (probably) belong to that group, giving you access to the sudo command. That is how you have elevated permissions for your account, which is quite different than using the root account.

Even if you don’t know this, you’re almost certainly a member of multiple groups. In the previous article, we learned how to show those groups and today we’ll learn how to show the groups you belong to.

Show The Groups You Belong To:

If you want to show the groups you belong to, you’ll need to have an open terminal. Just press CTRL + ALT + T and your default terminal should open. Otherwise, open a terminal from your application menu.

With your terminal open, you can show the groups you belong to with this command:

Your output will be different but here’s an example:

This also works with other users. Here’s the syntax:

That will show the groups that the user belongs to. It’s a pretty simple thing to learn and a pretty handy thing to learn. It’s so simple and easy that this is an intentionally short article.

Closure:

There you have it… It’s a short article but showing the groups you belong to isn’t a complicated affair. This is something anyone can do and there’s no reason to make the article longer than it already is. While I could make it longer, it’d be wasting my time and your time. It’s just that easy.

Thanks for reading! If you want to help, or if the site has helped you, you can donate, register to help, write an article, or buy inexpensive hosting to start your site. If you scroll down, you can sign up for the newsletter, vote for the article, and comment.

List All The Groups In Linux

This is going to be a simple enough article where we list all the groups in Linux – specifically your Linux. (Your list of groups may not be the same as my list of groups, of course.) This isn’t complicated but might be important to some of you, so we might as well write about it.

I’ve often mentioned that Linux is a true multi-user operating system. That is, you have many users, each with assigned tasks and permissions. You have users for everything from root to printing.

Well, along those same lines, Linux also uses groups. You can not only set permissions on a per-user basis, you can set permissions on a per-group basis. Any member belonging to that group will have the same permissions as that group.

A good example is ‘sudo‘. That’s a group you likely belong to. Because you belong to the sudo group you have access to the sudo command. This lets you have elevated permissions to perform various operations on your system. Make sense?

We’ll be using a new tool for this…

getent:

The getent command is used to read various databases. This is fine because ‘groups’ is one of the databases that getent can read. You won’t need to install anything to run this command.

You can check the man page with this command:

From there, you’ll see that getent is described like so:

getent – get entries from Name Service Switch libraries

So, it’s a database reading tool more than anything else.

If you’d like an easier way, we’ll do the same with the cat command.

cat:

I really shouldn’t have to describe the cat command. We’ve used it plenty of times. It takes the contents of a file and spits them out to your terminal (standard output). It’s an oft-used tool in the Linux world. Once again, you won’t have to install anything.

You can check the man page with this command:

At that point, you’ll see that the cat command is described like this:

cat – concatenate files and print on the standard output

See? It’s the correct tool for the job. We want to take the contents of a file and read it in the terminal. The cat command is perfect for that.

I’ll show you how to list all the groups in Linux with both commands. You can pick your favorite and just use that command. Either command will work just fine for this job.

List All The Groups In Linux:

If it wasn’t obvious from the above, this is yet another task for the terminal. If you don’t have an open terminal, you can probably open one by pressing CTRL + ALT + T. If that doesn’t work, find the terminal in your application menu and click it.

With your terminal open, run the following command:

While not of much use, here’s an example output:

You can get the same output with the cat command. That might be easier to remember for newer users. After all, you should be familiar with the cat command. That command is simple enough.

That will give you the same results as the ‘getent’ command above. Obviously, the group name is the first column.

I’m not sure where I learned this, but you can just list the first field and get a list of groups without any additional information. Just use this command:

That’s not nearly as useful as it could be, but I figured I’d share.

Closure:

Well, if you wanted to list all the groups in Linux, you now know how to do so. If you didn’t know about groups, you now know that you have groups and how to list them. So, you might as well add that to your notes and keep it in mind. (The groups subject may appear in a future article!)

Thanks for reading! If you want to help, or if the site has helped you, you can donate, register to help, write an article, or buy inexpensive hosting to start your site. If you scroll down, you can sign up for the newsletter, vote for the article, and comment.

How To: Clear the DNS Cache

Today’s article will be a nice and easy article where we learn how to clear the DNS cache as a simple exercise. This isn’t very difficult and won’t take too much time, so this article should be relatively short.

If you don’t know what DNS cache is, that’s fine. I’ll do my best to explain.

Chances are good that you do not need to clear your DNS cache. This isn’t something you’ll need to do all that often, maybe not ever. I only clear the DNS cache when I need to.

What is DNS?

DNS stands for Domain Name Service. When you type a domain name into your browser’s address bar, it relies on an IP address behind the scenes. DNS is the interface between those two.

You can think of DNS like a phone book, translating names to numbers.

While not important, a single IP address can host many websites. So, think of DNS as the phone book and nameservers are like the names of people who live in the same apartment complex.

As you browse, your computer tries to save you some time. It saves a cache of DNS hits. It saves a cache of domain names and their IP addresses. With a speedy connection, you won’t notice this as much today. However, it’s meant to speed up browsing when you revisit a site you’ve already visited.

Make sense? 

Let’s say you’re like me and have a website. For reasons, you decide to change your hosting company. You do so and update the nameservers. You now have a new IP address for your domain name, at least you will when the changes propagate.

Suddenly, you have an old IP address cached for that domain name. Because it is in the cache, your system won’t look that address up again. What do you do to get access to the site again?

Clear DNS Cache:

We’ll learn to clear the DNS cache in the terminal. In fact, I don’t know of a GUI way to do this for the system. (It’s possible to clear the DNS cache in Chrome via a GUI.) So, open a terminal. Many of you can just press CTRL + ALT + T and your default terminal will pop open.

With your terminal now open, enter one of the following commands to see the state of affairs regarding your DNS cache:

Or:

One of those two commands should work for you.

Here’s an example output:

Now, let’s clear that cache.

One of the following commands should work for you:

Or:

There won’t be any output from that command to confirm that the cache has been cleared. If you run the first command all over again, you should see something like this after you’ve run the command:

See? It’s pretty easy to clear the DNS cache!

Closure:

This is only something a few people will need to do. If you’re having issues visiting a site you recently were able to access without issue then this might be something you try. You can try to clear the DNS cache to see if it helps but there are a million and ten reasons why a site may suddenly be down and DNS is unlikely to be the issue unless you have a specific reason to expect this particular problem and solution.

Thanks for reading! If you want to help, or if the site has helped you, you can donate, register to help, write an article, or buy inexpensive hosting to start your site. If you scroll down, you can sign up for the newsletter, vote for the article, and comment.

Subscribe To Our Newsletter
Get notified when new articles are published! It's free and I won't send you any spam.
Linux Tips
Creative Commons License
This work is licensed under a Creative Commons Attribution 4.0 International License.