Today, We Have Fun In The Linux Terminal

Today, we will learn nothing of value – except how to have fun in the Linux terminal. You know what they say, all work and no play makes Jack a dull boy. So, today we’ll be doing some playing.

Why? Well, because it’s fun. There are a number of fun things you can do in the Linux terminal, but this article is only going to cover a few of them. All of these are harmless, some perhaps even fun to share with a co-worker (perhaps even mischievously) and some just to make you smile.

For the sake of brevity, I’m just going to write this from the perspective of an Ubuntu user. You should be able to find equivalents for most every major distro, but that’s up to you. I mean, it’ll work in Debian and Mint etc, but you’ll have to hunt for yourself to find them in Arch, Fedora, or Gentoo!

So, without further ado…

Fun In The Linux Terminal:

This article requires an open terminal, like many other articles on this site. If you don’t know how to open the terminal, you can do so with your keyboard – just press CTRL + ALT + T and your default terminal should open.

Once you have your terminal open, let’s visit the Matrix!

cmatrix:

Start this off by installing ‘cmatrix’ with this command:

Next, in your terminal, type ‘cmatrix‘ and watch the screen. It’ll look something like this as the text flows by:

cmatrix in action
With the new Matrix coming out… Feel free to run this when nosy people look over your shoulder!

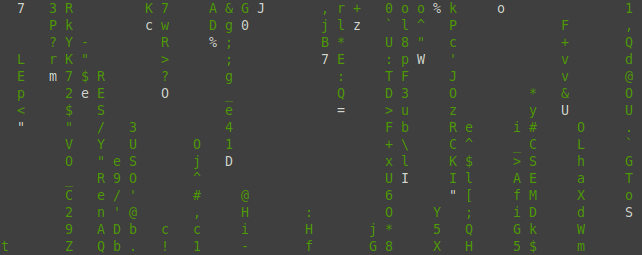
See the man page for more detailed usage. Or not… It’s just for fun!

sl (Steam Locomotive):

This one is for those times when you fat-finger ‘ls’ and type ‘sl’ by mistake. My screenshot abilities were lacking with this one. So, you’ll have to make do. 

To install ‘sl’, just do this:

The next time you mistype ‘ls’ you’ll see what it does. Of course you can just type ‘sl’ and not wait for it. If you do so, be prepared for a steam locomotive that looks a little like this:

sl in action
Choo choo!!! It makes a more complete train, I just suck with graphics.

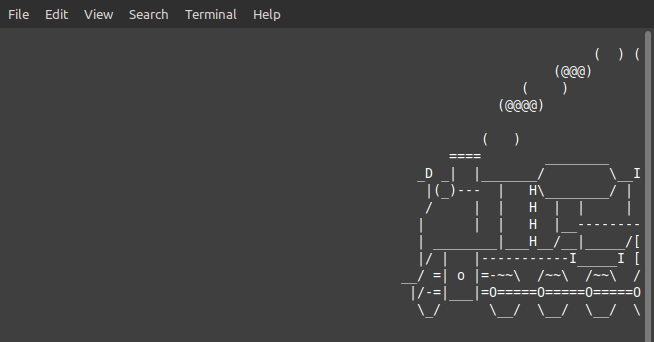
That’s sure to brighten a day such as the one where you’d be mistyping ‘ls’. Who doesn’t like trains?!? Sad people. Sad people don’t like trains.

Toilet:

You’ll find that toilet is a free version of figlet, a tool for making text larger for things like banner printing. I don’t think too many people have printed banners since the end of the dot matrix era, but it’s fun to play around with in the terminal.

To install toilet, and its wonderfully juvenile name, you just use:

There are a number of advanced features, but you can just type ‘toilet <text>’ and press the enter button. For example, there’s this output:

toilet in action - showing large text
There you have it, a giant KGIII! Just what you wanted for your birthday!

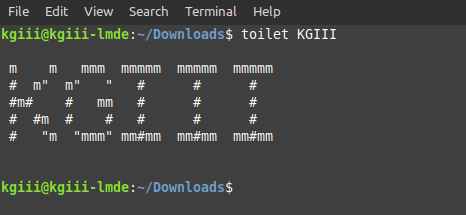
Again, go through the man page for more options – like the ability to choose a font and size. Have fun with it!

Closure:

See? Just like I promised, you’ve learned nothing of value. You can use ‘sl’ on a co-worker, frighten people on a train with cmatrix, or make large ASCII text in the terminal to amuse yourself. Yup, nothing of value! You’re welcome!

Thanks for reading! If you want to help, or if the site has helped you, you can donate, register to help, write an article, or buy inexpensive hosting to start your own site. If you scroll down, you can sign up for the newsletter, vote for the article, and comment.

How To: Make A Directory In Linux

Today’s article will teach you how to make a directory in Linux. Making a directory in Linux is pretty basic, straightforward, and easy. There are some options when making directories which we’ll be covering, but we’ll just be using ‘mkdir‘ for this exercise.

You’ll find the man page describes mkdir eloquently enough:

mkdir – make directories

And that’s exactly what it does. It’s a tool for making directories. Again, it’s pretty straightforward.

If you want a decently useful directory structure, you’re going to want more than the default directories. You’re going to want to make a consistent and meaningful directory structure, which will save you quite a bit of time and effort. Life is easier when you have a useful directory structure that makes sense to you – making things easier to find.

In case one doesn’t know, you can use ‘folder’ as a synonym for ‘directory’. It’s a hierarchical marker to which files can be designated – meaning you can stick stuff in your folder if you want to. They’re one of the best ways to organize your files in a meaningful fashion.

Like files, there are permissions for folders. Often, those permissions are inherited by the files within, though that’s not strictly necessary. We’ll lightly cover that as well.

For such a simple subject, there’s a bit of meat to it. We’ll cover that too in this article about how to make a directory in Linux. It’s mostly a beginner oriented article, but there may be some options that are unfamiliar more advanced users.

On to the article!

Make A Directory In Linux:

This article requires an open terminal, just like many other articles on this site. You can do so with your keyboard – just press CTRL + ALT + T and your default terminal should open.

Once you have your terminal open, you can change directories or make these practice directories in your home folder (which would lead to clutter). So, if you want you can run mkdir tmp && cd tmp to get a fairly clean workspace going. (See? We’re using mkdir already!)

Anyhow, a nice basic use is to make a directory. To make a directory called ‘foo’ then you’d simply use:

If you want to make parent and child directories, you can also do that with just one command:

You can even make multiple directories in the same directory. That’s just a simple use of brackets and looks like this:

If you want to set permissions at the same time, that’s also an option:

You can also add the -v flag (meaning ‘verbose’) to any of these commands. That will output the results of your command so that you can verify that the command actually created the appropriate directories. After all, you never know when you’ll fat-finger something.

Closure:

There you have it! It’s another article, this one teaching you how to use the mkdir command to make a directory in Linux. This article is not terribly difficult, but there are a few advanced options that can make your file management even better. It’s a handy set of flags to know if you’re keen on keeping your system free of clutter.

Thanks for reading! If you want to help, or if the site has helped you, you can donate, register to help, write an article, or buy inexpensive hosting to start your own site. If you scroll down, you can sign up for the newsletter, vote for the article, and comment.

How To: Find Your Present Working Directory

There are times when you need to know your present working directory. You may need to know because the terminal doesn’t output that data, you may need to know for scripting, you may need to know for a variety of reasons.

So, what is the present working directory? Well, it’s simply a fancier name for the directory you happen to be working in – usually in the terminal. If you open your terminal and type something like cd Downloads, then your present working directory is going to be something like /home/<user>/Downloads. It’s pretty simple and this is going to be a pretty basic article. It’ll be a nice and easy exercise, even for a newbie.

There are a couple of ways to determine your present working directory and we’ll share them with you today. It’s really not a very complicated article, and not all articles need to be complicated. Sometimes, you just need new information that will help get you up to speed with your Linux understanding. After all, that’s the stated goal of the site.

Your Present Working Directory:

This article requires an open terminal, like many other articles on this site. If you don’t know how to open the terminal, you can do so with your keyboard – just press CTRL + ALT + T and your default terminal should open.

As I said above, there are a couple of ways to do this. With your terminal open, why don’t you type something like cd Downloads just to have a different directory than your default directory.

When that’s done, just enter the following command:

The output should look a little something like this:

present working directory
See? It’s all pretty basic information that you’ll need to know.

But wait, there’s more! There’s also an environment variable that will show you your present working directory. It’s pretty simple and you can use it like this (among other ways):

Be sure to make note of the dollar sign and the all caps. You’ll need to include those if you want it to work. Depending on what you’re doing, you may want to use the environment variable (as I understand, it’s better to do this when  you’re scripting).

You can see an example of $PWD usage here.

Closure:

There you have it, another article. This one shows you how to determine you present working directory. As far as articles go, this one is pretty short and easy, aimed at newer Linux users.

Thanks for reading! If you want to help, or if the site has helped you, you can donate, register to help, write an article, or buy inexpensive hosting to start your own site. If you scroll down, you can sign up for the newsletter, vote for the article, and comment.

Take, Edit, And Upload Screenshots With Shutter

For such a minimal thing, there are some strong opinions about Shutter. Me? I love Shutter. I love Shutter, warts and all. Some folks have some pretty strong opinions regarding how much they dislike Shutter. And, well, they’re not all wrong. Their complaints can be pretty legitimate.

Man, sometimes Shutter will freeze when you try to take a screenshot limited to just a specific section of the screen. Shutter went a very long time without getting any updates – so long that it has been booted from some of the repositories, as it relied on older libraries.

But, things have changed… Well, no… No, that bug is still there and I’ve been too lazy to report it. But, on a positive note, it’s actively being developed again. It is now ported to GTK3 and is slowly making its way back into the default repositories. The author is now fixing bugs again.

Because of this, I feel comfortable putting it out there. Yeah, once in a while it’ll freeze – and you have to use a TTY to stop the processes manually – but it’s worth it. That doesn’t happen all that often.

I not only use Shutter for screenshots, I use it to do quick edits to pictures I plan on uploading. You can even upload it to a few services from within the program itself – like Imgur and DropBox. The editing is a bit better than basic editing and more than enough to redact important information, crop, add text, add arrows etc…

Screenshots With Shutter:

I usually work with Lubuntu, and in the Ubuntu family. So, I’m just going to cover how to install it with Lubuntu, or any official Ubuntu flavor. For quite some time, you’ve had to add a PPA (repository) but there’s now a new ‘official’ PPA that you can use.

This step requires an open terminal, like many other articles on this site. If you don’t know how to open the terminal, you can do so with your keyboard – just press CTRL + ALT + T.

Once you have the terminal open, you can add the official PPA with the following:

If you’re using a modern release, it should then automatically update the database. If you’re using something older, go with this next:

Once that has finished, you just need to install it. That’s done with:

Let that finish and, once installed, you can open Shutter from the menu and immediately go to work taking screenshots. 

If you want to integrate it into your system the shortcuts would be:

shutter -f for a full screenshot
shutter -a for the active window
shutter -s to manually grab an area

So, swap those to fully integrate it into your system – if you want. 

Give it a shot. You might like it. It actually works these days without installing a bunch of old library packages. If you decide you don’t like it, you can always remove it. To remove it, you’d simple run these commands:

And remove the PPA with:

Tada! It’s all gone. Again, it’ll be a bit different if you’re not using Ubuntu or an official Ubuntu flavor. Any distro that also supports PPAs should handle this by default, so there’s that. There’s a way to install it on most distros, if you want to put the effort in.

Closure:

There you have it, another article – and this one is about Shutter – a tool to take screenshots. I find it easiest to just integrate it into the system and just have the application sitting in the tray. After all, I deal with a lot of images and a whole lot of screenshots. I’m not sure how I got there, but here I am. Man, I take a lot of screenshots.

Like I said, you can use it to edit regular images too. Then, you just click the button to export them and you upload them to sites like Imgur. If you’re curious, it looks a bit like this:

shutter in action
Shutter can be used all sorts of ways – including editing pictures.

Anyhow, it’s worth looking at again. I’ve used it all along, but there are bug fixes and the whole porting to GTK3 thing. If you’ve shunned it, or overlooked it, it’s time to try it again – warts and all. Just try reporting bugs (me too) and we’ll see where it goes.

Thanks for reading! If you want to help, or if the site has helped you, you can donate, register to help, write an article, or buy inexpensive hosting to start your own site. If you scroll down, you can sign up for the newsletter, vote for the article, and comment.

Guest Article: Kickstart Vol. III

Today is the third guest article in a row, and is one more article about Kickstart. There will be more Kickstart articles, but we’ll release those in time. This is the third one in a row, so we’ll try to mix it up a bit.

By now, we should all have at least a little familiarity with Kickstart. Frankly, I’ve still not had a chance to use it – but it does seem like it’d be fun to play around with it. If I were an admin of anything major, I’d definitely look to Kickstart as a solution. Again, if you read this on day one, be sure to check back later as the author may suggest some edits.

See the previous articles here:

Guest Article: Kickstart Vol. I
Guest Article: Kickstart Vol. II

Kickstart Vol. III

Now we need to create a menu for your Kickstart, so you can select which OS you want to install.

Now edit a new file named grub.cfg. It must be named grub.cfg. Here is an example of what it should look like.

The set-default lets you pick which is the default install, it starts at zero, so the options here would be 0, 1 and 2.

Note the IP address of my Kickstart server is here, the path to my extracted iso directory is here, and the location of my boot kernels is here.You can change all of these to fit your needs.

Now we need the actual anaconda-kickstart.cfg files, this is what actually does all the work.The location of these, is set in the grub.cfg file above. You will want these to be in the extracted iso directory, but not in the “dvd” sub-directory.

Here is an example of what one of these would look like. This one is fairly basic.

Again you see the IP address of my kickstart server here, you see the location of my extracted iso files here.Now there are a few things you will need to know in advance.

What I typically do, is install the OS from a USB the first time.In the case of fedora/redhat/CentOS there will be a file at /root/anaconda.cfg. You can copy this file as a starting template for your kickstart of this OS.

(Yes I am re-naming the file here.)

Also you will need the password has strings for your users.

(Or whatever user name you use.)

You will need to know the name of the LAN interface, and you will need to know the size of your hard, and how big the partitions should be.All of these things will be in your anaconda.cfg file

Now change and edit a few things in your fed35srv/fed35.cfg file now.

Change the graphical install to..testskipx This uses a cli interface, not a GUI when installing.

Change the url line to the location of your extracted iso directory in your web server. Note you don’t put the full path, only the path from your webroot.

I like to turn off seLinux, but you can delete that line if you like.

Change your timezone to whatever is appropriate for you.

Using the two example user lines above (those aren’t real hashes, I just typed a bunch of random characters to simulate what it looks like). Edit the user lines to be whatever your values are.

That’s it, you’re don! Now boot your test computer on the kickstart network. A Kickstart menu should appear. Select the appropriate OS.

I’ve found this usually works best with a few settings on the test computer. CSM should be disabled. Network stack should be enabled. Some UEFI settings let you pick PXEboot IPv4 as a boot option. This is preferred. I’ve found it works best with a freshly formatted hard-drive, that way it doesn’t try to boot into the installed OS.

Good luck!

Closure:

And there you have it! You have a guest article, from dos2unix, about Kickstart. There are now three of them and there are a couple of others sitting in the potential queue. We’ll get to them. These few days off have been a very welcomed respite!

Thanks for reading! If you want to help, or if the site has helped you, you can donate, register to help, write an article, or buy inexpensive hosting to start your own site. If you scroll down, you can sign up for the newsletter, vote for the article, and comment.

Linux Tips
Creative Commons License
This work is licensed under a Creative Commons Attribution 4.0 International License.