Save A Web Page As Text

If you’re at all like me, you document all sorts of things and you too might find it handy to know how to save a web page as text. It’s not a complicated task; you can do it in the terminal easily enough. So, if you want to save a web page as text, read on! 

This intro should be rather short. Imagine that!

I don’t have to explain what a web page is. It’s a page (just a page) on a website.

I don’t have to explain what text means. We’ll just be using .txt files.

While this isn’t something I’ve bothered with in a long time, you might find it interesting and helpful. If you’re into keeping notes of things you want to learn more about and remember, you may find saving a web page as text worthwhile.

You can organize the text files however you want and one of the best benefits is that you can perform searches on your local documents easily enough. This might be something that interests you, especially if you’re new and browsing around the web looking for things to learn.

We’ll only be using a couple of tools. We will be using the terminal.

curl:

The first application you’ll need to save a web page as a text file will be the curl application. The curl application is used to transfer a URL. A curl command downloads a file and shows it in your standard output.

If you check the man page, you’ll see:

curl – transfer a URL

See? Exactly as I had said. It’s the correct tool for the job. 

You can also see this article about curl:

Let’s Have a Limited Look at Linux’s cURL Application

html2text:

This should be obvious by the title. It should be made further obvious by the title of this article. This is an application that turns HTML (Hypertext Markup Language – what is used on web pages more often than not) into plain text.

If you check the man page, you’ll see:

html2text – an advanced HTML-to-text converter

Once again, a fine application for the task at hand. You’ll see!

Save A Web Page As Text:

As mentioned above, this is a terminal-based operation. We’re going to save a web page as text, but we’re going to do it in the Linux terminal. More often than not, a terminal can be opened by pressing CTRL + ALT + T on your keyboard.

I’ll give installation instructions for the apt-using distros out there. These packages will be available in your package manager if you’re using any of the major distros. Just adjust these commands to match your needs.

curl:
html2text:

We’re interested only in the -o (output) flag for this application of html2text.

The Process:

The syntax to save a web page as text is simple. It looks like this:

Simply, we’re using the curl application to grab the data, we then send that data through the pipe command where it’s processed by the html2text application.

An example would look like this:

You can, of course, save individual pages as text. Here’s an example:

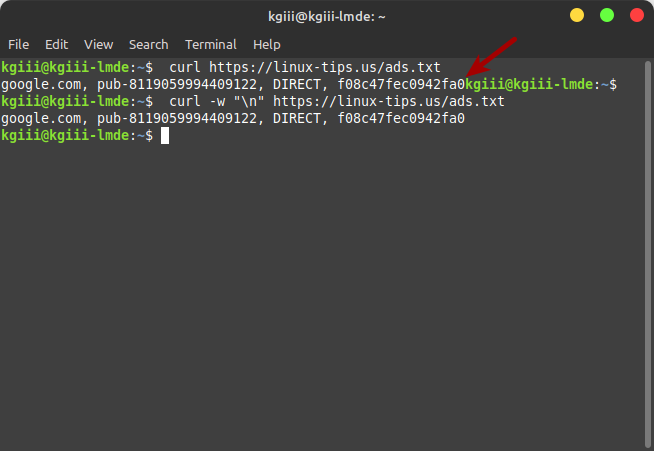
The terminal output is interesting:

Then, you can use a plain text editor to read (and edit) the text file. You can view it in the terminal with just the cat command. That’d look like this:

Though, it’s probably easier to read the saved file with a decent plain text editor that has a GUI. There’s an abundance of text editors available for Linux, so pick your favorite and use that to read the saved output.

Closure:

Well, if you have ever wanted to save a web page as text, you now know how to do that. This was an article that came not from my notes but from my memory. I used to do this with some regularity but I’ve stopped doing so as of late. I haven’t kept so many new notes lately, though I’m not sure why not.

Anyhow, this is a nice and simple exercise that anyone should be able to follow. If you’re using a different package manager it may take a bit more effort, but it’s not complicated. The packages should be available in all the major distros, or something similar. The curl application will certainly be available and might even be installed by default.

Thanks for reading! If you want to help, or if the site has helped you, you can donate, register to help, write an article, or buy inexpensive hosting to start your site. If you scroll down, you can sign up for the newsletter, vote for the article, and comment.

Set A Timeout Value In cURL

Today we’re going to discuss a topic you probably won’t ever need but is worth knowing, we’re going to set a timeout value in cURL. We’re telling the cURL application to quit trying if it takes too long. I suppose it is something worth knowing, so we might as well learn it.

How often do you need this? Well, that depends on you and your workflow. Me? Well, let’s just say that it’s in my notes. I’m not sure that I’ve ever actually used it productively, but it is in my notes. Now? Well, now it’s in your notes! Or, at least it’s here and searchable should you ever actually need to set a timeout value in cURL.

So, what is cURL? I’ve written about it before (some links to follow) but it’s a tool to transfer a URL. That’s exactly what the man page says. Specifically, it says:

If you want to see what the HTML looks like for this site, you can run this:

(That’s not particularly helpful, but you can do it.)

I mentioned that I’d written about cURL before and it may be of some benefit to read these articles (or at least skim them) if you’re unfamiliar with the cURL application.

Let’s Have a Limited Look at Linux’s cURL Application
How To: Make ‘curl’ Ignore Certificate Errors
How To: Add A New Line With CURL

You can see a couple of useful applications of cURL:

Weather In The Terminal? We can do that!
How To: Find Your IP Address Through Your Terminal

See? So, cURL has some use – even for a regular desktop user. If any of those things take too long, you can set a timeout value for cURL, which is what this article is all about.

Set A Timeout Value In cURL:

cURL is a terminal-based tool. Sure, some GUI applications use it in the background, but it’s a terminal tool. As such, you are going to need a terminal available. You should be able to press CTRL + ALT + T to access a terminal. If not, open one from your application menu.

With your terminal open, the syntax for setting one of the timeout values in cURL is pretty basic and easy to understand. Try this:

The time_limit value is in seconds. If you wanted to load the content of this site’s home page and set a timeout value of 10 seconds, you’d run this command:

(Again, not very useful.)

But, that timeout value is just for time-to-first-byte. So, the server will need to respond within 10 seconds else the cURL process will shut down.

There’s another timeout value for cURL. You can set the overall time limit, that is the entire process (including transferring of data) must be completed within that timeframe. If it isn’t, the cURL process will shut itself down. The syntax for that time of timeout value would be like so:

So, if you wanted to make sure the entire transfer of data was done in under 60 seconds, your command would look like this:

(Again, not very useful – but it should certainly take less than 60 seconds!)

I suppose you might find some of this useful if you’re cURLing files more weighty than a web page. You can cURL actual files and write that data to your terminal’s standard output. That’s what cURL does, after all. So, you might find a use for this command.

Closure:

Well, this wasn’t a very long article. It doesn’t cover a great deal and probably won’t be useful to 99 out of 100 people. That’s okay. Not all of my articles are meant for the 99% and sometimes you just gotta write what you feel like writing. This is what I felt like writing. It probably won’t do well for search engine results and that’s okay. Someday, somebody will want this information, type it into Google, and find this site. Or another one just like it, I suppose…

Thanks for reading! If you want to help, or if the site has helped you, you can donate, register to help, write an article, or buy inexpensive hosting to start your site. If you scroll down, you can sign up for the newsletter, vote for the article, and comment.

How To: Add A New Line With CURL

Today’s article isn’t going to be all that long and it’s definitely not going to be complicated, as we just discuss how to add a new line with curl. It’s just an annoyance factor and something I was reminded of today. Lacking a better idea, I decided I’d use this annoyance and recollection as a reason to write an article about how to add a new line with curl.

First, this obviously requires a terminal.

Second, this obviously requires curl. You almost certainly have curl installed, so you won’t have to install anything. 

If you’re curious, you’ll find that the curl man page defines the application as:

curl – transfer a URL

You’ll understand why I’d use that in a second, but you can imagine that it’s a pretty handy tool to have in your Linux toolbox. We’ve previously used curl in many articles. Here’s a sampling of those articles:

Let’s Have a Limited Look at Linux’s cURL Application
Weather In The Terminal? We can do that!
How To: Find Your IP Address Through Your Terminal

… and more!

So, in this case, I show ads on the site. To do this, Google relies on a file known as ‘ads.txt’ being in your web’s root folder (often called ‘public_html’). If the file is not there, there’s an ad inventory issue and Google won’t show ads.

Well, if you read the previous article you’d know that there was an outage. During this outage, it appeared that the site was still reachable – except it wasn’t. It was during this time that AdSense decided to check and see if the ‘ads.txt’ file is there. (This is nothing private. Everyone using AdSense has an ads.txt file.)

Because of this, I decided to verify that the ads.txt file existed and contained the appropriate information. To do this, I simply used the following command:

It gave me the answer I wanted, but I disliked the formatting of the output. But, it was enough for me to determine that the file existed and that I just had to wait for Google to confirm this.

The formatting was horrible. I’ll show you an image in the next section and you’ll see…

Add A New Line With curl:

So, when I saw the output from the above command (feel free to run it on your computer), it just ran the line into the next prompt. I had to dig through my ~/bash_history file because I couldn’t remember how to fix the formatting.

A picture is probably going to describe this best. In the picture, you’ll see the ugly formatting and you’ll see the solution.

adding a new line to the curl output
As you can see, the second command has a much nicer output.

So, to make sure you have a new line, you use the -w (write-out) flag and add the character for a new line in quotes – which is "\n". It’d look like this:

As you can see (and I hit the enter button between commands to start on a fresh new line) the output is much nicer. So, instead of curl starting a new line, a command entry line as it were, you’re starting with a nice fresh new line.

I messed with this way too long before I started digging into my bash history to find other curl commands used over time. Eventually, I found it, but I’d already verified that the file existed and that Google would notice the next time they checked.

Closure:

Well, it’s not the greatest of articles – but it’s useful if you want to know how to add a new line with curl. It’s a much tidier output this way. I just need to remember to do it without having to dig through my bash history each time I want to have a clear curl output.

Meh… I’m sure it’ll eventually be handy for someone…

Thanks for reading! If you want to help, or if the site has helped you, you can donate, register to help, write an article, or buy inexpensive hosting to start your site. If you scroll down, you can sign up for the newsletter, vote for the article, and comment.

How To: Make ‘curl’ Ignore Certificate Errors

In today’s article, we’re going to learn how to make ‘curl’ ignore certificate errors. If you do a lot of ‘curl’ing, this is something you’ll want to know. It’s not a dreadfully difficult task to ignore certificate errors, just a couple of options, but we might as well learn them both today.

We have previously covered the curl command, though the article only touched the surface – covering the basics that a regular Linux user might want to know. If you’re unfamiliar with curl, it’s a tool that’s used to transfer data to or from a server. It defines itself as a tool that you use to ‘transfer a URL’ and it’s an expansive application, with myriad options only a true guru would need or want to know.

What we haven’t really covered much is SSL and certificates. Briefly, SSL stands for “Secure Sockets Layer” and means that there’s a secure connection between you and the site. The certificate contains information like the URL and IP address – and is the confirmation used in the secure socket layer. Meaning, the certificate matches the site and this confirmation is what lets you use SSL without any warnings. Any break in the chain should throw an error up on your screen about a broken or missing certificate.

But, what if you still need that information? What if that data is essential? If the certificate is broken then curl will throw an error and not complete the transfer. It’s for this reason that you’ll want to learn how to …

Make ‘curl’ Ignore Certificate Errors:

Obviously, curl is an application used in the terminal, so this article requires an open terminal. If you don’t know how to open the terminal, you can do so with your keyboard – just press CTRL + ALT + T and your default terminal should open.

These days, everything is expected to have a security certificate and SSL. Even this site has one, as you can tell by the https:// in the URL. Some folks want them for everything on the web, but I’d contend not every site really needs to have one – especially sites that aren’t interactive and don’t collect personal information. But, I have one and would have one regardless – simply because we do exchange some personal information (like email addresses) and I want folks to know we take security seriously.

Moving on…

The syntax is simple and, again, we’re only tackling part of the curl application. It’s simply too large a program, with too many variables, to cover it all in just one article. You basically have two choices:

And the other option is:

Either of those will let  you make curl ignore certificate errors, allowing  you to fetch whatever it is you were after. I suppose you should be careful with this, always verifying what you fetch is what you were actually after. Be extra careful to ensure the address is the one intended, of course. Just practice some careful scrutiny and you’re likely to be just fine.

Closure:

Yup. Another article. This one will help you use curl and to ignore certificate errors. It’s especially useful if you use curl a great deal. If not, stick it in the back of your memory banks and recall it when you do end up needing it. You never know when a tool like this will come in handy.

Thanks for reading! If you want to help, or if the site has helped you, you can donate, register to help, write an article, or buy inexpensive hosting to start your own site. If you scroll down, you can sign up for the newsletter, vote for the article, and comment.

Weather In The Terminal? We can do that!

Weather in the terminal? There are people who pretty much live in the terminal! They do everything there, including checking the weather! This article will show you how to get your local forecast in your terminal, because why not?

Where I live, they have a saying, “If you don’t like the weather, wait a minute.” The weather is constantly changing and is responsible for killing quite a few people every year. We have some pretty extreme weather. Because of this, I pay fairly close attention to it – but, really, I don’t tend to check it in the terminal. I use a more robust solution. This article is for those folks who want to. You’re welcome!

First, a little poem:

Whether the weather be fine, or whether the weather be not,
Whether the weather be cold, or whether the weather be hot,
We’ll weather the weather, whatever the weather,
Whether we like it or not.  — anonymous

See? Who says we’re uncultured here?

Anyhow, this is just going to be a pretty brief article. It’s pretty simple to check and it requires just your terminal and a tool called ‘cURL‘ (which has been covered already, so click that link to save some time). If it turns out to be something you like, you can always alias it for regular use or just commit the short commands to memory.

Weather In The Terminal:

Seeing as this is ‘weather in the terminal’ we should probably start with opening the terminal! That’s easy enough, just press CTRL + ALT + T and your default terminal will open.

Once you have it open, you’ll be using a website known as WTTR.IN. You can actually just click that link and get the weather in your browser. It should be your local-ish weather, unless you’re using a VPN. The site is using IP Address Geolocation to show your local weather and a VPN presents a different IP address, meaning it may not actually be your local weather. The same is obviously true in the terminal.

Start with just a basic example, try:

That should be ‘close enough’, depending on where you live and how accurate the geolocation is. If it’s not, you can add some information – such as town and state (or province, or whatever your country uses). It’d look something like:

The output from that command would look a little something like this:

weather forecast in the terminal
See? It even knows I’m in the USA, so it uses the correct units. Neat, huh?

You can even use some landmarks and it will try to figure it out. For instance, you can check the output from this command:

If you’re in the US, then it will show you the results in our goofy units – even if metric is used at the location. Well, it will try to – within the limitations of geolocation. If you want to change it up, you use a ‘u’ or an ‘m’. To force the above with metric units, you enter:

Anyhow, there’s so much more that you can do. Frankly, the above are all I really use it for – and I seldom bother with that. Living where I do, I get my weather in a browser and with a browser extension. So, be sure to use the following to learn more:

You can also just visit https://wttr.in/:help to get that same information in your browser. It’s up to you, but you’re already in the terminal so you might as well keep using it!

Additional info: GitHub repo is located here.

Closure:

And there you have it. Another article is in the books, this one showing you how to use your terminal to check the forecast and current conditions. There are a ton of options that I didn’t bother covering, but options that you may find useful. Be sure to check the help page and keep up with the project on GitHub.

Thanks for reading! If you want to help, or if the site has helped you, you can donate, register to help, write an article, or buy inexpensive hosting to start your own site. If you scroll down, you can sign up for the newsletter, vote for the article, and comment.

Subscribe To Our Newsletter
Get notified when new articles are published! It's free and I won't send you any spam.
Linux Tips
Creative Commons License
This work is licensed under a Creative Commons Attribution 4.0 International License.