Today we’re going to install a nifty application and then we’re going to make ourselves a directory tree. We’ll learn a couple of other things along the way, as we often do. Linux is great like that, and so we’ll have some fun along the way – including generating an entirely pointless text file that takes up too much space and takes too much time! That sounds fun to me!
So, what is a directory tree? Well, you start in one directory and then make a “tree” of all the directories below it. The directory you start in will be the top of the tree, and the directories below will be the branches. In its simplest form, it might look a little like this:
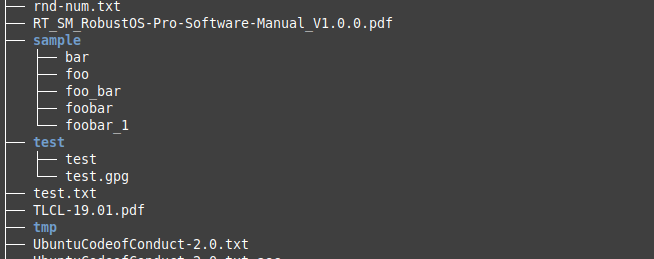
You can’t see the parent directory, but there is one. That’s just a piece of the tree, which should be enough to explain this tree concept.
The tool we’ll be using is known as ‘tree’, of course. The man page describes it as being:
tree – list contents of directories in a tree-like format.
You may not have ‘tree’ installed and you will need to install it. It should probably be a default tool, but it is not. Use your package manager, search for ‘tree’, and install it. In Ubuntu/Debian/Derivatives, you can try:
1 | sudo apt install tree |
That should get you started and, with tree now installed, we can…
Make A Directory Tree:
If you had your terminal open to install ‘tree’, you might as well leave it open. You’ll need it for the rest of this article. If your terminal is not open, you’ll need to open it. Just press
Now, the first thing we’re going to do is right there in your home directory, simply make a directory tree with the following command:
1 | tree -d |
That will make a lovely tree. The -d flag means that it will only show directories in the output. That’s what we wanted, a directory tree. However…
You can make a tree with the files included. Just drop the -d flag and try this:
1 | tree |
Now, let’s send that output to a file. If you want a tree (with or without files listed in it) as a saved text file, you can try this command:
1 | tree > tree.txt |
Now, for some fun, you can try this (it will take a long time):
1 2 | cd / sudo tree > root_tree.txt |
You need ‘sudo’ for that command so that it can traverse and list the various directories for which you have no permissions. It will take a long time. I want to say that it took about 30 minutes, but I currently have a bunch of external stuff hooked up to this device.
It will also generate a giant text file. Mine was over 500 MB in size. Opening it is a slow and painful process, but it’s not too bad once it is open. There are other options for the tree command, just type man tree to learn more about the tree command.
Closure:
So, now you know how to create a directory tree. You also know how to make your directory tree include files and how to make a directory tree of your entire computer’s file system. I don’t know why you’d need to know this, but now you do. They do make good text documents for small sections of the tree, especially if you need to quickly see the directory structure for some other task.
Thanks for reading! If you want to help, or if the site has helped you, you can donate, register to help, write an article, or buy inexpensive hosting to start your site. If you scroll down, you can sign up for the newsletter, vote for the article, and comment.