In today’s article, we’re going to learn how to change Snap application privileges in Lubuntu. With Ubuntu, it’s a bit more straightforward. In Lubuntu, you have to dig around a little bit. Don’t worry, ‘snot hard – it’s just not all that intuitive.
Snap applications come with their own privileges. This is useful because sometimes you may want to change them, to enable something that was disabled or to disable something that was enabled. I think it’s sorted now, but at one point you even had to change the permissions to let the Firefox browser access removable media.
In Ubuntu it’s pretty straightforward and there are a ton of tutorials already out there that will help you change Snap application privileges. It’s just one of those things that comes with Snaps, so we’ll cover Lubuntu.
I’ve written about Snap applications before, including sharing how to disable Snaps completely. However, the reality is that they’re going to be a part of the Ubuntu ecosystem for the foreseeable future.
Like them or not, they will be a part of Ubuntu and official Ubuntu flavors. I suspect trying to avoid them will get more difficult. With the new Lubuntu, for example, the Firefox browser will come as a Snap application by default.
So, well, even we folks using Lubuntu must come to grips with Snap applications. This can be a pretty painless process, if you’re armed with some information. That’s what this article is meant to do. This article is meant to teach you how to …
Change Snap Application Privileges In Lubuntu:
This is actually pretty easy, but not necessarily intuitive. Unlike many of my articles, you don’t actually have to start with an open terminal. No, you need to start with “Discover”.
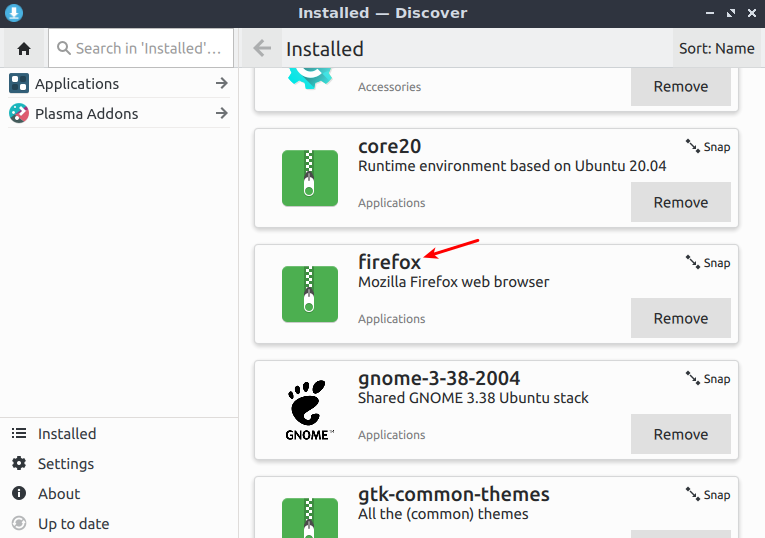
So, crack open your menu, click on System Tools, and then click on Discover. Once you have Discover open, you can use the search or installed option to find the application in question. In this article, I decided to just use Firefox – seeing as we Lubuntu users will be faced with a Snap app Firefox.
When you find the application, you just click on it. It looks like so:
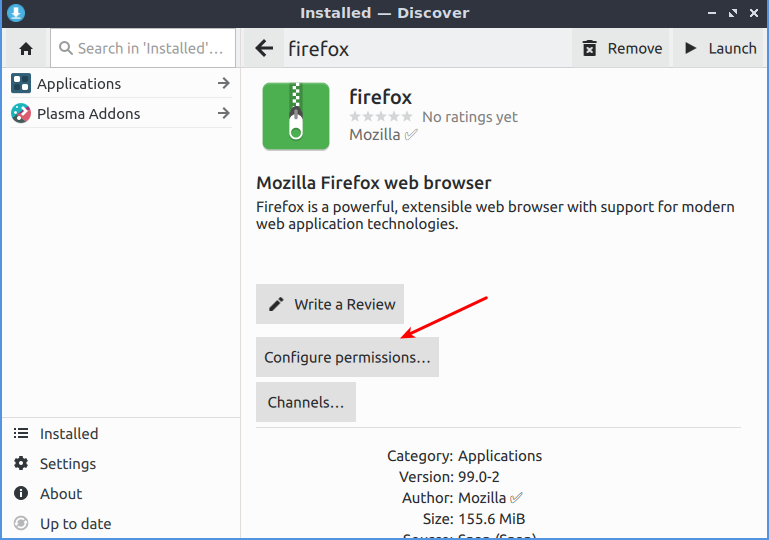
Once you’ve clicked the application, then you just click on the obvious! You just click on “Configure permissions”. That looks like this:
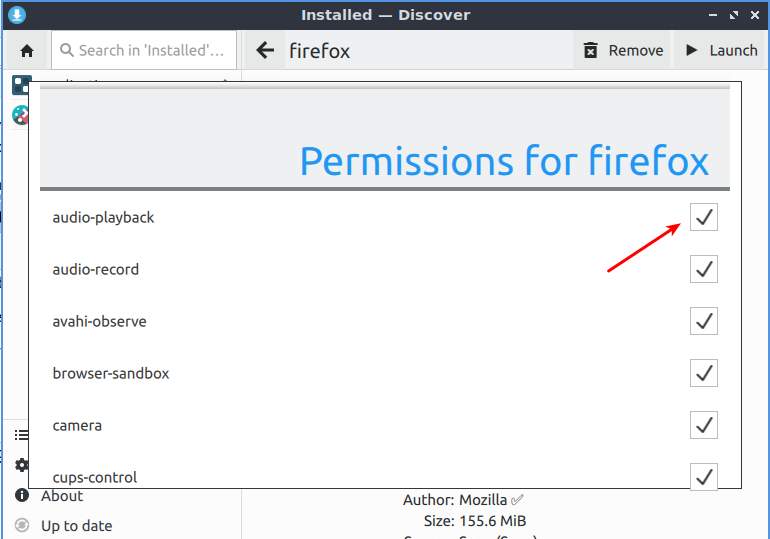
Finally, you can adjust the individual permissions. That looks like this:
That’s about it, really. The thing is, you have to use Discover. While the Muon application is able to install applications, it doesn’t deal with Snap applications. Only the Discover application has these menus and it’s the only way (at least graphically, by default) for you to adjust the individual Snap application privileges.
So, while it’s not necessarily intuitive – it’s not dreadfully difficult. You just have to know where to look and then it becomes obvious.
Closure:
Guess what? As of tomorrow, a day where no article is scheduled, it will have been a full year that this project has been alive. That’s right! I’ve gone the full year without missing a single publication date! If I can do it, so can’t you!
So, am I done? No… No, I don’t think so. I still have articles that need to be written, things that need to be said. I’ve had a great deal of fun, though it has been a lot of work. I’ve learned some, you’ve learned some, and I’d say it’s a net benefit to the Linux community – though I suppose I’m a bit biased. (Feel free to agree with me!)
I may take a few days off. I’m not actually sure. I haven’t decided. I have decided that this can’t be the last article, so there’s that. Which is nice… If nothing else, I’ll see you again in a few days. I might enjoy taking a break. Then again, I kinda suck at taking breaks. I truly suck at retirement.
Thanks for reading! If you want to help, or if the site has helped you, you can donate, register to help, write an article, or buy inexpensive hosting to start your own site. If you scroll down, you can sign up for the newsletter, vote for the article, and comment.