Today we’ll have a fairly simple article that may not generate much interest as we’re just learning how to temporarily set a static IP address. This isn’t all that difficult, as I’ll just show you the syntax, but it’s something you might find worth knowing. So, if you’re interested in learning how to temporarily set a static IP address, read on!
What is an IP address?
If you have to ask that question, this article isn’t one that you need to try. You can, it’s just usually something reserved for specific circumstances.
Every networked computer is assigned a numerical IP address. You may have more than one address, including a public and a private IP address. It’s possible to have an IP address on multiple network interfaces, but every connected computer has an IP address. That’s what we use for the web – you just don’t see it as we use domain names that get resolved to IP addresses.
Some links you should read:
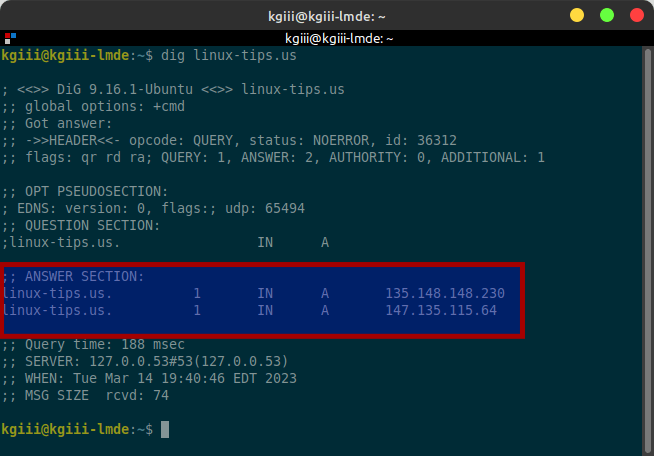
How To: Find Your IP Address Through Your Terminal
Find Your Network Interface Name
A Couple More Ways To Find Your Network Interfaces
Those articles aren’t all on the same subject, but they’re articles where I discuss things like IP addresses and DNS. If you’re new to this, you should read the first link, about how to find your IP address.
The IP address we’re concerned with is our private IP address. This is different than our public IP address and is used on your local network. It’s the address your router sends data, for example. If you remotely control devices on your network, that IP address is what goes on behind the scenes as it denotes the device.
Each private IP address will almost certainly resolve to just one device. This is not true everywhere. One IP address can have many websites and some ISPs are doing IP address subnets for public IP addresses because they’ve run out of IPv4 IP addresses. You needn’t concern yourself with that and that’s just for some random information.
So, the IP address we’ll be setting as a static IP address will be your internal, that is private, IP address. I sometimes do this when I don’t want to have to hunt around for an IP address and device.local isn’t working.
This will only be a temporary change. When you reboot your computer, you may have an entirely different IP address. I don’t want to add complexity, but some routers may already assign a device the same IP address every time it sees it. While this isn’t a static IP address per se, it’s effectively the same.
We’ll be setting that private IP address locally, establishing it on the computer itself. Any modern router should handle the change just fine. However, this may prove problematic for those who have equipment that strays from normal behavior. If that’s the case for you, either reboot or just change your IP address back to what it was originally and everything should be good. However, I can’t see this being a problem, because your original IP address will still work just fine.
Got all that figured out? Well, good! Let’s jump into the article!
Temporarily Set A Static IP Address:
Yes, you’re going to need an open terminal for this. There might be a way to do this with a GUI, but I’ve never tried it. Route around in your network manager and there might be a way. Specifically, check for DHCP and see if there’s a way to change that to a manually configured IP address. It might be the ticket. I’m seeing something similar to that in my network manager, but I haven’t tested it.
Anyhow, as you’re going to need an open terminal, you can probably just press
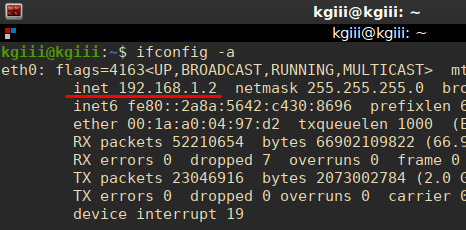
With your terminal now open, we need to find the name of your network interface. I shared a link in the opening section, but the command is just this (assuming you’re using a modern distro):
1 | ip addr |
Your network interface names will look something like enp2s0 (for an ethernet/wired connection) or maybe something like wlxe4beed0e5f5c for a wireless network interface. You can assume ‘en’ is ethernet and ‘we’ is wireless. That seems to be fairly consistent.
Now, while you’re there, you need to determine your IP address, specifically your private IP address. This may look something like this:
1 | inet 192.168.1.4 |
That’s the number you’re going to change.
NOTE: Unless otherwise noted, you want to stick to Class C private network addresses. These are addresses reserved for your private networking and are 192.168.0.0 to 192.168.255.255.
So, let’s say your private IP address is indeed 192.168.1.4 and you want to change it to 192.168.1.42 (because 42 is indeed the answer). You can do that. The syntax needed to temporarily set a static IP address is as follows:
1 | sudo ip addr add <IP_address>/24 dev <network_interface_name> |
So, it’d look like this:
1 | sudo ip addr add 192.168.1.42/24 dev enp2s0 |
Next, you verify that it worked:
1 | ping 192.168.1.42 |
What this does is it adds a static IP address. Your original IP address will still work, but you’ll have designated and set a static IP address that will also work.
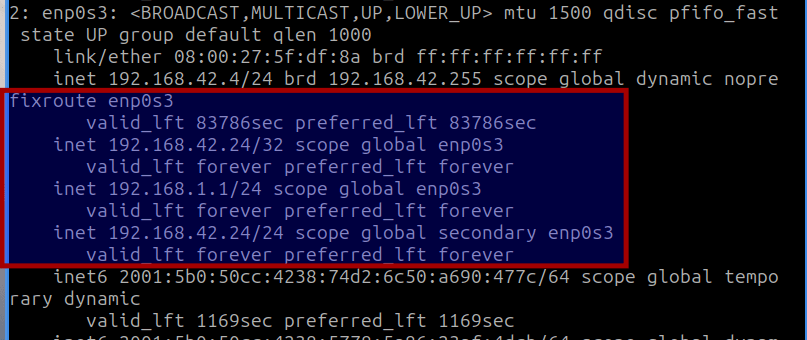
You can add all sorts of static IP addresses by this means. If you run the ip addr command again, you’ll see that the static IP address has been added under the fixroute <network_interface_name> heading.
For example, see this image:
You can just reset it to the same original IP address but you shouldn’t need to. This shouldn’t break anything because the original IP address remains the same and remains usable. You can connect to that computer with any one of those private IP addresses, each of them a static IP address.
It’s possible to make this change a permanent thing, which might make an interesting future article. I don’t think anyone will find it complicated. These things are easier to do than they are to explain. I spent more time with the verbiage than anything else. It’s hard to include all that you need to know because I don’t know what you know.
Closure:
Well, there’s another article. If you’ve ever wondered how to set a static IP address, this is the answer. It’s not complicated. Anyone should be able to figure it out, using the syntax above. I hope that I’ve made it clear. Sometimes it’s not all that easy to explain stuff in plain English without going too deep.
Thanks for reading! If you want to help, or if the site has helped you, you can donate, register to help, write an article, or buy inexpensive hosting to start your site. If you scroll down, you can sign up for the newsletter, vote for the article, and comment.