How To: Open FeatherPad At A Specific Line

Today’s article is going to show you how to open FeatherPad at a specific line. It won’t be a very long article. It won’t be a difficult article. But, ideally, it’ll be a handy article. Read on!

FeatherPad is a pretty decent, lightweight text editor. It reminds me of LeafPad quite a bit, but it’s its own separate project. You will find that FeatherPad is the default GUI plain text editor with Lubuntu, which is how I first learned of it.

FeatherPad supports things like tabs, tab drag and dropping, and can even do things like automatically close brackets when you open them. There are plenty of options, but it’s a basic text editor. You can even use CTR: + + to zoom in, and you can use CTRL + to zoom out. That’s pretty neat.

Me? I love the ability to save a session and have the previous session open automatically when the application is started. FeatherPad lets me have a couple dozen text files that I want to keep open at all times, and this is how I do that. I just use the session manager and open the previous session when FeatherPad starts.

If you’re looking to try a new graphical text editor, I would suggest taking a look at FeatherPad. It’s certainly in your default repositories, assuming you’re using a major distro. As I mentioned above, it’s still a pretty basic editor, that could also be used as a code editor – so don’t expect too much from it, as it’s not intended to do all that much.

So then, let’s learn how to…

Open FeatherPad At A Specific Line:

You can open FeatherPad via the GUI and just navigate to the intended line. It supports line numbering, so that’s not a problem. You can also start FeatherPad from the terminal, which is what we’ll be doing here. Press CTRL + ALT + T and your default terminal should open.

With your terminal now open, you should probably start by installing FeatherPad. It is installed by default in Lubuntu, but to install it in something like Ubuntu you’d run this command:

Now, if you try to run ‘man featherpad‘ you’ll find out that there’s no man page associated with FeatherPad. So, to access the help documents, you’d just run:

Of course, that right there’s enough for the article. What you need to know is mostly right there in the help pages. They’re not even complicated, but that’d make for a very short article. So then…

If you want to open LeafPad at a specific line, it’s this:

A real world example of that would be something like:
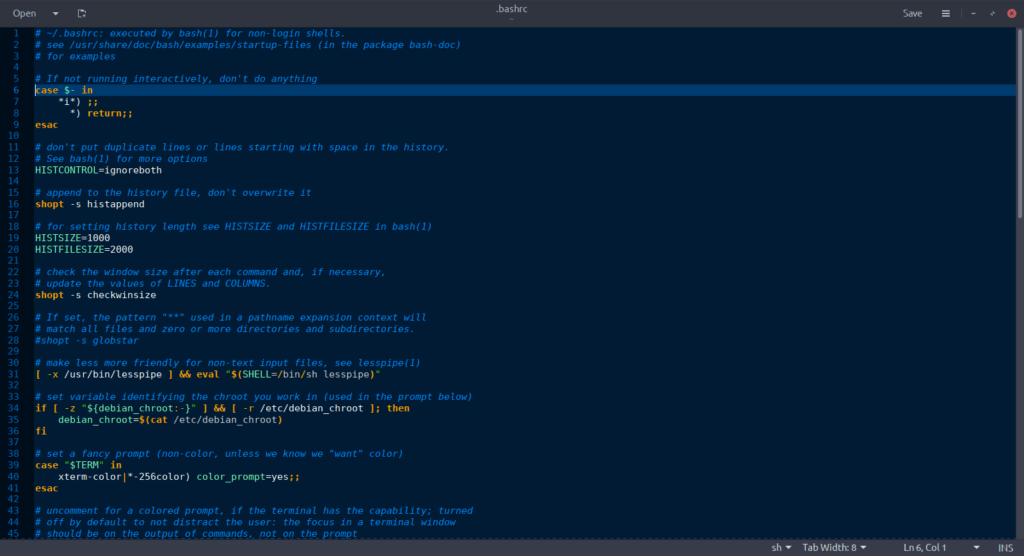
You can even open LeafPad at a specific line AND at a specific column. That command isn’t much more difficult, it looks like this:

Again, for a real world example, if you want to open ~/.bashrc on line 12 and at column 5, the command would look like:

Bonus:

In all those instances above, FeatherPad will be attached to the terminal. If you close the terminal FeatherPad will also close. So, if you start the application from the terminal, you have to leave that terminal window open until you’re done with it.

If you close the terminal, FeatherPad would also close. On top of that, there’s no new line for you to continue typing further commands into the terminal. So, you can’t keep using that terminal while FeatherPad is open.

We got this figured out!

Which is also why you might want to read this previous article:

Don’t Let Applications Close When The Terminal Is Closed

Or, to save you some reading time, you can just add a ‘&‘ at the end of the terminal command to open FeatherPad at a specific line number. Like so:

If you use that command, with the ‘&‘ at the end of it, it will detach FeatherPad from the terminal, meaning you can keep FeatherPad open while still using the terminal or that you can even close the terminal while that instance of FeatherPad remains open.

Closure:

And there you have it. You have another article! This time it turned out a bit longer than I expected. I wasn’t going to include the bonus content but that seemed like a good idea. Either way, it’s not very complicated and should be a quick read.

Thanks for reading! If you want to help, or if the site has helped you, you can donate, register to help, write an article, or buy inexpensive hosting to start your own site. If you scroll down, you can sign up for the newsletter, vote for the article, and comment.

Let’s Install Nano (With Some Bonus Information)

This site mentions Nano quite a few times but never tells you how to install Nano. Today, this changes! Today, we make sure you have Nano available! Not all distros have Nano installed by default, but in pretty much all distros Nano would be a useful tool to have.

The Nano text editor (GNU nano) has been around since 1991, 21 years at the time of writing. I’ve written about it a few times, but nothing major. I think the most I’ve written about it was in an article about My Three Favorite Text Editors. If it’s not obvious from all of this, Nano is one of my favorite editors.

Rather than gush, I think I’ll just explain why I like Nano. It’s simple. When making quick edits to text from the terminal, I don’t need to know things like :q! just to exit the program, I can see how to exit the program because it’s written at the bottom. Nano has plenty of features, even a viable, albeit not great, find-and-replace function.

In Nano, you can do the obvious text manipulation tasks – like cut and paste, of course. You can jump to line numbers and all that stuff. At the end of the day, it’s a great terminal text editor that just works and is simple to use. If you’re new to Linux and think Nano looks daunting, you should introduce yourself to Vim or Emacs!

I like simplicity and effectiveness. For the things I do in that situation, quick file creation or editing, it works just fine. I don’t need anything more robust – or more complex.

Install Nano:

Sadly, Nano doesn’t come installed by default on all distros. It’s a tiny application that just works, so I’d be happy to see it as the default (or available by default) on more distros. Until that time, we’re stuck installing it ourselves.

Fortunately, there’s not much trouble installing Nano in the major distros. You just need to start with an open terminal. You can open one with your keyboard. Just pressing CTRL + ALT + T should open up your default terminal. Pick the appropriate command below and it should install nano for you.

Arch/derivatives:

RHEL/Fedora/derivatives:

OpenSUSE/derivatives:

Debian/Ubuntu/derivatives:

For everyone else, hunt around or download and compile it from source

Once you have Nano installed, you’ll need to know how to use it. Fortunately, for most users and most uses, there are a few shortcuts to learn and that’s it. For most people, you don’t need to know a whole lot for basic functionality. As you’re making basic edits, that works. It’s pretty easy.

My usual blurb (that I cut and paste) to tell people how to save a file in Nano is just this little snippet:

(Which, when formatted properly, comes out looking like “press CTRL + X, then Y, and then ENTER“.)

And, that’s it. That’s pretty much all you need to know when making quick text edits in Nano. However, there’s so much more to Nano than you might be expecting.

Bonus Nano Info:

While Nano is simple, it is deceptively simple. If you type nano into the terminal, you’ll see just a few options on the bottom. And, like I said, that too is a bit deceptive. With your terminal still open, type the following:

As you can see, there are a whole lot more options. There are far too many options for me to even begin to touch on them, and you won’t need any/most of them for the basic text editing for which we usually rely on Nano.

You can open a file with Nano like this:

You can also just open an instance of Nano and name the file when you’re closing it. If you want to create the title when you’re starting, you can just use:

That’ll auto-populate the name field when you’re saving the file. So, you can use Nano to create a new text file easily enough.

While you’re in there, you can use CTRL + W to search. If you then use ALT + W to go to the next instance of the text you searched for. Searching is even kind enough to support regex, case-sensitive searches, and can even be used to replace text.

At the bottom of the output, you’ll see directions that tell you how to use Nano. The ^ means you use the CTRL as the modifier. The M (such as M-A to undo) means you use the ALT as the modifier. So, to cut, you’d use CTRL + K and to undo something you’d use the previously mentioned ALT + M.

You’ll get used to it, I promise. You’ll learn it much faster than you’ll learn Vim or Emacs – but those too have their place. I wouldn’t want to spend hours in Nano, but it’s great for a few minutes when you need to make a quick edit.

Like I said, this is just touching on the surface. Look at the man page ( man nano) for more information. There’s a lot to this little editor and the advanced features are there if you need them. For example, I often open files with the -l flag so that it will show line numbers.

Closure:

Yup… There’s another article. This one tells you how to install Nano and has some bonus information about how to use Nano. I didn’t have time (and this isn’t that kind of site) to tell you about all the other nano options. Those options are just a man nano command away, should you want to use them.

Thanks for reading! If you want to help, or if the site has helped you, you can donate, register to help, write an article, or buy inexpensive hosting to start your site. If you scroll down, you can sign up for the newsletter, vote for the article, and comment.

Use Sublime Text On Ubuntu (And Derivatives)

Sublime Text is a proprietary, closed-source, paid application with a free version that has most of the paid features. It’s a pretty solid text editor and it’s worth taking a look at it.

I covered my favorite text editors and Sublime Text got a mention, even though it isn’t in my top 3. It’s actually a very capable text editor, it’s just not in my top 3 list. I don’t have to be the target audience to recognize its potential! It’s great to expose folks to the application. Choice is a good thing and it could be in your top 3 list.

It has a great ‘find in files’ feature that works well and I’ll sometimes start the application just for that. Being able to find (and replace) text across multiple files in a graphical way is pretty great. They’re not alone in that feature, it just works well in Sublime.

In fact, Sublime Text has a tagline that reads:

Text Editing, Done Right

And, they’re not wrong. There are all sorts of ways to be right, as there are as many preferences for text editors as there are text editor users. Here, they’ve been making and selling Sublime Text for 13+ years and have loaded the application up with a ton of features.

And, indeed, there are a lot of features – from multi-tab select, to ‘context-aware’ autocomplete, to GPU rendering, to macros, projects, and more. It’s definitely aimed at programmers who work with large amounts of text.

While I could try to enumerate the many features and benefits, you can just try them for yourself. It’s a time-limited trial, but the application keeps working beyond the trial date. You can continue using it, or you can pay for it.

Install Sublime Text:

When installing Sublime Text in the past, I’ve come across convoluted methods to install it. The reality is that it’s just three (maybe four) commands. You don’t need to install a bunch of prerequisites. There’s no need to install other things to get it to work, it’s a fairly normal installation.

Note: This installs the ‘free trial’ version. It works wonderfully. At the end of the free trial, it’ll happily continue to work with most features still intact. There’s no ‘need’ to pay for the software. However, many people have found it useful enough to pay for it.

Let’s press CTRL + ALT + T to open the terminal and get Sublime Text installed! Remember, if you don’t like it, you can just as easily remove it.

If it’s not obvious, copy each line, paste it into the terminal, press ENTER, and make sure to pay attention to any outputs so that you can act on them. I don’t anticipate any trouble, but you can leave a comment if need help. You can also ask at (I’m a moderator) Linux.org if you get stuck.

Properly installed, it’ll look a little something like this:

sublime text finding text in files
Sublime Text being used to find a phrase in multiple files. It’s a great feature.

You may not need to run the sudo apt update from above. The system may automatically update the database after the repository is added. The other commands are probably all you need. It’s nothing convoluted and it “Just Works!®” Well, it just worked with a few local tests. It’s also worth installing this way to make sure that that Sublime Text gets updated with the rest of the system.

Closure:

And that’s it. Open Sublime Text from the GUI menu, probably entered under “Programming.” If you want to see the text information in your terminal that you already have open, it’s called ‘subl’. So, try subl -h to see what command line options you have. 

Thanks for reading! If you want to help, or if the site has helped you, you can donate, register to help, write an article, or buy inexpensive hosting to start your own site. If you scroll down, you can sign up for the newsletter, vote for the article, and comment.

My Three Favorite Text Editors, a Meaningless List

One of the things I hope to avoid on this site is lists and rankings. I hope to be creative enough to avoid what other sites do. You shouldn’t expect this site to have articles like, “The Top 10 Distros for Low-end Computers!” It’d be great if I were creative enough to not end up with articles like that. Though they do appear popular, I think we can do better than that!

Ah, yes… I see that paragraph coming back and biting me in the arse after I’ve run out of article ideas and am just publishing fluff content. Anyhow…

People have heard me say this before, and it’s just like how I do it with browsers, I use different text editors for different reasons. I do different things in each, using each for specific tasks. This article shares my three favorite text editors, along with the why and how I use them.

This isn’t a list of the best text editors, because I don’t know what needs you have and I don’t feel qualified to say what is best. (That’s another sentence that’s going to come back and bite me in the arse.) Instead, it’s a list of my favorite text editors – so you could say that they’re the best for me.

The order that I list these text editors in might as well be in the order that I use them. I can’t think of a better way to organize them. So, here they are from most-used to least-used.

Favorite Text Editor #1: FeatherPad

Link: FeatherPad

That’s right, FeatherPad comes in first. Why? Because I always have it open. It, along with a host of other software, gets opened immediately after booting and never gets closed. 

Maybe a picture will explain it:

FeatherPad with many files open.
As you can see, it’s a pretty busy application with many text files open.

See? I do a lot of things in plain text files. I keep track of many things, including ideas for articles for this site. When it comes to keeping many text files open and available, FeatherPad does great. FeatherPad doesn’t use a lot of resources, never crashes, and has adequate preferences for me to set it up how I like.

I use all those text files (fuzzed section on the left) on a regular basis. Not only can I save them as a session, FeatherPad can helpfully open all previously opened text files when it is started. I don’t use a clipboard manager, I use plain text files that can be easily managed and FeatherPad is one of my favorite text editors. The session feature is a great benefit.

Favorite Text Editor #2: gedit

Link: gedit

gedit, no caps, is a rather pompous application. When you install it, it boldly refers to itself as “Text Editor”, as though it is the only text editor out there. It’s also meant to be used in the Gnome desktop environment, and is actually the default Gnome DE text editor. You can trivially install it on other desktops and it doesn’t pull in a ton of dependencies.

The gedit text editor is one of my favorite text editors because of the plethora, yes an overabundance, of plugins available. It’s easily themed with colors that don’t burn my eyeballs, and the syntax highlighting works well enough. I even wrote an article about installing gedit with all the bells and whistles. (I know, it needs to be transferred to this site.)

gedit in action
See? It doesn’t scald my eyeballs and it highlights text just fine.

I use gedit when I’m editing files with my FTP client. I use gedit when I right click on a file and want to open it. The gedit text editor is good for that sort of stuff. It’s basically my default editor for plain-text files that I don’t already have opened in FeatherPad. 

It’s not the lightest editor out there, but it’s not all that heavy. gedit opens responsively even with reasonably large text files. It does what it says it does on the tin and, as such, is one of my favorite (or at least most frequently used) text editors.

Favorite Text Editor #3: nano

Link: nano

At the time of writing, nano is going on 22 years of age. Yeah, it has been around that long. While I have a passable familiarity with Vim, I don’t really need any advanced features when I’m editing files in the terminal.

nano is a GNU project, just like Emacs, but doesn’t have nearly as many features and runs in the terminal. You also don’t get to use the macros that you get to use in Emacs. It’s a much more simple application than Emacs.

While you can surely use nano for a lot of text editing, it’s not ideal for doing so. If you’re going to do a lot of text editing from the terminal, learn to use Vim. If you’re going to just do quick edits (like me), nano works just fine.

nano text editor in action
There aren’t many features. This is a very bare-bones editor. That”s intentional.

As I said, it’s really basic, and that’s by design. It’s meant to be basic and to just be used for editing text. Unlike some of the other editors that run in the terminal, this one probably came installed on your distro by default.

You’ll need to learn some keyboard shortcuts to make use of nano, but they’re easily learned and you’ll soon have a familiarity with the application. It’s great for quick edits, especially if you need elevated permissions – which is when you just open it with ‘sudo’ and it functions like normal but with the ability to edit things like system files.

Closure:

There are a ton of editors out there. Feel free to leave comments telling us about your favorite text editors. You too many find that it’s easier to use different editors for different tasks, and I’d encourage folks to try it. I’ve been doing it this way for years. It seems to actually save time, because each application is used for the tasks it is most suited for.

I also use other text editors, such as Sublime, Bluefish, and Notepadqq. Those get used with less frequency and only for more specific tasks. They aren’t included here, because I use them far less often. 

As always, thank you my wonderful readers. Traffic is starting to pick up on this site. That’s a good thing! Don’t forget that you unblock ads. If you want to support this project, you can also sign up for the newsletter, donate, or even write articles.

Subscribe To Our Newsletter
Get notified when new articles are published! It's free and I won't send you any spam.
Linux Tips
Creative Commons License
This work is licensed under a Creative Commons Attribution 4.0 International License.