Today we’ll cover a not-so-serious topic about how to use an older version of a Google Chrome extension. There’s a subset of my readers who may eventually want to know this information. It might not be today, it might not be tomorrow, but someday you may need this information.
Fortunately, that information will be right here in an article about how you go about using an older version of a Chrome extension. This is one of those things you don’t need – until you need it. It’s kinda like how I answer kids who ask if I have any good life advice; “But a plunger before you need a plunger.” It’s pretty solid advice.
The gist of the story is that I live in a very remote area. I also live where weather events are (and this is not in jest) sometimes fatal. If you’re unprepared for the cold, it can kill you. Of course, it’s unseasonably warm right now – but that doesn’t change the point.
So, I take the weather a bit seriously. One of the tools I use for cursory weather examination is a browser extension called “Forecastfox.” The extension relies on AccuWeather and folks have determined that it’s an API change that broke the extension. Also, to make it a bit more interesting, the author of the extension is in Ukraine.
It could be a while before it is fixed and operating properly. Fortunately, and for whatever reason, the previous version was known to still work. Unfortunately, it is a bit of a hit-and-miss, but it’s sometimes possible to get an older version of a Chrome extension. It’s then easy enough to install it, which is what this article is all about.
Use An Older Version Of A Google Chrome Extension:
When you find a Google Chrome extension (and this applies to Chromium, Opera, Brave, Edge, and all the other Chromium-based browsers out there) that doesn’t work anymore, you have some options. You can try a previous version, an older version, to see if that still works as expected.
Unless it’s a security extension, or unless the extension had a security-related flaw, it’s reasonable to try an older version of the extension to see if it works. In my case, I did a bit of research before choosing this route – and I’d advise you to do the same. Make sure the update was just bug fixes and feature additions and that you’re not reverting to an extension with known security issues.
Once you’ve looked around and determined that using an older version of the extension is a good idea, you can get to work on using an older extension version. You’ll want your browser open for this. In this instance, we’ll be using Chrome.
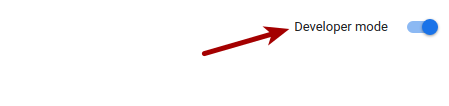
Your first real step is to click the three-dot menu in the upper right. Then, open “More Tools” and click on “Extensions”. In the upper right, enable “Developer mode”. It looks like this:
With that enabled, your next step is to find and download an older version of the extension. Be sure to remove the existing version before going any further. Additionally, leave that extension page open because you’re going to need it again.
Now to find an older version of your extension. Start by searching here:
That site has a whole lot of extension versions backed up. Odds are very good that you’ll find an older version of your extension there. If you don’t find one, you can try going to the extension’s home page or checking code repositories like GitHub. For example, if it’s on GitHub, just look to the right sidebar to find the releases link and look in there.
Once you have that file (it should be a string of letters and numbers that end in .crx) just drag it to your Google extension page. There’s nothing fancy, just left-click on the .crx file and drag it to Chrome’s open extensions page.
That’s it. It’s that simple.
As you manually loaded the extension you shouldn’t need to worry about it updating automatically. It shouldn’t automatically update until you’ve installed the current version from the store again. So, you’re good to wait for a version or two with your working extension. Then, once you’ve determined the current version works, just remove the extension you manually added and install the version from the store.
See? You’re done!
For Our Firefox-Using Friends:
If you use Firefox add-ons, I did look up how to do the same thing with Firefox. It’s much easier to do this with Firefox. I don’t use Firefox all that often anymore, but I figured I’d learn how to load an older add-on and share that information with you.
If you’re a Firefox user, you’ve got it easier – mostly…
Your first step is to click the three-line menu, where you’ll select “Add-ons and themes”. Open up the add-on’s settings so that you can remove the extension. After you remove the add-on, leave that tab open because you’re going to need it again.
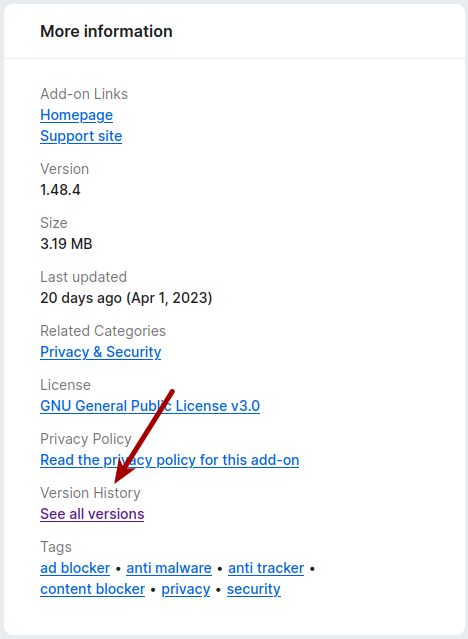
Once you have the add-on removed, find the add-on’s home page on the Mozilla Add-On site. Look on the left and scroll down. You’re looking for “More information” which should have a “See all versions” link. Click on that and download an earlier version. It’d look something like this:
On the next page, scroll down to find the add-on’s older version, the version you believe will still work. It’s a bit uninformative, but just click the older version’s download link on the right and it will download it and ask if you want to install it. Of course, you’ll pick yes to install it.
Now, go back to the tab that you were using to show your add-ons. Find the extension you just added and open up its properties (it’s ‘Manage’ under the three horizontal dot menu). Scroll down to find “Allow automatic updates”. Click on “Off” to disable automatic updates so that it doesn’t automatically update your add-on to the newest version.
When you are reasonably sure that the current version of the add-on will work with your system, you can just enable automatic updates. That should do the trick but will take time as it’ll just update when it next checks. You can simply remove the add-on and add the current one after that, should you be in any sort of hurry.
And, for you Firefox users, that’s it! That’s all you should have to do if you want to use an older version of a Firefox add-on. It’s not too taxing, now is it?
Closure:
Alright, so it’s another long article – and another one that doesn’t require an open terminal. This time around, we’ve talked about how to use an older version of a Google Chrome extension. I also covered how to do so with Firefox. Ordinarily, I’d have considered making these two separate articles, but I figured you could handle another long piece.
Thanks for reading! If you want to help, or if the site has helped you, you can donate, register to help, write an article, or buy inexpensive hosting to start your site. If you scroll down, you can sign up for the newsletter, vote for the article, and comment.