One of the most frequent things you’ll do is read data from disk, so why not test your storage drive’s read speed? In this article, we’ll use an application we’ve used before. This shouldn’t be a very complicated article.
We store data on drives, or disks if you prefer. Most of us don’t use disks as our main storage devices. We do use disks for backups or storing large amounts of data, but we largely use SSDs these days. Some of us even use NVMe M.2 SSDs to store our data. The latter is currently the quickest you’re likely to encounter as a consumer.
The old spinning platters we used (though we’ve used lots of forms of magnetic storage) are typically referred to as HDDs (Hard Disk Drives). The SSDs (Solid State Drives) have no moving parts and are much faster. The NVMe M.2 SSDs are faster still.
If you’re suffering from some bottleneck, you might want to diagnose that. You might just be curious. It is also possible that you just purchased new hardware and want to see if the storage device reaches the advertised speed.
The tool we’ll be using is hdparm. This works fine with USB thumb drives, HDDs, regular SSDs, and even NVMe SSDs. It’s a complex application with a lot of options. I’ve covered some features before.
How To: Show Your Hard Drive Specifications In The Terminal
So then, let’s learn about this hdparm…
hdparm:
It should be noted that this hdparm application should be installed by default. It should also be mentioned that hdparm is a terminal-based application. You can verify that hdparm is installed with the following command:
1 | which hdparm |
If you then check the man page (with man hdparm) you’ll see that hdparm is described quite nicely like this:
hdparm – get/set SATA/IDE device parameters
If hdparm is not installed, you can surely find it in your package manager.
As you can see, hdparm is the right tool for the job assuming you want to test your storage drive’s read speed. It’s also the right tool for a bunch of other jobs, but we’ll just be covering the read speed today.
Test Your Storage Drive’s Read Speed:
As I mentioned above, this hdparm application is something you use in your terminal. I suspect my regular readers will have guessed that. If you’re new to the terminal, more often than not you can open your default terminal by pressing
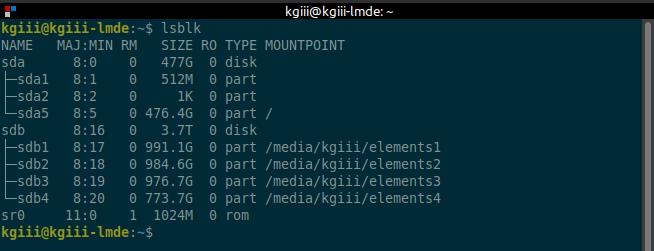
With your terminal open, let’s identify your storage drives with this command:
1 | df |
You’re interested in the bits that start with /dev/<drive_ID> as those are the drives you’ll be able to test.
NOTE: You should run these tests several times and average them, and you should do so while the system is otherwise idle. That will give you the peak results.
We’re interested in two flags, as they represent two tests. The -t flag tests the read cached. The -T flag tests the drive’s buffered read timings. You’ll often find the first test is fairly similar throughout the different drives and that the cached test shows the most differences. If those two terms, cached and buffered, confuse you, here’s a link about the differences between cache and buffer as far as the hdparm application goes.
You’ll need elevated permissions for this, so the command looks like this:
1 | sudo hdparm -tT /dev/<device_ID> |
Or, as an example for many of you, the command might look like this:
1 | sudo hdparm -tT /dev/sda1 |
That command will test both the cached read speed and the buffered read speed. These tests are important because you’re using a smart operating system that puts things into the cache and buffer that are likely to be read from the drive. So, the command listed will test both. You can split them up of course.
I decided to get you some examples:
Some Quick Read Speed Tests:
This is the internal SSD on a desktop:
1 2 3 | /dev/sda1: Timing cached reads: 16736 MB in 1.98 seconds = 8451.25 MB/sec Timing buffered disk reads: 512 MB in 1.10 seconds = 464.39 MB/sec |
Next is a USB 2.0 device plugged into that desktop:
1 2 3 | /dev/sdc1: Timing cached reads: 16904 MB in 1.98 seconds = 8532.39 MB/sec Timing buffered disk reads: 240 MB in 3.01 seconds = 79.74 MB/sec |
Then we have an external HDD plugged into a USB 2.0 port on that desktop:
1 2 3 | /dev/sdb1: Timing cached reads: 16548 MB in 1.98 seconds = 8350.55 MB/sec Timing buffered disk reads: 62 MB in 3.17 seconds = 19.56 MB/sec |
For comparison, this is an NVMe M.2 SSD:
1 2 3 | /dev/nvme0n1p1: Timing cached reads: 29316 MB in 2.00 seconds = 14681.89 MB/sec Timing buffered disk reads: 4210 MB in 3.00 seconds = 1403.05 MB/sec |
As you can see, the internal SSD is quite fast. The thumb drive is the next quickest. This is followed by the external drive that’s just a spinning platter drive.
Then, of course, you can see that the NVMe M.2 SSD is so much faster. That’s not even the fastest SSD out there. There are faster NVMe M.2 SSDs that don’t cost a lot of money. The prices have come down these days. You can even get a PCIe card that lets you mount an NVMe M.2 SSD if your motherboard doesn’t already support it.
Closure:
Should you want to get some drive benchmarks, you can certainly use hdparm to test your storage drive’s read speed. This isn’t something complicated and most anyone can figure it out. All you need to do is follow the directions carefully and in order. I do try to explain things as I go along.
There’s a lot more to the hdparm application. I encourage you to check the man page. There are probably another half-dozen articles that can be written about hdparm, so you’ll likely see this application again in the future. I doubt I’ll do another one too soon, as I like to space things out and not get too repetitive.
Thanks for reading! If you want to help, or if the site has helped you, you can donate, register to help, write an article, or buy inexpensive hosting to start your site. If you scroll down, you can sign up for the newsletter, vote for the article, and comment.