Today’s article is going to be an interesting one, an article where you learn how to show RAM information with Ramfetch. For many of you, I expect Ramfetch will be a completely new application, which is nice. However, this article should be simple enough for even a new user. Read on and learn more about your RAM!
By now, you’ve seen some of the following articles:
Well, this time around, we’re going to be using a similar application – but one meant specifically for RAM. The name of this application is ‘Ramfetch‘. Let’s just say the idea will be familiar, as you’re already aware of similar applications. At the end, you end up with a handy screen to screenshot to show your friend and family – or to learn from. Bragging rights is always a good reason!
So, then why would you want to do this? Well, Ramfetch gives you some good information about your RAM. It’ll do the basics, like show you what’s free, what’s available, and the total amount of RAM. But, it shows you quite a bit more than that, and it’s data worth looking at for those who want to know more about their RAM.
What we’ll be doing is cloning a git repository, moving a file, and changing the permissions to ensure it can be executed so that you can run the command from anywhere within the terminal.
You’ll need ‘git’ installed, and that should be installed by default in pretty much every major distro. If it’s not, check your package manager – or simply follow the URL in the article and perform the operations manually.
With all that said, let’s just jump into the article!
Show RAM Information With Ramfetch:
Of course, you’re going to need an open terminal. Ramfetch is a terminal-based tool. So, open your default terminal emulator. If you don’t know how to open the terminal, you can do so with your keyboard – just press
UPDATE: Without letting me know, they changed things up. Follow these new instructions.
With your terminal open, let’s clone the project:
1 | git clone https://github.com/WhoseTheNerd/ramfetch |
Now, let’s move it to a directory where you can always use it from the terminal, regardless of which directory you’re in:
1 | sudo cp ramfetch/ramfetch /usr/local/bin/ |
The next step is to make Ramfetch executable:
1 | sudo chmod +x /usr/local/bin/ramfetch |
With that said and done, just execute the ‘ramfetch’ command to show RAM information with Ramfetch. It’s simply:
1 | ramfetch |
Your output might look a little something like this:
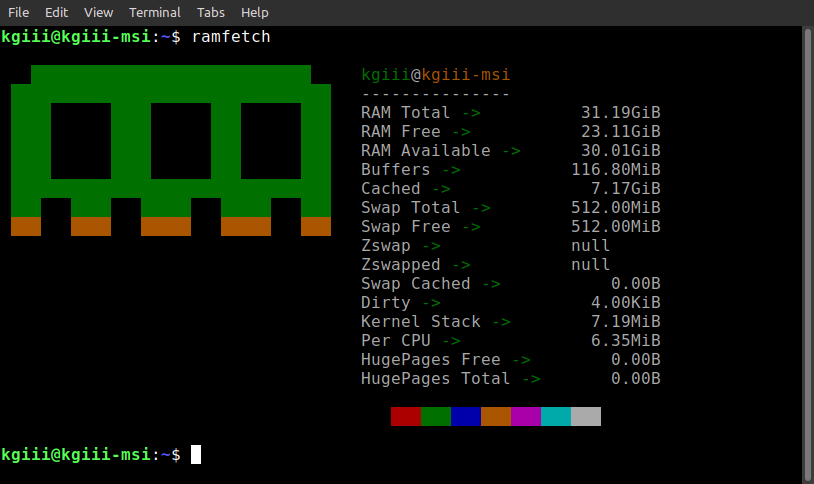
There you have it. You can now show RAM information with Ramfetch! Pretty simple, huh? There’s no man page and the ramfetch --help command doesn’t really show you any other ways to run Ramfetch.
Here’s a better image, as supplied by the author of Ramfetch (o69mar):

Closure:
There’s another article said and done. Welcome to the new year and I hope you had a safe New Year’s Eve this year. We start the new year off with a simple enough command, learning how to show RAM information with Ramfetch.
I’ve not missed a publication schedule yet, so we’ll see how much longer this can go on. (I’m sure I’ll miss a publication deadline at some point, but today is not that day. In fact, I wrote this days ahead of time!) So far, so good! I never thought it’d reach this level, by the way.
Thanks for reading! If you want to help, or if the site has helped you, you can donate, register to help, write an article, or buy inexpensive hosting to start your own site. If you scroll down, you can sign up for the newsletter, vote for the article, and comment.