I figure that today is a good day for a shorter article, so we’ll look at another way to locate files by extension. This is something that you can do in so many different ways. We’ll just cover another one, simply because we can.
You might want to locate files by extension when you’re doing file management tasks. When you have a directory containing many files, the output from the ls command can be pretty cluttered. For example, you might want only to list the files with a .txt extension. This article will help with that.
It should be noted that Linux doesn’t much care about file extensions. If you create a plain text file without any extension at all and add some text to the file, Linux will know that it’s a text file. See this article on Wikipedia about magic bytes:
See also this article:
About a year ago, I wrote a couple of articles on this same subject – that is finding files by extension. Of course, those articles are different than this article. This is a different way to locate files by extension. Those previous articles were:
Find Multiple Filenames By Extension – With Locate
How To: Find Multiple Filenames By Extension
So, finding files by their extension type has been covered before. We’re just going about it another way. The previous examples were a bit convoluted and this is just going to be an “easier” way. (I suspect that it’ll be easier. I guess that depends on what you consider to be easy!)
Locate Files By Extension:
Yes, we’ll be doing this in the terminal. I’m sure there’s a GUI way to do so, but that’s going to be a matter of the file manager you use. They will not all have the same features and not all of them will access those features in the same way. So, let’s get started by opening your terminal – just press
With your terminal now open, we’ll use the find command again. You almost certainly won’t need to install anything but you can confirm that you have find installed with this command:
1 | find --version |
See? You have the find application installed already.
If you check the man page (with man find), you’ll see find is described as:
find – search for files in a directory hierarchy
We’ll also be using grep and a pipe “ |” in this article. You should know that grep helps you sort stuff and that the pipe lets you take the output from one command and use it in another. The pipe is a very underrated tool by people who don’t know much about the terminal.
The command we’ll be using is a find command. The syntax is quite simple and would look something like this:
1 | find /path/to/directory -type f | grep .<extension> |
For example:
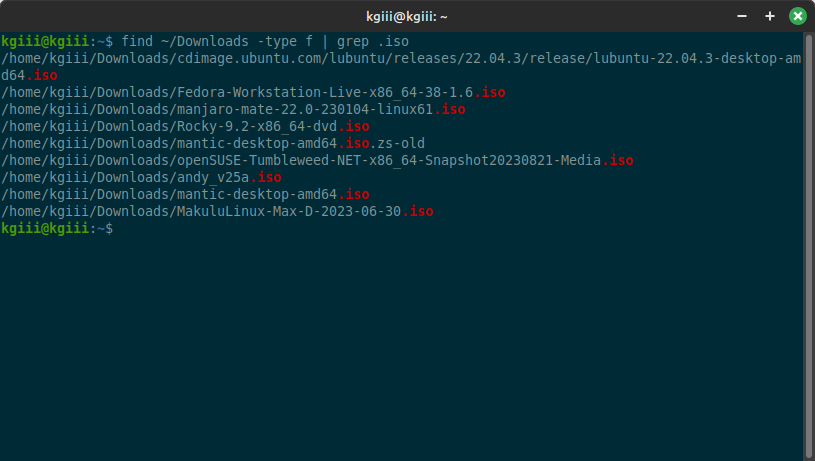
1 | find ~/Downloads -type f | grep .iso |
The -type f is telling the find command to only look for regular files. Then, the output from that command is then piped to the grep command. After that, the grep command looks for file names that contain a . and the specific extension you’re looking for. The output might look like this:
Now, this isn’t going to work if you just use wonky file names. This isn’t going to find files without that extension name. Remember, we’re trying to locate files by extension. We are not determining if the extension is correct and we are not determining what the file really is.
See? Pretty simple!
Closure:
Well, I said today’s article would be shorter. It’s also fairly simple. If you need to locate files by extension, there are many ways to do it. Some methods are easier than others. Perhaps some are more robust than other methods. Either way, you can now locate files by extension type.
You might also be interested in this article:
Otherwise…
Thanks for reading! If you want to help, or if the site has helped you, you can donate, register to help, write an article, or buy inexpensive hosting to start your site. If you scroll down, you can sign up for the newsletter, vote for the article, and comment.