How To: Delete A Swapfile In Linux

Today’s article will be a bit more advanced than some as I try to explain how to delete a swapfile in Linux. If I do my job right, it’ll be easy enough for a newbie to follow. However, I’m not going to suggest newbies mess around with removing swapfiles – but they certainly can.

It should probably be noted that some folks will call this a “swapfile” and others will add a space to call it a “swap file”. I’m not sure which is correct, so I’m sticking with “swapfile” for consistency sake. After all, about two years ago, I wrote an article about how you can enable a swapfile.

How To: Create And Enable A Swapfile

This article might be a bit complicated. The directions themselves are pretty simple. Distilling the concept of ‘swap’ down to an 800-word article is the difficult part. 

What Is A Swapfile:

What is swap? Well, it’s not really a place where the kernel sticks stuff when there’s no more free RAM. People seem to think that’s what swap is, and it’s not. Even on systems with lots of RAM, the kernel will use swap when it is available.

It’s quite a bit more complicated than that, though it can sort of be related to that. It would be prudent to suggest that you read this thread first, concentrating on the first post in the thread:

To swap or not to swap, that is the question.

I’d further suggest reading this article from the folks at linux.com:

All about Linux swap space

There’s more to it than the article goes into, but pay attention to this bit of text quoted below:

Second, a significant number of the pages used by an application during its startup phase may only be used for initialization and then never used again. The system can swap out those pages and free the memory for other applications or even for the disk cache.

In the early years, we used a special partition for our swap. These days, there probably isn’t much need for a special partition. Most of us that still use swap will be using a swapfile. This is essentially the same thing, but it is a file instead of a special partition on your storage drive.

Your distro may have created a swapfile during the installation process. You may have created your swapfile along the way. Well, this article is going to tell you how to delete a swapfile, just in case you changed your mind.

Delete A Swapfile In Linux:

Yeah, this sort of thing pretty much requires using the terminal. I don’t know of a way to do this graphically, though there’s probably a way that I don’t know about. So, press CTRL + ALT + T to open your terminal and we’ll head straight into the article.

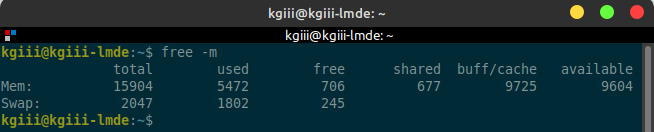
With your terminal now open, let’s first make sure that you have swap to begin with. To do that, you can run this command:

Technically, you don’t need the -m flag, but it’s easier to read in my opinion. The output might look something like this:

As you can see, the system has 16 GB of RAM and 2 GB of swapfile space. Of that 2 GB of swapfile, 737 MB is being used. There’s lots of free RAM, but swap is still being used. Like I said, it’s not just a place where the kernel stuffs things when there’s no more free RAM.

So, now that we’ve learned there’s a swapfile, you can run this command:

The output from that might look something like this:

The bit we’re looking for is /swapfile because that’s the literal name of the swapfile. You could have called it anything while setting it up, so it’s important to get the name correct for the next command.

Now, we want to delete your swapfile. That’s a very easy command. It looks like this command:

In my example, if I wanted to delete a swapfile on my system, the command would look exactly like this:

To confirm that the file is deleted and no longer being used, just run this command all over again:

It might seem a little complicated at first and I hope I explained it well. Using swap (or not) can be a complicated subject, but it’s not all that taxing to delete a swapfile in Linux. If you can follow the above directions, you should be good to go.

Closure:

As I’ve mentioned before, I leave swap enabled because the kernel uses it. The kernel uses swap even on systems with a lot of free RAM. I figure the kernel is smarter than I am, so I leave it enabled.

The second link in this article is well worth reading. Deciding to use swap or not is a very personal thing. If you have plenty of RAM, you can get away with not using any swap at all. Of course, if your system is fast enough and you’re using an SSD, having a swap isn’t going to add much latency to your system – if any at all.

This is something you get to decide. You can decide what is right for you and your computing needs. If you want a swapfile, you can easily add one. If you want to delete a swapfile that was created during the installation, you can do that as well. This is Linux and your configuration options are nearly endless. You decide what’s best for you. You decide how you run your Linux because it is your Linux. And that is awesome.

Thanks for reading! If you want to help, or if the site has helped you, you can donate, register to help, write an article, or buy inexpensive hosting to start your site. If you scroll down, you can sign up for the newsletter, vote for the article, and comment.

How To: Clear Swap

Today’s article is just going to be a quick and easy article, where we learn how to clear swap. I figured I’d do this article while swap was still fresh in my memory so that I’d not forget to write it down the road. If you use swap and want to learn how to clear swap, read on!

Again, this article is only useful for those that use a swap. There are different opinions about using swap and this article is for those who do. I just wrote an article about how to monitor swap, so we might as well learn to clear it.

What do I mean by clearing swap? I mean emptying it. I mean removing all the data held in swap, allowing for data to be written to swap again. It’s not something I worry about, but I know folks have asked about it in the past. I might just as well cover it, though it really won’t take much time.

Clear Swap:

This article requires an open terminal, like many other articles on this site. If you don’t know how to open the terminal, you can do so with your keyboard – just press CTRL + ALT + T and your default terminal should open.

With your terminal now open, you can clear swap with the following command, by turning swap off:

You then turn swap back on with:

Tada! You’re all done. If you want, you can do it all with just a one-liner:

That’s really all there is to it. It’s not terribly complicated and it’s something you might as well know if you’re going to use swap and are concerned with monitoring and clearing it.

Closure:

There you have it. I told you that it’d be short and easy. You now know how to clear swap, should you actually want to do so. You might as well know how. It’s bound to come in handy for someone.

Thanks for reading! If you want to help, or if the site has helped you, you can donate, register to help, write an article, or buy inexpensive hosting to start your own site. If you scroll down, you can sign up for the newsletter, vote for the article, and comment.

A Couple Of Ways To Monitor Swap Usage

Today’s article will be nice and easy, as we cover just a couple of ways to monitor swap usage. There are several ways to monitor swap usage, so we’ll just cover a couple of them. One of ’em is bound to work.

So, this only applies to those people who use swap. If you use the search feature, you’ll see that I’ve addressed this before and that I tend to use swap – because it’s more than just a place the kernel sticks stuff when you’ve run out of RAM.

swap is still used with plenty of RAM
See? The system happily uses swap with plenty of free rams.

As you can see, on a system with plenty of RAM – and plenty of free RAM – the system still uses swap. I figure that the kernel is smarter than I am. You do you, but I will continue using swap.

But, enough about that. If you don’t use swap, just accept that this article isn’t meant for you and move along. Tomorrow’s article might just have something useful for you. You never know!

So then, I will assume readers know enough about what swap is and will have made their own choices. This article is for those who want to monitor swap usage.

Let’s Monitor Swap Usage:

You guessed it. You’re going to need an open terminal. So, open your favorite terminal emulator. If you don’t know how to open the terminal, you can do so with your keyboard – just press CTRL + ALT + T and your default terminal should open.

With your terminal now open, you can try the following command:

(You can just use ‘free‘ but the -m flag makes it easier to read. You can also use ‘free -h‘ if you prefer that output.)

That command should be fairly universal. You can also use the following command if you’d prefer. It’s just:

That command is pretty handy and pretty much is the same as you’d get if you just run’cat /proc/swaps‘ which is, I suppose, yet another way for you to monitor swap usage. Think of it as a bonus way to check swap usage. After all, you can’t have too many ways and one of ’em is bound to stick with you if you use it often enough.

Closure:

And there you have it. You have another article. This time, we’ve discussed how to monitor swap usage (in the terminal, of course). It’s a handy tool for those who do use swap (be it partition or swapfile). If you don’t use swap, you probably won’t get much use from this article. Maybe tomorrow will be more interesting for you?

Thanks for reading! If you want to help, or if the site has helped you, you can donate, register to help, write an article, or buy inexpensive hosting to start your site. If you scroll down, you can sign up for the newsletter, vote for the article, and comment.

How To: Adjust Swappiness

In today’s article, we’re going to learn how to adjust swappiness. It’s something you might want to do, as many don’t like the initial value set by the developers. It’s relatively easy.

I’ve written about swap before. I think you’ll find the best information in my recent article telling you how to remove a swap file. In that article, I tell you why I still use a swap file – even when I have lots of RAM available.

The reason for that boils down to how a swap file isn’t just some place that the kernel sticks things when you’re out of RAM. It has other uses as well. I figure I’m not smarter than the kernel and evidence tells me that the kernel uses swap even when there’s all sorts of RAM available. So, I use a swap file (not a swap partition these days). You might also want one if you plan on using advanced power management features like hibernation or sleep.

Anyhow, one of the only settings you can change regarding swap is the ‘swappiness’ value. That setting is basically how aggressively the kernel will use swap. The higher the number, the more the kernel will use swap. The lower the number, the less the kernel will use swap. It’s pretty basic in theory.

I don’t actually normally adjust the swappiness value. It works just fine at the default setting, so it doesn’t seem to me like I need to adjust it. Other people adjust it, and that’s fine. Either way, I’m going to tell you how to adjust the swappiness value. You do what you gotta do.

Adjust Swappiness:

This article requires an open terminal, like many other articles on this site. If you don’t know how to open the terminal, you can do so with your keyboard – just press CTRL + ALT + T and your default terminal should open.

With your terminal open, let’s see what value swappiness is set at before we decide to adjust swappiness. Enter the following command:

The default is usually 60, at least in the Ubuntu world, and some folks think that’s too aggressive. That value is easy enough to change. But, what I’d suggest doing is adjusting the value temporarily so that you can see what happens when you adjust swappiness. To set the value temporarily, you can just use this command:

Adjust the ’30’ to any number you want between 0 and 100. Both extremes are likely bad, but I’ve used values as low as 10. You could even set it to 0, which should stop the kernel from swapping anything.

Once you find a swappiness value you like, you can make it a permanent change to your system. That’s pretty easy. You just:

Add the following lines of text:

Use your own value if it’s not 30 and save the file. To save a file in nano, press CTRL + X, then Y, and then ENTER.

You can then reboot, or just wait until your next reboot, and the new swappiness value will be used. If you don’t feel like rebooting immediately, just adjust it temporarily and reboot when it’s convenient for you.

Closure:

There you have it, another article! This one has you learning how to adjust swappiness to a value that you can work with. I’d encourage folks to read the linked swap file article to see why I use a swap file even when I have gobs of RAM. If nothing else, using one won’t break anything.

Thanks for reading! If you want to help, or if the site has helped you, you can donate, register to help, write an article, or buy inexpensive hosting to start your own site. If you scroll down, you can sign up for the newsletter, vote for the article, and comment.

How To: Create And Enable A Swapfile

Today’s article is about how you can create and enable a swapfile. It largely ignores the debate about whether a swapfile is needed or not, though I make it clear that this is something I prefer. I know that others will have different views, but I also make it clear why I enable it.

A swapfile, or swap partition, isn’t just where the OS crams stuff when it has run out of RAM. It’s more complicated than that. Sometimes, the OS knows where it wants to store cached items and prefers the swap partition or swap file.  The OS can put items in swap while freeing up RAM for other bits that need caching. 

To make it abundantly clear, you absolutely can use Linux without a swapfile. You can also use Linux with a swapfile. If you want to enable a swapfile, read on. I’ll touch on this a little bit later in the article.

Some Swapfile Background:

I have a modern, large SSD and more RAM than I’ll ever possibly use. I still want to use swap, in this case a swapfile. Imagine my dismay when I installed Lubuntu 20.04 and found there’s no swapfile available during the basic installation? (It’s there in 21.04 and proceeding versions.)

no swapfile
See? There’s nothing there!

I could have manually made a swap partition during installation, but that didn’t seem like something I wanted to do – and messing with manual partitioning can be tiresome and tedious. I knew I could enable a swapfile later, which is what I did.

Again, trying to avoid the debate – just sharing my reasoning; I have ample disk space and storage is cheap. If it has any chance of helping, it’s a small investment. I should also mention that swap is far more complicated than ‘a place where the kernel sticks stuff when there’s no more RAM left’. In fact, it’s a lot more complicated than that. It’s where the kernel pages content that’s seldom used, and it’ll happily use swap even when there’s plenty of RAM available.

Since the option to enable a swapfile isn’t there during the installation, we might as well learn how to add a swapfile to Ubuntu. It’s a pretty painless process. 

Is Swap Already Enabled?

You should first check to see if you already have swap enabled. The process is the same with both a swap partition and a swapfile. To check we first need to open your terminal emulator. You can do that by pressing CTRL + ALT + T.

Now, let’s check to see if you’ve already got some swap going on.

If the output of that command shows nothing but a new line, you have no swap. If it says anything else, you’ve got swap enabled already and this article is not one you need to read. As this article is only about a swapfile, it won’t be helpful for questions about a swap partition. This article also won’t tell you how to resize your swapfile, though you could put some pieces together and figure it out for yourself.

Let’s Make A Swapfile:

Seeing as you already have your terminal open from the previous step, you can just leave it open. That’ll make this easier. Start with this first command and work your way through the article – making sure to not skip any steps.

Why 8 gigabytes when I have ample RAM and an SSD? Because I don’t want to worry about it ever it again. I should be able to open up every app I have and leave them open for a month. You do you and decide how big you want it to be!

Now that we’ve allocated space for the swapfile, we need to set some permissions. We don’t want anyone and their kid brother writing to swap, we only want root writing to swap.

Next, we need to let the OS know that’s swap space, to be used as a swapfile.

Then you turn it on with:

And you now have swap in the form of a swapfile and it’s turned on.

Permanently Enable A Swapfile:

I suppose we should make this change permanent, as it’d be an unneeded step to have to do it every time the system reboots. To make this permanent, we need to edit fstab and nano is a good tool for this.

And add this at the bottom of that document:

Those are 0, the digit, in case the font here makes it confusing. And seeing as we’re using nano, you save your by pressing CTRL + X, then Y, and then ENTER

At the end of this exercise, you should have a swapfile that gets loaded on reboot.  You shouldn’t even have to reboot for it to effect, it should already be currently loaded and working. You can next edit the swappiness value, if that’s something you feel like you want to do – or have a reason to do. In Ubuntu, it is a default of 60. If you want to edit it, you’ll have to wait for another article.

Closure:

There you have it! We’re on the downhill side of this project and it’s an article about how you enable a swapfile. If you don’t use swap, that’s fine. This article is for those who do want to use swap.

Thanks for reading! If you want to help, or if the site has helped you, you can donate, register to help, write an article, or buy inexpensive hosting to start your own site. If you scroll down, you can sign up for the newsletter, vote for the article, and comment.

Subscribe To Our Newsletter
Get notified when new articles are published! It's free and I won't send you any spam.
Linux Tips
Creative Commons License
This work is licensed under a Creative Commons Attribution 4.0 International License.