How To Tell If You’re Using Wayland Or X11

Today’s article will be an interesting one, for at least a subset of readers, as we learn how to tell if you’re using Wayland or X11. The command isn’t all that difficult and is just a single command that should work with everything, but the topic might confuse some of you.

Frankly, if you ask this question to the majority of users, you’re probably going to find out that they’re still using X11. The move to Wayland has been a process, that started back in 2008. The goal is to replace X and provide a much better set of protocols.

That’s what Wayland is… It’s a set of protocols dealing with how things are displayed on your monitor. X is also a set of protocols for the display server – and it dates back to 1984. Without X (or something else), we’d have been staring at nothing but terminal outputs this entire time, so it is kind of a big deal.

That doesn’t mean the current X implementation is that old on your device, it just means that it has been the default for a long time. The upstart, that is Wayland, is meant to take care of a variety of flaws – including potential security flaws. That’d be a subject way too deep to get into today.

Currently, some distros are confident with Wayland and release distros that default to Wayland. Some offer it as an option, without it being the default. The GNOME and KDE desktop environments are currently the closest to being ‘Wayland-ready’. It’s a slow process!

So, you might not know if you’re using Wayland or X11 and this article tells you how to check just that.

Are You Using Wayland Or X11:

This article requires an open terminal, like many other articles on this site. If you don’t know how to open the terminal, you can do so with your keyboard – just press CTRL + ALT + T and your default terminal should open.

With your terminal open, just run the following command: (It should work in any distro, regardless of which display server you’re running.)

The output should look a lot like this:

Unless you’re using Wayland. In that case, it’d look something like this:

If the output says x11,  you’re not using Wayland. If it says Wayland, you’re using Wayland. I probably didn’t need to specify this, but I did. This way, you can be completely sure if you’re using Wayland or x11.

Closure:

See? There’s a fun command you can play around with. If you’re not sure if you’re using Wayland or X11, this command will get you sorted quickly and easily. There are all sorts of great things you can do with an open terminal and a little bit of knowledge.

Thanks for reading! If you want to help, or if the site has helped you, you can donate, register to help, write an article, or buy inexpensive hosting to start your site. If you scroll down, you can sign up for the newsletter, vote for the article, and comment.
How To: Use Wayland in a Live Ubuntu Instance

This article is based on an AskUbuntu question I answered a while back. The user wanted to know how to use Wayland in a live instance of Ubuntu. They wanted to test some Wayland stuff and this was how they wanted to do it.

I personally would have gone a different route, but that’s fine. There are likely other people who have this same question, so it seems prudent to put the answer up here, as others will likely want to use Wayland in a live environment.

It actually turned out to be pretty easy, so this isn’t going to be a very long article. If you follow the directions carefully, you should be able to use Wayland while running Ubuntu live.

Use Wayland in Ubuntu Live:

The first thing you need to do is boot into the live instance of Ubuntu, and then you change the way you login. You don’t want to automatically login for this exercise.

Click in the bottom right and ‘Show Applications.’ Once there, you can enter the word ‘users’, click on the settings app offered, and then disable automatic login.

Next, you have change the password. You’re forced to deal with Ubuntu’s need for a complex password. The password you pick must be at least 12 characters long, not a dictionary word, and have a mix of numbers and letters. 

Next, you want to edit “/etc/gdm3/custom.conf” and comment out the line that disables Wayland. To do this, we’ll open a terminal by pressing CTRL + ALT + T. That opens the terminal where you’ll enter:

Find the line:

Change it to (comment it out):

Make sure to save it. Just press CTRL + X, then Y, and then ENTER and nano will save it.

Restart gdm3 with:

If that doesn’t automatically log you out, log out manually.

Now start the process to log back in, but after you click the user, there’s an icon in the lower right. It’s a gear icon. Click that gear icon and choose  “Ubuntu on Wayland”. Then enter your password and press ENTER.

If everything worked, you’re now logged in with Wayland.

Now, if you want to verify that you’re using Wayland…

Press CTRL + ALT + T
to open the terminal and enter:

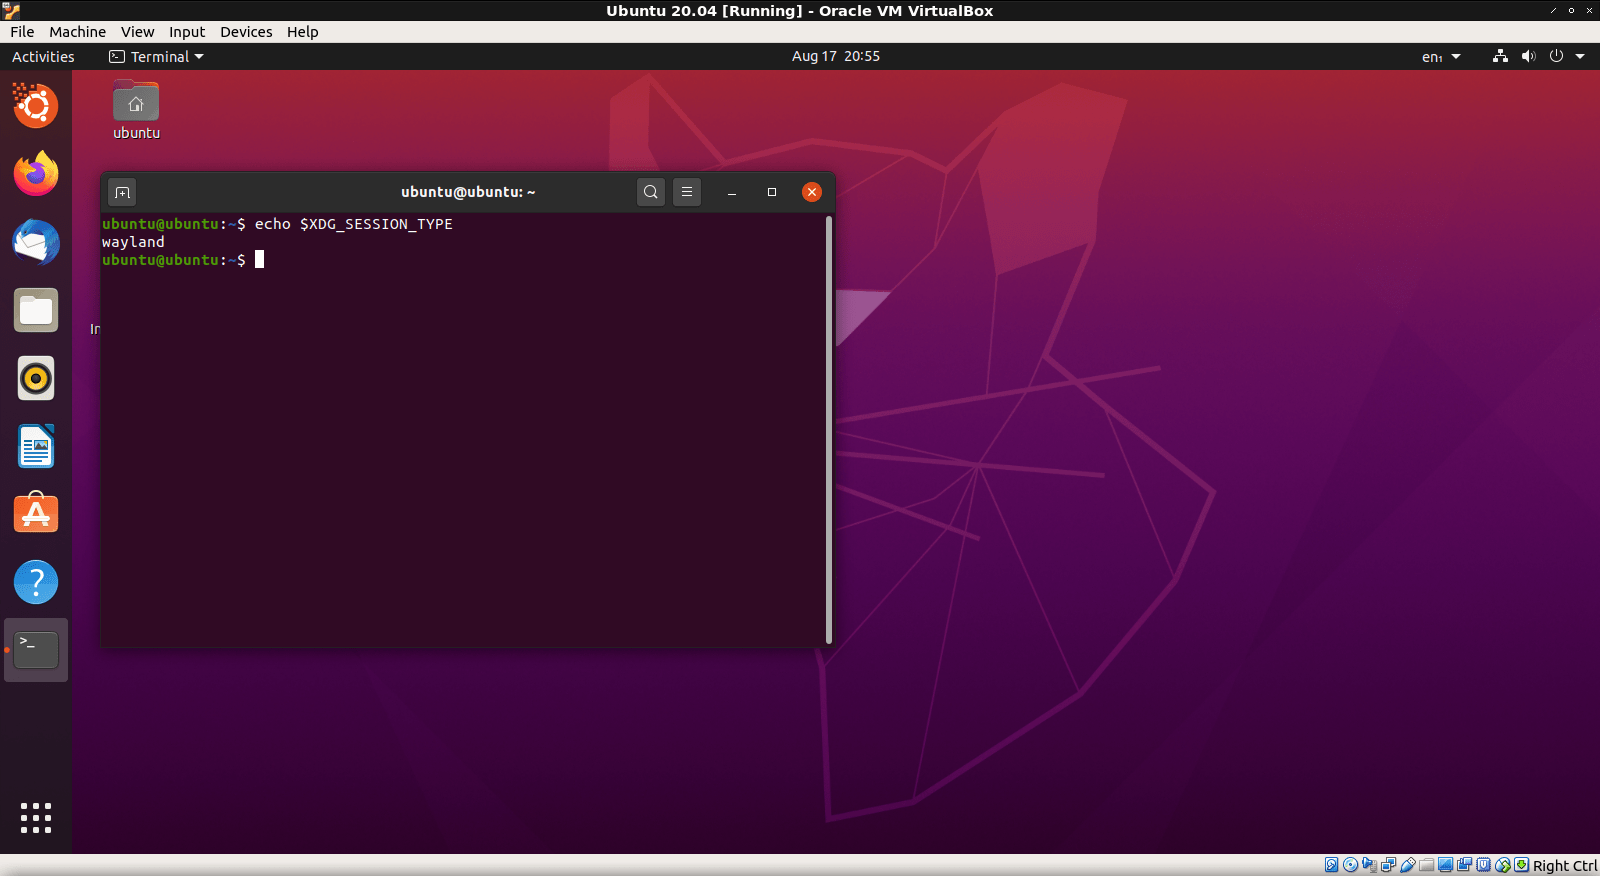
If you have done everything correctly, it looks like this:

live ubuntu running wayland
See? That’s how you use Wayland in a live Ubuntu instance. And now you know…

So, there you have it for those that want it. If you want to use Wayland then you can. You can do that in a live environment if you want. It’s Linux. You can do most anything, if you put enough work in.

Closure:

And there you have it. Another article is in the books. This one helps you use Wayland and helps you use it in a live Ubuntu instance. I suspect you could use this as a basis for other distros, but I’ve never actually tested that theory out. If you have tried it, let me know in a comment. Thanks!

Thanks for reading! If you want to help, or if the site has helped you, you can donate, register to help, write an article, or buy inexpensive hosting to start your own site. If you scroll down, you can sign up for the newsletter, vote for the article, and comment.

Subscribe To Our Newsletter
Get notified when new articles are published! It's free and I won't send you any spam.
Linux Tips
Creative Commons License
This work is licensed under a Creative Commons Attribution 4.0 International License.