Enable/Disable Your Network Interface

Today we’ll cover one way to enable or disable your network interface in the Linux terminal. We will cover enabling and disabling your network interface, so you might want to keep this in mind.

If you have multiple network interfaces, you might want to disable one of them. You might want to disable networking to keep a computer offline. There are many reasons why you’d want to enable or disable your networking.

This isn’t a very complicated process, so it won’t take too long.

The command we’ll be using, and we’ll be using it twice, is the ‘ip’ command.

The ‘ip’ Command:

If you’ve got a modern Linux desktop (or server), you’ve got access to the ‘ip’ command. It’s a relative newcomer in the space but it’s pretty universal at this point. 

That’s it. That’s the only tool (other than ‘sudo’) we’ll need for the job. You can verify that ‘ip’ is installed with this command:

The output should match:

If you check the man page, you’ll see why this is the correct tool for the job:

ip – show / manipulate routing, network devices, interfaces and tunnels

We’ll use the command with a couple of different ways to enable and disable your network interface. It’s not terribly complicated.

Enable/Disable Your Network Interface:

Yes, the ‘ip’ command is used in the terminal. That means you’ll need an open terminal. Just press CTRL + ALT + T and your default terminal should open.

With your terminal open, your first step is to identify the network interface:

That should look something like this:

show your network interface names
It should look something like that. That’s both a wired and wireless network interface.

With that information, the syntax to disable a network connection is simple.

For example:

If you’ve disabled the device, it’s just as easy to enable it. The syntax is:

An example would be:

See?  It’s pretty easy to enable or disable your network interface.

Closure:

If you need to enable or disable your network interface you now know how. That’s a handy thing to know as folks have inadvertently disabled their network interface. This enables it if you did. This also disables your network interface if you’d rather.

Thanks for reading! If you want to help, or if the site has helped you, you can donate, register to help, write an article, or buy inexpensive hosting to start your site. If you scroll down, you can sign up for the newsletter, vote for the article, and comment.
Check Your NIC Speed In The Terminal

Today’s exercise is a nice and simple exercise where we check your NIC speed in the terminal. Anyone can do this, but it’s less useful for you if you don’t use a NIC and rely on wireless. If you’re using a wireless controller, this isn’t the article for you.

I’ll make this article short.

What is a NIC?

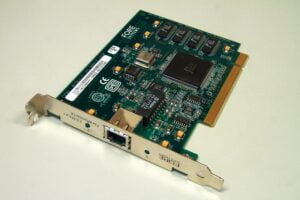
computer NIC
An example of what a NIC might look like.

NIC stands for Network Interface Card and is how you connect to a wired internet connection. They come in various speeds with gigabit being a fairly common speed these days. There are a number of reasons to use a wired connection, including security and maximum speeds.

The tool we’ll be using is ‘ethtool’. We will also use the ‘ip’ command. If you don’t have ethtool available immediately, you must install it. The ‘ip’ command works by default (unless your system is rather old).

ethtool:

As I said, if you don’t have ethtool you’ll need to install it. I just checked a couple of distros and it appears to be a fairly common application, installed by default. If you check the man page, you’ll see this:

ethtool – query or control network driver and hardware settings

So, if we want to check your NIC speed in the terminal this is a good tool for the job. We will use another command along the way…

ip:

There’s another command we’ll be using. This will be available by default in a modern system. This is, of course, the ‘ip’ command. We’ll just use the ip command to identify our NIC. If you check the man page, you’ll see this:

ip – show / manipulate routing, network devices, interfaces and tunnels

That’s exactly what we need to do! So, this is the correct tool for identifying your NIC. You used to be able to just assume that it was eth0 but those days are no more. Now it’s a longer string of characters.

Check Your NIC Speed:

As mentioned above, this is a terminal-based article. You’ll need an open terminal, of course. You can usually press CTRL + ALT + T and your default terminal will open. Try that before checking in your application menu. It’s not quite a standard but it’s pretty common.

With your terminal open, we first identify our NIC. In this case, we’ll use the following command to show our network devices:

From there, find your NIC’s name. It’s probably going to start with enp and then be followed by some letters and numbers. Mine is enp0s31f6 for example. 

You then take that information and use it with the ethtool command. This command requires elevated permissions, so we’ll be using sudo. The syntax is as follows:

Then, you’re looking for ‘Speed:’, which will tell you the currently connected speed. There’s additional information that will tell you things like supported speeds, but this section tells you the current speed. 

I suppose you could use grep for this…

Or, using my case as an example:

Which looks like this:

That’s it. That’s all you need to know for this article…

Closure:

Well, if you ever need to know your NIC’s speed you can refer back to this article. I don’t expect you’ll need to check your NIC speed often enough to commit this one to memory, though it is relatively short and easy. If you don’t remember it, you’ll know where to find it. There’s that…

Thanks for reading! If you want to help, or if the site has helped you, you can donate, register to help, write an article, or buy inexpensive hosting to start your site. If you scroll down, you can sign up for the newsletter, vote for the article, and comment.

Is Your Storage Drive An SSD Or An HDD?

Today’s article aims to answer a simple question, simply is your storage drive an SSD or an HDD? This is not something most folks will have trouble knowing, but it’s still something worth knowing how to do. After all, you never know when you’ll be attached to a remote computer with disks of different types.

And, yes, due to expense and sizes, HDDs still exist and are still in use all over the place. Not everything has been converted to an SSD.

We’ve relied on spinning media for quite some time. We used this in hard disk drives. They were the norm for many years. SSDs (solid-state drives) are more common in end-user computers these days. If you can, you might even have an NVME SSD which is exceptionally fast.

We’re only going to use one command in this article, so it will be quite short. That’s not a bad thing. Not every article needs to be all that long.

We’ll simply be using the cat command. We’ve used this command many times in the past because it’s a handy command to use!

cat:

The cat command is a command used in the terminal. We want to read a file and cat is the correct tool for the job. The cat command reads a file and sends the output to the terminal. You won’t need to install anything.

Let’s check the man page (with man cat) to see:

cat – concatenate files and print on the standard output

See? If we want to read a file to the terminal, this is the correct tool for the job. Again, you won’t need to install anything.

An SSD Or An HDD:

Like oh so many articles, you will need an open terminal. Just press CTRL + ALT + T and your default terminal should open.

With your terminal open, let’s see if you’ve got an SSD or an HDD.

First, identify your drives with this command:

Now, ignoring the partitions, you can run the following command:

So, for example, you’d run this command:

And here’s an example output:

The zero means that it’s an SSD. 

If we run this command against a drive that I know is an HDD (a plugged-in external HDD that’s used for backups and storage):

The 1 means that it is a spinning HDD.

So, if you have both you can now distinguish between an SSD and an HDD.

Closure:

So, now you know how to tell if your device is an SSD or an HDD. This is something easily determined. If you have questions about your storage, this will help answer those questions. I’m not sure that I’d memorize this command, but it’s worth adding to your notes.

Thanks for reading! If you want to help, or if the site has helped you, you can donate, register to help, write an article, or buy inexpensive hosting to start your site. If you scroll down, you can sign up for the newsletter, vote for the article, and comment.

Monitor System Resources With “Resources”

Today is one of those days when I’d like to introduce you to new software as we learn to monitor system resources with “Resources”. That may not make much sense, but it will! The Resources application is a great option if you want a great way to monitor system resources.

I may do a few articles about monitoring system resources. That’ll be fun.

It’s probably important to mention that many of you will not have this in your default repositories. For those who do, it won’t be in the typical repositories but will exist because your distro ships with Flatpaks enabled.

That’s right. To use this article, you should read a previous article:

Installing Flatpaks In Linux

Once you get Flatpak installed and the FlatHub repository added, you can use a great application known as Resources.

Of course, your desktop distro shipped with a GUI resource monitor and it’s usually fit for purpose. However, this Resources application has a bunch of great features and it is easy to live with. 

Another great thing is that this shouldn’t be a very long article…

Monitor System Resources:

Once Flatpak is installed, you might want to keep your terminal open. Yes, Flatpaks are large – but they have great features, including running in isolation and shipping with all their dependencies.

Most of you can open a terminal by pressing CTRL + ALT + T. If that doesn’t work for you, you’ll have a terminal option in your application menu. It might be under the Administration sub-section.

With your terminal open, you can install Resources quite easily:

That should add Resources to your application menu. It will fall under the Administration sub-section. I’ve seen some distros not show newly added Flatpaks in the menu until after a reboot. If that’s the case, you can manually run Resources with this command:

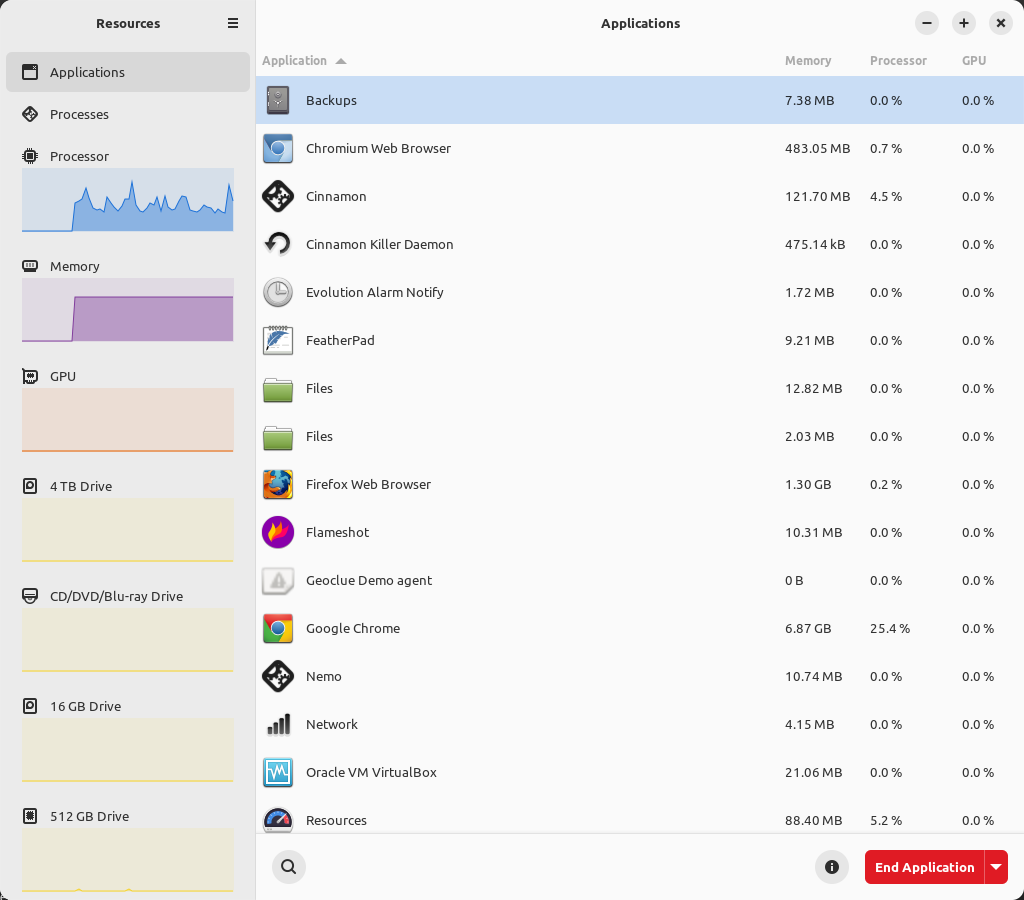
Once you open the application, all will be revealed. Here’s an image:

Resources default screen.
This should be self-explanatory if you’ve monitored resources before.

One of the great things is that you can monitor applications that might have multiple processes – such as Google Chrome. You can also monitor processes individually, including closing those applications and processes.

Additionally, you can monitor CPU use, memory use, GPU use, and your various storage devices – including optical media. If you want to know read and write speeds on the fly, that information is available in an easily understood graphical tool.

That’s right… I’m covering a graphical tool today! Let it be said that a GUI is sometimes a good tool for the job and that the Resources application is one of those tools.

If you click on the hamburger menu near the top, you can also adjust your preferences. You can choose to display more information than the default and adjust how you’d like to read things like temperature values. It’s a pretty handy application.

Yes, you already have a GUI tool to monitor system resources but you can opt to use this one instead. It’s a pretty large file (or multiple files) but that’s to be expected with Flatpaks. So, get a coffee going while you wait for the application to install.

Closure:

So, there’s a GUI tool you can use to monitor system resources. It’s worth investigating. Some of you may like it well enough to switch to it entirely. Others may find they reach for it when they need more information than they usually have available on one screen. Either way, it’s a handy application and one worth knowing about.

Thanks for reading! If you want to help, or if the site has helped you, you can donate, register to help, write an article, or buy inexpensive hosting to start your site. If you scroll down, you can sign up for the newsletter, vote for the article, and comment.

A Quick Look At The Shutdown Command

This is going to be just a quick article about a command many of you will be familiar with, as we take a quick look at the shutdown command. This is pretty basic and something everyone should be familiar with.

Our pure-GUI users will just shut the computer down with the menu option but sometimes a GUI is unresponsive. There are other times when you don’t have GUI access, as there’s no desktop environment loaded. When this happens, you can still shut the computer down. To do this, you can use the shutdown command.

There’s not a lot to the shutdown command, but the good news is that you won’t have to install anything to use it. If you’ve got a Linux system, you’ve got access to the shutdown command.

In fact…

shutdown:

As I said, you won’t need to install anything to use the shutdown command. It’s something that’s built in. You can check the man page with the following terminal prompt:

If you run that command, you’ll see that this is the correct tool for the job. It will in fact shut down the computer, though it has a few options that we’ll cover. We won’t cover everything,  just the things you’re likely to need.

The man page describes the command like so:

shutdown – Halt, power-off or reboot the machine

See? If you want to shut the computer down (including halt and reboot) then this is the correct command for the job.

The Shutdown Command:

As mentioned above, this is a terminal-based command. That means you’re going to need an open terminal. If you press CTRL + ALT + T a terminal should pop up. If not, there’s a terminal in your application menu.

Some systems may require ‘sudo‘ for this. This is not true for all distros and you’ll need to discover that on your own. I’ll omit the sudo in this article.

The basic syntax is this:

That command will stop anyone from logging in and shut the computer down in five minutes. It’s the basic usage of the shutdown command.

If you want to shut down the computer immediately, try this command:

If you want to reboot, try this command:

Again, that will reboot the computer in five minutes and stop anyone from logging into the system. 

If you want to reboot immediately, add ‘now’ to the command like so:

You can also halt the system. If you halt the system, it will remain powered on but all CPU functions will cease immediately. That works just like the above commands. To halt the system in five minutes run this command:

If you want to halt the system immediately, run this command:

You’ll need to power the system down and back on with the power button.

You can also schedule a shutdown, reboot, or halt. To do that, you use the HH:MM (hours/minutes in 24-hour time), like so:

If you schedule a shutdown, nobody will be able to log in within five minutes of the scheduled shutdown command. You’ll remain logged in and people can log in until that time is reached, but after that time is reached no new users can log into the system.

There is more to the shutdown command but that’s all you’ll realistically need, even as a system administrator. And, if you don’t know this already, you’re a system administrator even if you’re just a basic Linux desktop user. You’re in control of your computer.

Closure:

I thought I’d cover the shutdown command because it’s something I haven’t covered yet. I started off trying to cover the basics first, but I didn’t cover everything. There are still basic functions that I’ve yet to cover. I’ll get to them eventually.

Thanks for reading! If you want to help, or if the site has helped you, you can donate, register to help, write an article, or buy inexpensive hosting to start your site. If you scroll down, you can sign up for the newsletter, vote for the article, and comment.

Linux Tips
Creative Commons License
This work is licensed under a Creative Commons Attribution 4.0 International License.