Is Your Storage Drive An SSD Or An HDD?

Today’s article aims to answer a simple question, simply is your storage drive an SSD or an HDD? This is not something most folks will have trouble knowing, but it’s still something worth knowing how to do. After all, you never know when you’ll be attached to a remote computer with disks of different types.

And, yes, due to expense and sizes, HDDs still exist and are still in use all over the place. Not everything has been converted to an SSD.

We’ve relied on spinning media for quite some time. We used this in hard disk drives. They were the norm for many years. SSDs (solid-state drives) are more common in end-user computers these days. If you can, you might even have an NVME SSD which is exceptionally fast.

We’re only going to use one command in this article, so it will be quite short. That’s not a bad thing. Not every article needs to be all that long.

We’ll simply be using the cat command. We’ve used this command many times in the past because it’s a handy command to use!

cat:

The cat command is a command used in the terminal. We want to read a file and cat is the correct tool for the job. The cat command reads a file and sends the output to the terminal. You won’t need to install anything.

Let’s check the man page (with man cat) to see:

cat – concatenate files and print on the standard output

See? If we want to read a file to the terminal, this is the correct tool for the job. Again, you won’t need to install anything.

An SSD Or An HDD:

Like oh so many articles, you will need an open terminal. Just press CTRL + ALT + T and your default terminal should open.

With your terminal open, let’s see if you’ve got an SSD or an HDD.

First, identify your drives with this command:

Now, ignoring the partitions, you can run the following command:

So, for example, you’d run this command:

And here’s an example output:

The zero means that it’s an SSD. 

If we run this command against a drive that I know is an HDD (a plugged-in external HDD that’s used for backups and storage):

The 1 means that it is a spinning HDD.

So, if you have both you can now distinguish between an SSD and an HDD.

Closure:

So, now you know how to tell if your device is an SSD or an HDD. This is something easily determined. If you have questions about your storage, this will help answer those questions. I’m not sure that I’d memorize this command, but it’s worth adding to your notes.

Thanks for reading! If you want to help, or if the site has helped you, you can donate, register to help, write an article, or buy inexpensive hosting to start your site. If you scroll down, you can sign up for the newsletter, vote for the article, and comment.

View Detailed Hardware Information

There are many tools for showing your hardware information and today we’ll get to view detailed hardware information. This is going to work in a variety of distros, so you probably won’t be left out.

We’ve covered many ways to view hardware information, be it all of the hardware or just some particulars. For example:

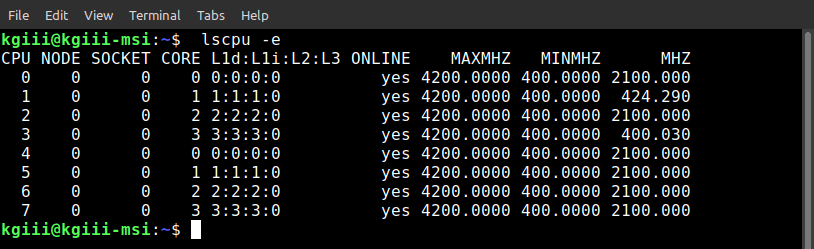
How To: Find Your CPU Information
Show RAM Information With Ramfetch
Let’s Install INXI
Find Your Graphics Card Information
Gather Storage Disk Information With ‘smartctl’

The list goes on and on and on… After all, knowing about your hardware is an important step in a lot of your activities. If you don’t know what you have for hardware, you’re quite limited in the steps you can take. You need to know that your system supports 64-bit to install some distros, for example.

So, today we’re going to examine another way of learning about your hardware. We’ll be doing this in the terminal and we’ll be doing it with a tool known as ‘hwinfo’. It’s a handy application that’s available nearly universally.

hwinfo:

You’ll find that hwinfo is a terminal-based (CLI) tool. If you look at the title of the application you can surmise its function – and it’s very much fit for function.

We’ll get to installing hwinfo, but you can see hwinfo is already installed with the following terminal command:

If it is installed, the output should look like this:

If it’s not installed, we’ll get to that in the next section.

Once installed, you can check the man page with this command:

There, you’ll see that hwinfo is fit for purpose. It’s described as:

hwinfo – probe for hardware

There’s also this blurb:

hwinfo is used to probe for the hardware present in the system. It can be used to generate a system overview log which can be later used for support.

So, you can see that this is indeed a good tool for showing detailed hardware information in the terminal. There are other such tools, but we’ll just be covering hwinfo in this article. There will be other articles and have been other articles. This is one of those subjects you’ll see more than once because there’s always more than one way to learn about your hardware.

View Detailed Hardware Information:

I mentioned that this is a terminal-based application. There are GUI tools but this is not one of them. Most of you can open a terminal by pressing CTRL + ALT + T. Others may need to find a terminal option in their application menu.

With your terminal open, you can install hwinfo easily.

Debian/Ubuntu/etc:

Arch/Manjaro/etc:

RHEL/Fedora/etc:

Gentoo/etc:

SUSE/OpenSUSE/etc:

Once you’re done with installing hwinfo, you can ‘just run it’ like so:

As you can see, that’s rather overwhelming. You could use grep, but there are many flags you can use to make this information more useful. If you check the man page (with man hwinfo) you’ll see this:

all, arch, bios, block, bluetooth, braille, bridge, camera, cdrom, chipcard, cpu, disk, dsl, dvb, fingerprint, floppy, framebuffer, gfxcard, hub, ide, isapnp, isdn, joystick, keyboard, memory, mmc-ctrl, modem, monitor, mouse, netcard, network, partition, pci, pcmcia, pcmcia-ctrl, pppoe, printer, redasd, reallyall, scanner, scsi, smp, sound, storage-ctrl, sys, tape, tv, uml, usb, usb-ctrl, vbe, wlan, xen, zip

Those are all the available flags. The syntax is simple:

So,  you could run this command to learn about your CPU:

The output from that is still more information than most folks are going to want. That information is there for those who need it. For everyone else, there’s the --short flag. That works like this:

In the case of the CPU, the command would look like this:

You can quickly get a list of all the flags (as you may not remember them all) with the following command:

Note that this is different from the --all flag which will display everything.

Closure:

Well, there you have it… You now know how to view detailed (and less detailed) hardware information, you get a choice with hwinfo. You can view detailed hardware information or you can use the flag to show just a summary. Use hwinfo according to your needs and enjoy it!

This seemed like a fine article to write. It’s a pretty basic application but it does have some useful output. It’s worth installing hwinfo just for when you need it, rather than waiting for when you need it and installing it then. That way the tool is read and waiting for you and one less step when you need support or trying to resolve a bug on your own.

Thanks for reading! If you want to help, or if the site has helped you, you can donate, register to help, write an article, or buy inexpensive hosting to start your site. If you scroll down, you can sign up for the newsletter, vote for the article, and comment.

Seeing as you’re here, why not visit our friends at Blunix?

“Blunix GmbH offers Debian and Ubuntu focussed Linux Emergency Support 24/7, Project-based Linux Consulting, FOSS-based Managed Hosting on your company IaaS provider account as well as custom Training and Workshops. We prioritize fair business partnerships and employee quality of life over profit. We focus on reasonable security by default and encourage your employees and developers to keep things secure enough to avoid 99% of security issues with automated attack vectors. We focus exclusively on this and do partner with other companies to refer customers that do not fit exactly what we do, or where we require additional help (for example we have a security-focused company that we partner with for higher risk factor hosting setups).”

Click to visit Blunix GmbH

How To: List USB Devices

Today’s article might look like a funny headline, where the subject would be how to list USB devices. Today, we’ll have a relatively short article. It’s not complicated and you’ve already learned how to list USB devices! Wait-a-minute!

After all, you’ve already been told how to do this. In fact, I’ve written an article on this very subject! See:

A Little About The ‘lsusb’ Command.

That article covered how to list USB devices, using the lsusb command. Right?

Yes. Yes, it did.

But, this is Linux and there’s another command that doesn’t get enough attention. In fact, I’d wager (a small amount) that many of you wouldn’t have used this command before. 

What is this mystery command? It’s really easy to remember. It’s not complicated, it’s simply “usb-devices”. On the man page, the command describes itself as:

usb-devices – print USB device details

Sure enough, that’s what it does. But, unlike the ‘lsusb’ command, this command spits out a whole lot more information by default. There’s not a whole lot more to say about it, and I’m making this article extra short. So…

List USB Devices:

As implied in the opening part of this article, you’re going to need an open terminal. If you don’t know how to open the terminal, you can do so with your keyboard – just press CTRL + ALT + T and your default terminal should open.

With your terminal now open, simply run the command:

If you check the man page, you’ll find that that’s it. There’s nothing special to do with this command, you just run it. The man page contains this:

usb-devices is a (bash) shell script that can be used to display details of USB buses in the system and the devices connected to them.

It might be the easiest command you’ll ever run – and it’s also easy to remember. So, why is it so unknown? Well, we use ‘lsusb’ for listing USB devices and the command doesn’t rank well in search engines, but it’s at the bottom of many such articles. It also doesn’t do much more than list USB devices, as it’s just some sort of a built-in bit of shell scripting.

Closure:

So, I figured I’d do an extra short article today. Why not? We’ve done some longer articles lately, so we might as well try the super-short format. It helps that I didn’t dive off-topic or the like, but simply explained how to list USB devices. Do you have any thoughts on articles in this shorter format?

Thanks for reading! If you want to help, or if the site has helped you, you can donate, register to help, write an article, or buy inexpensive hosting to start your site. If you scroll down, you can sign up for the newsletter, vote for the article, and comment.


How To: Install Proprietary Drivers In Ubuntu

Today is going to be a very quick and easy article, where we learn how to install proprietary drivers in Ubuntu – in the terminal, of course. It’s easy enough for a new user, as it’s just a single command. It’s also not all that well known and not documented in the man pages or anything, so I might as well cover it here.

There are all sorts of reasons why you might want to install proprietary drivers in Ubuntu. Some of your hardware may not work at all until you do. Some of your hardware will only have partial functionality until you do install the proprietary drivers.

Of course, if everything is working just fine, you might not even need to worry about the proprietary drivers in Ubuntu. If everything is fine, there’s no reason to worry too much. You know what they say, “If it ain’t broke, don’t fix it.” 

Of course, a subset of you will say, “If it ain’t broke, tweak it!”

Anyhow, this article only applies to Ubuntu and official Ubuntu flavors. It likely also applies to Ubuntu derivatives. A quick check seems to indicate that Mint is one of those derivatives that support this command. We’ll only cover it from the Ubuntu-specific direction. If it also works for you, that’s a benefit. If it doesn’t work for your distro, the maintainers likely took it out for a reason.

So then, let’s get to work installing proprietary drivers on Ubuntu…

How To Install Proprietary Drivers In Ubuntu:

As mentioned above, we’ll be doing this in the terminal. So, you’re going to need an open terminal for this exercise. You can just press CTRL + ALT + T and your default terminal should open.

With the terminal now open, we need to ensure you have the “Restricted” repository enabled. As you already have a terminal open, we might as well do that while in the terminal. So, type the following command:

Now, you need to update your database of software that’s available and we might as well make sure all other software is up to date. You do that with this command:

There you go. You’re now ready to install proprietary drivers in Ubuntu. So, while it’s a single command, it may require some preparation for some users. If you’ve run the above commands, we should be on the same page. So, with that, you just run the following command:

If there are any prompts, just go ahead and press the Y button. Everything should go smoothly and you may need to reboot after installing the proprietary drivers. When you’ve done that, you should be using the newly installed drivers instead of the open-source (or no) drivers. 

That’s all there is to it…

Closure:

There you have it! You have another article. I know I told you that it was just a single command and then shared more than one command, but it is just one command so long as you’ve got the Restricted repository enabled already (and I think most of us do). Either way, there’s a quick and easy way to install proprietary drivers in Ubuntu, in the terminal even. ‘Snot all that difficult after all!

Thanks for reading! If you want to help, or if the site has helped you, you can donate, register to help, write an article, or buy inexpensive hosting to start your site. If you scroll down, you can sign up for the newsletter, vote for the article, and comment.

A Little About The ‘lscpu’ Command

In today’s article we’re going to do what the title says, we’re going to learn a little about the ‘lscpu’ command. We’ll just touch the ways you’re likely to use ‘lscpu’ and that’s it. Then again, there’s not much more to it than that, so it’s going to be easy enough for a new Linux user to understand. You’re invited to read on…

As mentioned in the last article, and in the article before that, I’m going to take some time to cover some of the basic commands. However, I’m going to try to intersperse them, that is mix them up a bit, so that it’s not too boring for myself and my regular readers who are beyond this level.

The first of these articles was:

A Little About The ‘lsusb’ Command.

This article will cover ‘lscpu’. If it’s not obvious, this command will list information about your CPU. In fact, the man page describes ‘lscpu’ like:

lscpu – display information about the CPU architecture

And, sure enough, that’s the information we’re after in this article.

Of course, this is another command that gets run in the terminal. It’s an application that comes with ‘util-linux’ and is something you shouldn’t need to install. You should be able to use the ‘lscpu’ command without installing anything. So, there’s that…

Rather than drag the intro out, let’s just jump into it…

About The ‘lscpu’ Command:

As I mentioned in the intro, ‘lscpu’ is a terminal command. Of course, this means you need an open terminal. You should open one now. If you don’t know how to open your terminal, just press CTRL + ALT + T and your default terminal should open.

With your terminal now open, simply run the ‘lscpu’ command:

Tada! You have all the information you really need to know about your CPU – and quite a bit more information. So, let’s see what else we can do with the ‘lscpu’ command.

Let’s say you want some extended information. You can go about that with the -e flag. That’s easy enough to do, a simple command. It looks like this:

The outcome from that command would probably look a bit like:

the output of lscpu
As you can see, this CPU isn’t anything all that fancy. It’s effective and efficient!

As you can see, there’s nothing too fancy there.

You can actually select the fields you want to output from that command. For example, you can see the CPU and the CORE fields like this:

The only other way you’re going to use ‘lscpu’ is likely to be with grep. For example, if you want to know what architecture your CPU supports, you can run this command:

There’s more to ‘lscpu’, but you’re not likely to really need it for anything. If you do need more from ‘lscpu’, you just check the man page like so:

The man page should help you with anything more than what’s covered in this article. There’s not all that much more that’s useful, we’ve at least examined the ‘lscpu’ command.

Closure:

Yup, there’s another article. This article does what it attempted to do – which is share the most useful ways to use the ‘lscpu’. If you find yourself in a position where you need fairly detailed CPU commands, then ‘lscpu’ is the command you’re looking for.

Thanks for reading! If you want to help, or if the site has helped you, you can donate, register to help, write an article, or buy inexpensive hosting to start your own site. If you scroll down, you can sign up for the newsletter, vote for the article, and comment.

Subscribe To Our Newsletter
Get notified when new articles are published! It's free and I won't send you any spam.
Linux Tips
Creative Commons License
This work is licensed under a Creative Commons Attribution 4.0 International License.