Show USB Devices In A GUI In Lubuntu

Today’s article will be easy to follow and is for those who’d like to show USB devices in a GUI in Lubuntu. Though truth be told, this is applicable for other distros. I’ve just tested it on Lubuntu and Linux Mint.

I want to assume that all my readers are familiar with USB. There are all sorts of things that can use USB, which stands for Universal Serial Bus. You can plug in USB storage, fans, power devices, and (with USB C) even connect external monitors or graphics cards. The standard has existed since 1998 and the most recent version is USB4. It has come a long way.

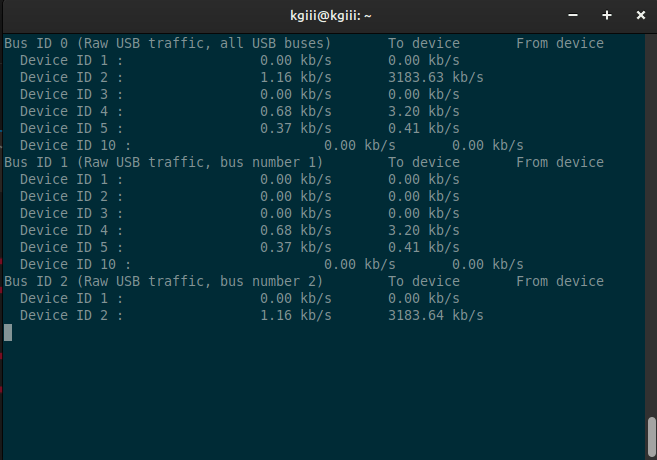
Linux is pretty good at enumerating USB devices and can use many of the various USB-powered tools. It’s possible to show the USB devices in the terminal, of course. I just figured I’d cover a way to do so graphically. You never know who wants to show USB devices in a GUI, so why not cover it in an article?

I’ve covered ways to show USB devices before. I’ve done so multiple times, so it seems. Click one of the links below to view another article.

Show Your USB Devices In The Linux Terminal
A Little About The ‘lsusb’ Command.
How To: List USB Devices

As this article is for Lubuntu, I’ll give directions as though you’re using Lubuntu. This is going to work on any Debian/Ubuntu-based operating system. The tool we’ll be using is also available for Arch and, I assume, other package managers.

So, what will we be using?

usbview:

We’ll be using a small application known as usbview. This is available in your default repositories and is easy to install. I’ll cover the installation methods below.

If one were to check the man page, you’d see it’s the right tool for the job.

usbview – display information on USB devices

Further, you can see this on the man page:

No command line options are accepted by usbview.

So, usbview a graphical (GUI) tool. There are no options for the terminal – but you’ll need to start it from a terminal. For reasons beyond my knowledge, there’s no application menu added when you install usbview. That’s something to keep in mind. It’s a GUI tool – but you start it from the terminal. Got it? Good!

Show USB Devices In A GUI In Lubuntu:

As mentioned above, you’re going to need an open terminal. As you’re using Lubuntu, you can just press CTRL + ALT + T and your default terminal should open.

With your terminal open, you first install usbview…

That’s nice and simple.

Now, you can run usbview with this command:

Yes, you need elevated permissions. It throws an error otherwise.

You’ll get a new window that looks something like this:

using usbview to show usb devices
This is pretty self-explanatory, though I don’t have much plugged in.

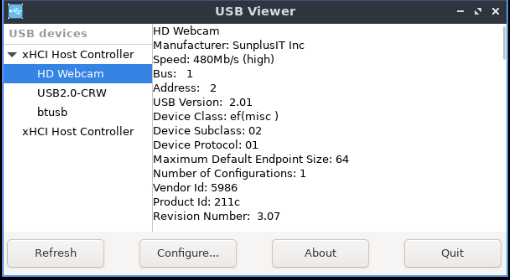
You can not only view USB devices, you can learn more about them. There’s not much to configure and you can ignore all the buttons except the Quit button. You’ll want that to quit the application.

But, there you go… That’s how you show USB devices in a GUI in Lubuntu!

Closure:

Anyhow, now you’ve learned how to show USB devices in a GUI in Lubuntu. This is a good thing and something you can trivially apply to other distros. I’m sure there’s a way to build usbview if you don’t already have usbview in your repositories. If graphically viewing USB devices is your goal, usbview is a possible solution.

Thanks for reading! If you want to help, or if the site has helped you, you can donate, register to help, write an article, or buy inexpensive hosting to start your site. If you scroll down, you can sign up for the newsletter, vote for the article, and comment.

Seeing as you’re here, why not visit our friends at Blunix?

Here’s why you might just want to visit Blunix:

“Blunix GmbH offers Debian and Ubuntu focussed Linux Emergency Support 24/7, Project-based Linux Consulting, FOSS-based Managed Hosting on your company IaaS provider account as well as custom Training and Workshops. We prioritize fair business partnerships and employee quality of life over profit. We focus on reasonable security by default and encourage your employees and developers to keep things secure enough to avoid 99% of security issues with automated attack vectors. We focus exclusively on this and do partner with other companies to refer customers that do not fit exactly what we do, or where we require additional help (for example we have a security-focused company that we partner with for higher risk factor hosting setups).”

Click to visit Blunix GmbH

Show Your USB Devices In The Linux Terminal

Today’s article won’t be all that long or complicated because we’re just going to show your USB devices in the Linux terminal. This is something easily done and not something too unusual. You never know when you’ll want to show your USB devices, but this is your chance to do so.

We have covered the lsusb command in the past, but we’ll include that and go beyond that. Why? Because we can. It’s okay to revisit earlier material if we’re going to add to it.

USB stands for Universal Serial Bus and there are many versions. I’d like to think that my readers don’t need to be told what USB is. You’ve probably used USB devices in the past, including using a USB storage device to install Linux or use as an input device like your keyboard and mouse. 

Not having to explain that will save a lot of time!

Show Your USB Devices:

You can learn quite a bit about your USB devices in the terminal. You can learn what the devices are, maybe the product name, where it’s plugged in, and more. So, we’ll cover that in this article.

The two tools we’re going to use shouldn’t require any new software. Sweet!

lsusb:

The first tool we’ll cover is the lsusb application. You won’t need to install this. It will be installed by default. You can confirm that you have lsusb installed with the following command:

Sure enough, you can check the man page to see that this is a good tool for this task. That command is:

With that information, you can see that it’s described like this:

lsusb – list USB devices

See? It’s exactly the tool for the job!

To run this command, you simply run it in your terminal – like so:

That will output a bunch of USB information.

usb-devices:

Now this is a command that I’ve not previously covered. It’s a simple command to operate but the output is different from the above. This command gives a great deal more information than the above lsusb command does. 

You can ensure that usb-devices is installed with this command:

If you want to check the man page, run this command:

You’ll see that this is a useful tool if you want to show USB devices. In fact, you’ll see that it’s possibly better than the plain lsusb command. It’s described like:

usb-devices – print USB device details

The important part is ‘details’. This command will show you a great deal of the details regarding the USB devices.

NOTE: This will only show the details for things that are active. If you have inactive USB devices it will not show them. That explains the difference between the lsusb command and the usb-devices command. Well, that and this command spits out a lot more information.

If you want to run this command in your terminal, it’s simply done like so:

That’s not very complicated at all and will reveal quite a bit more information than you’d get with the previous lsusb command. It’s worth running both in some situations, but run this usb-devices command if you need detailed information.

Closure:

See? I told you that this one wouldn’t take all that long. I probably could have labeled this one as a short article, but I didn’t. It’s also written in a different format – not even telling you how to open your terminal. If you need to know that, you can figure it out – or you already know. I did mention the terminal in the headline.

Thanks for reading! If you want to help, or if the site has helped you, you can donate, register to help, write an article, or buy inexpensive hosting to start your site. If you scroll down, you can sign up for the newsletter, vote for the article, and comment.

Monitor USB Bandwidth

Most of us use USB devices regularly, even using USB thumb drives to install Linux, and today we’ll learn how to monitor USB bandwidth. What we don’t tend to do is monitor the bandwidth of our USB devices. Today, we’ll be doing that and just that. It shouldn’t be a long article.

When I say bandwidth, you could also say throughput, I speak of the speeds at which data moves from one place to another. In this case, it’s the speeds supported by your USB devices.

When you move data from one place to another, it does so at various speeds. These days, you have better speeds with USB devices, now that we have USB 3.1 and USB C. Those are pretty speedy.

If you don’t know, USB stands for Universal Serial Bus and USB has been around since 1996. There are a number of standards for transferring things across the bus lines and USB is just one of them. USB is a ratified standard that gives us uninversal connections shared among manufacturers. There’s even USB4 that I’m entirely unfamiliar with.

I suppose I don’t really need to explain this. We all understand USB well enough, I’d think. Still, we may not know some of the details and we may have never thought about monitoring USB bandwidth. Well, that’s what we’re doing and we’ll be doing it in the terminal.

What will we be using?

usbtop:

We’ll be using a nifty application known as ‘usbtop’ for this exercise. While there’s a tiny bit more to it than we’ll cover, we’ll at least use it to monitor USB bandwidth. If the ‘top’ aspect looks familiar, it should. This usbtop is familiar in the sense of top, htop, or atop. All of which are applications I should cover but haven’t. If you’re already familiar with those, you’ll have the right sort of expectations.

The usbtop application runs in the Linux terminal. I know that it’s available for more than just the Ubuntu family, but I’ll be testing this in Linux Mint. That’s just the device I’m using at the moment, though I’d normally be using Lubuntu.

If you’re using Linux Mint (or Debian, Ubuntu, Lubuntu, or even ElementaryOS) you can install usbtop easily. I had to refer to the Arch AUR page for this article, so I’m sure this is available elsewhere – though I think it might be in AUR for Arch derivatives like Mandriva.

But, seeing as we’re using Linux Mint, you can install usbtop with this command:

(Don’t try running it just yet. It won’t work properly.)

Once installed, you can type man usbtop to read the manual but that doesn’t appear to do a darned thing. No, I do not know why. If you want, you can try something like gibberish – like usbtop -help which won’t actually work but will be kind enough to spit out the two options you have with this usbtop application.

Monitor USB Bandwidth:

Well, I’ll assume you were able to run the installation command above. It’s run in the terminal. If you go this far, you didn’t need help opening the terminal. See? You’re getting better with this Linux stuff already!

Now, it’s not going to run. Feel free to try it. If you try, it will spit out an error that looks remarkably similar to this:

No USB bus can be captured thanks to libpcap. Check your name filter and make sure relevent permissions are set !

Don’t blame me. I’m just the messenger. Instead, start with this command:

Now you can run the following command:

Yes, you want elevated permissions to run usbtop.

With usbtop now up and running, you can try transferring something to a USB drive, or something from one USB drive to another USB drive, or anything involving your USB drive. You can even start up a USB webcam and monitor the bandwidth that uses.

I took a crappy screenshot… You’re welcome!

monitor USB bandwidth with usbtop
See? It’s easy enough to monitor USB bandwidth with usbtop. It’s not too difficult to use.

If you want to exit that screen, press CTRL + C. For some reason, the Q doesn’t quit. Then again, what do you expect from a project that can’t even sort out their man page. So, it is what it is. Again, don’t blame me. I’m just the messenger!

Nah, it’s a perfectly usable application. It doesn’t do much. You can expect it to do what it says and just what it says. If you checked the fake help page above, you’ll see that you can monitor a single device and you can list the devices. Those can be monitored individually, but you might as well monitor USB bandwidth on all the devices at once. It’s not too confusing, I swear.

Closure:

Well, now you know how to monitor USB bandwidth. I’m sure the application is available for other distros, but I did not test that. If you do test that, feel free to leave comments so that other people can learn from your labor. It’s a community, so share the wealth of knowledge in a comment.

I promise, it won’t be used as a way to spam you. I’ve been almost 500 articles and I’ve never spammed anyone so far – even with hundreds of comments and a bunch of people signed up to the newsletter. I just don’t see me violating that trust. If I ever do have a commercial message, it’ll just get attached to the newsletter – like a sponsor or something like that.

Thanks for reading! If you want to help, or if the site has helped you, you can donate, register to help, write an article, or buy inexpensive hosting to start your site. If you scroll down, you can sign up for the newsletter, vote for the article, and comment.

Let’s Make A Linux Installation Drive

Today’s article might seem like a duplicate article, but it’s just another way that you can make a Linux installation drive. Today, we’ll be showing you yet another way to accomplish your goals. Why? Because we can! Because Linux has umpteen different ways to reach your goals – and that is awesome.

We’ll also be using a different tool for this exercise. It’s a pretty handy tool, suitable for more than just making an installation drive. Specifically, a USB thumbdrive! But, that’s just one thing you can do with this tool. It’s my way of introducing you to the tool in a useful manner. 

So, what tool will be using?

Introduction To ddrescue:​

The tool we’ll be using is called ddrescue and it’s a pretty handy tool. You probably won’t find ddrescue pre-installed, so you’ll almost certainly need to install it yourself. 

Also, if you want some confusion, if you’re using Debian, Ubuntu, Mint, etc., you’ll find it’s gddrescue at least during the installation process. Why? I don’t know. You’ll have to find out from the Turks.

Once you do have ddrescue installed, you’ll find the man page (man ddrescue) describes the application like this:

That’s right, it’s a data recovery tool! We won’t be doing any of that, however. You can probably install ddrescueview and do some of that good old data recovery with a handy GUI. I’m telling you, check the man page. This article is just going to scratch the surface.

Let’s Install ddrescue:

Yes, you can open up some GUI, type in an application name, and then install ddrescue. Or, you can open the terminal and install ddrescue without any GUI help at all. Let’s do that! Press CTRL + ALT + T to (hopefully) open up your terminal.

With your terminal now open, use the appropriate following command to start the installation process:

Debian/Ubuntu/etc:

Fedora/CentOS/etc:

Arch/Manjaro/etc:

If you don’t use any of those package managers, you may still have ddrescue in your default repositories. I just can’t confirm that you do.

Now, with ddrescue installed (even if you had to call it gddrescue during the installation phase), we can get into the meat of the article!

Make A Linux Installation Drive:

Remember that terminal that you opened to install ddrescue? Well, I hope you left it open because you’re going to need it. While the ddrescueview tool is a graphical tool, that won’t help with what we’re doing. We’ll be using the tool to make a Linux installation drive, which is almost an afterthought for this tool.

First, like a previous article about making a Linux install USB, we need to identify your target device. Plug in  your USB thumbdrive and use the following command to identify it:

You should be able to easily pick out your USB device by size. It will begin with an ‘sd’ (remember that it’s case-sensitive) and then may be broken down into partitions. Ignore the partitions and know that you’ll be removing any information on that USB drive.

You’re looking for something like sdb or sdc and you’ll add a ‘dev‘ in front of it. So, if your thumbdrive is sdb, your path is /dev/sdb. If your thumbdrive is located as sdc, the path you want is /dev/sdc. It’s pretty simple.

The syntax is as follows:

For example, this would be a command I could use:

This would let me write today’s current Lubuntu testing .iso to a USB drive so that I can test it on a laptop without having to waste the bandwidth to download the same file twice. 

Pretty handy, huh? 

Well, there’s a lot more you can do with ddrescue. I highly recommend reading the man page to learn more about this nifty application. It can do quite a bit more than this. Indeed, this is more an afterthought than anything else, or so it seems.

Closure:

Well, there you go. You have a new article. That happens regularly around here! Today we talked about yet another way to make a Linux installation drive. Frankly, you can just use balenaEtcher and call it a day. There’s no reason for most of us to do this in the terminal – but we can and it’s not even that difficult. You just need the right tools for the job and Linux has many tools on offer.

Thanks for reading! If you want to help, or if the site has helped you, you can donate, register to help, write an article, or buy inexpensive hosting to start your site. If you scroll down, you can sign up for the newsletter, vote for the article, and comment.

How To: Encrypt A USB Drive

So, today’s article will be a bit different, as I answer a question posed to me by way of the contact form – which is how to encrypt a USB drive. Being the nice guy I am, I answered the question. As I’m also often busy (or lazy), I also decided to turn this into an article. Why not?

I normally frown on people asking me questions directly. My usual suggestion is that they visit a forum and ask there. I usually direct them to Linux.org, where there’s a good forum filled with all sorts of smart people. That’s usually a sufficient answer, but this time I had a few spare minutes and typed out a response to them.

First of all, this was their question (I’ve removed all the superfluous stuff):

How would you encrypt a USB drive?

There were several sentences, a preemptive thanks, and some commentary about reading the site regularly. I decided to tackle this question but I was limited strictly to text because I was using email as my format.

But, if we start with the question, we can see an immediate problem. The question was ‘how would you’… Well, I’d crack open the terminal and use a tool called cryptsetup. That’s what I’d do. It’s a great tool and I’m familiar with its use.

However… That’s not what I’d suggest to the person asking the question. I did mention this to them in my reply, leaving the door open for more questions or for them to hit up their favorite search engine. Instead, I detailed another way to encrypt a USB drive. Yes, they used the word ‘drive’ and not ‘thumbdrive’. That doesn’t matter.

How To Encrypt A USB Drive:

The first thing you’re going to need for this is ‘Gnome Disks’. So, let’s go ahead and ensure you’ve got that installed, open your terminal by pressing CTRL + ALT + T and install the application. If you’re using apt you’d use the following command, but you’ll need to edit it for your package manager. (It’s almost certainly available in your default repos.)

Using Gnome Disks is a good idea. It’s fairly ubiquitous, easy to install, and doesn’t pull in a ton of dependencies when you install it. That means you can easily use Gnome Disks with pretty much any desktop environment out there with ease and very little fanfare.

Now, insert the USB drive. Don’t worry if it automatically mounts. Gnome Disks is smart enough to deal with that. Any data on this disk will be lost. It will be irrevocably lost. There’s no ‘oops’ button involved.

With Gnome Disks now installed (do not ask me why the command to open the application is different than the command to install the application), you can open it with the following:

There you go, you’re in a GUI now. You won’t need the terminal for anything else. (This would be easier with images, but I couldn’t really include images in the email reply without a lot of work and them potentially never even seeing the images due to reading the email in plain text format.)

On the lefthand part of the Gnome Disks window, pick the USB drive you want to encrypt.

On the right-hand part of Gnome Disks, click on the ‘gears’ icon and select the ‘Format Partition’ option.

Add a name for your encrypted USB drive in the next window. Then, say it is an internal disk (it’s all good) and tick the button to password-protect the volume.

In the next window, you will type your password twice. You’ll type it once and then type it again below that. This is to make sure you typed it properly. It’s a good idea to remember this password, ’cause this isn’t something you can just back out of and still have your data.

At this point, Gnome Disks will give you a warning about data loss. In the upper right, click the ‘Format’ button. Be certain about what you’re doing because this will erase data. Gnome Disks doesn’t care if the drive contained the only copies of your child’s birthday pictures.

Gnome Disks is kinda like a wolverine. Approach it with caution because it does not give a crap about your feelings.

Assuming the winds are in your favor, you should now have an encrypted USB drive. Test this by unplugging your USB drive and plugging it back in. When you plug it back in, it should ask you for a password. Enter your password to ensure you typed it properly in an earlier step. If all goes well, enjoy your encrypted USB drive.

Closure:

By the way, happy Mother’s Day (for those who qualify).

And so, that was more or less my answer to the inquisitive user. I don’t mind questions. I just don’t always have time for that, and often don’t know the answers. Of course, I did make a few changes. The actual reply I sent them was worded a bit differently in places. I think the above reads better and is more concise.

In this case, I think I got it right and they were able to encrypt their USB drive. I haven’t heard back from them since. It’d be nice if they let me know but they left me hanging. Ah well… If it’s wrong, someone will leave me a comment!

Thanks for reading! If you want to help, or if the site has helped you, you can donate, register to help, write an article, or buy inexpensive hosting to start your site. If you scroll down, you can sign up for the newsletter, vote for the article, and comment.

Subscribe To Our Newsletter
Get notified when new articles are published! It's free and I won't send you any spam.
Linux Tips
Creative Commons License
This work is licensed under a Creative Commons Attribution 4.0 International License.