This article will explain a little about ‘traceroute’ as a network diagnostic application. We’ll give a few traceroute examples, enabling you to figure out some networking issues.
Whenever I find myself unable to connect to a networked device, including websites online via the internet, one of the first tools I reach for is called ‘traceroute’. It’s not exclusive to Linux and you may know of the tool ‘tracert’ in Windows that does the same thing.
traceroute defines itself as this:
traceroute – print the route packets trace to network host
More realistically, it shows you the hops (devices) you go through in order to make a connection. See, when you connect to a different computer over the network, you don’t generally do so without going through other devices. Your data will travel through multiple devices to reach the source device and all those hops along the way are potential points of failure.
Sometimes those devices are under your control and you can actually do something about it. Other times, it’s just informative and all you can do is wait, or inform someone else and hope they fix it. If nothing else, you’ll know where your packets stopped or slowed down to the point of uselessness.
For example, there 13 hops (devices) between me and linux-tips.us.
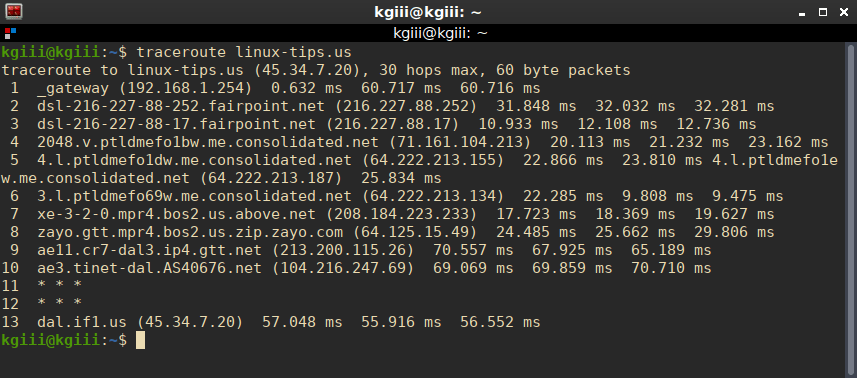
So, while that picture should explain it well enough, let’s get a little deeper.
Using traceroute:
You may find that traceroute isn’t already installed. If it isn’t, it’s absolutely in your default repositories. However you would normally install software is how you install this. If you look, traceroute is sure to be in there. So, go ahead and install it if it’s not already installed. For example:
1 | sudo apt install traceroute |
Just adjust that to your package management system and it’ll be in there. It’s that important a tool that I’m sure it’s in there. In fact, I’m a bit surprised that it’s not always installed by default, but it isn’t.
Now, the most basic usage is just like you saw in the image above.
1 | traceroute linux-tips.us |
So long as you’re within 30 hops and use 60 or fewer packets, that’s going to work well enough. The information it spits out is what devices it has traveled through (their hostname and IP address) and RTT – Round Trip Times. There are three of them because three packets are sent. Ideally, you’ll see your destination listed last. If not, you’ll see the closest you got to your destination.
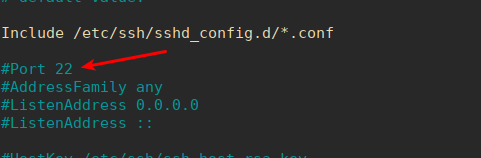
If you see an asterisk, that means the device didn’t respond as expected. Frequently, this means the device is blocking ICMP. You can try to get around this by using ICMP ECHO (-I) or TCP (-T) packets. However, both of those will require elevated permissions, or the use of sudo.
1 2 3 | sudo traceroute -I linux-tips.us sudo traceroute -T linux-tips.us |
All of this is mostly informative – unless you’re in control of the network and devices.
When it’s a network and devices under your control, you can use this information to troubleshoot. You can see the device names and time taken for packet transit, narrowing down your choices for troubleshooting.
When you’re using this over the public internet, you’re subject to other people who control the devices. If you find a break along the way, about all you can do is wait – or maybe use the data to contact your ISP (or hosting provider, if it’s your site that you’re trying to reach).
There are other options with traceroute. You can change the port you use, you can send more or fewer packets, you can not resolve hostnames, and more. To see the rest of the traceroute options:
1 | man traceroute |
That will fill you in with the many other choices you have. I find I don’t really need the advanced options, but system admins may need some of the features. As a regular user, I just use it to troubleshoot my own connections on my private network or when I am having web hosting/connectivity issues.
Closure:
And there you have it. Another article is in the books, and this time it’s just a nice easy article about the venerable traceroute. If you don’t already have this tool in your toolbox, it’d be worth adding and adding a basic familiarity to your mental toolbox.
Thanks for reading! If you want to help, or if the site has helped you, you can donate, register to help, write an article, or buy inexpensive hosting to start your own site. If you scroll down, you can sign up for the newsletter, vote for the article, and comment.