Many tools do the same thing in Linux and this is just another way to check filesystem space use. This one isn’t all that special, it’s just another way. If you want to check your filesystem usage (basically, how much free space you have used on your storage devices) this article can help you with that.
This shouldn’t be a long article. I’ve written others on the topic. It’s safe to assume that you know what a filesystem is. It’s the system your hardware uses to store data if you don’t know. There are many types, from Ext3 to ExFAT. They are all filesystems used to store data.
It should go without saying that you can fill up your storage space and might want to know how much space you have available. Well, if you want to find that information, this is an article for you!
This is another application. There are others.
Monitor Disk Usage With GDU
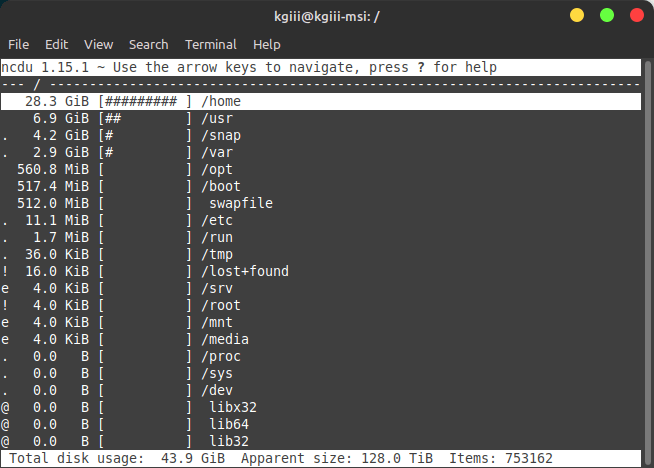
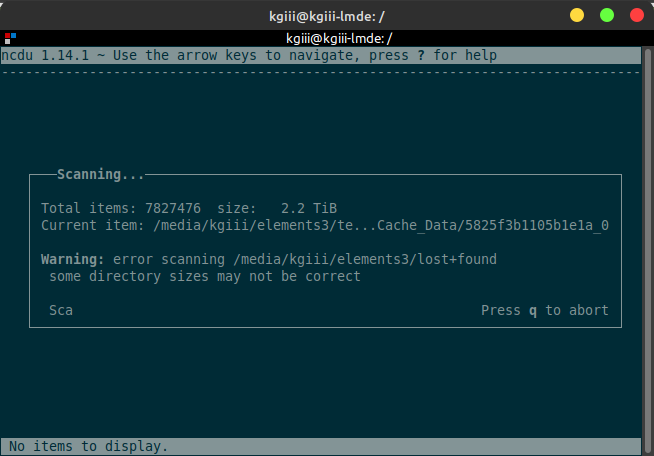
Show Disk Usage With ‘ncdu’
How To: Check Disk Usage With ‘df’
Those are just a few applications that will let you monitor your filesystem’s usage. I’m sure I’ve covered others.
This pydf is a Python script, but we’ll be using Lubunt and installing pydf just like we’d install any other application, albeit in the terminal. I will point out that pydf has a colored output, which is nice.
I can’t say that this pydf is available in other distros, but it’s available in Lubuntu. As Lubuntu is Ubuntu, that means it’s available in Ubuntu. It is also likely available in Debian. I think you’ll find that pydf is also available in the downstream distros like Linux Mint. I did provide a link above that will take you to the project page.
Check Filesystem Space Usage:
As I’ve done the work in Lubuntu, these directions will be for Lubuntu. You can adapt them easily. In Lubuntu, you can open the terminal by pressing
With your terminal now open, you can install pydf with the following command:
1 | sudo apt install pydf |
If you want to check the man page (say with man pydf), you’ll find that there isn’t one. If you’d like to view the pydf’s help file, try this command:
1 | pydf --help |
Once you’ve done that, you’ll see that using pydf is quite simple. If you just want to run the program to check filesystem space use, then just run it in the terminal like so:
1 | pydf |
If you want the output in ‘human-readable’ format, you can add a -h flag where bits are divided by 1024, or -H which means bits are divided by 1000. The choice is up to you.
Likewise, if you want to see even the zero-byte filesystems (the special filesystems that you don’t work directly with), you’d run this command:
1 | pydf -a |
Additionally, there’s a -l flag that limits the output to just the local filesystems. If I combine them for my preferred output, I get this:
1 | pydf -Hl |
Here’s an example output:
1 2 3 4 5 6 7 8 9 10 11 12 13 14 15 16 17 18 19 20 21 22 23 | $ pydf -Hl Filesystem Size Used Avail Use% Mounted on /dev/nvme0n1p1 503G 253G 225G 50.3 [###..] / /dev/loop0 131k 131k 0 100.0 [#####] /snap/bare/5 /dev/loop1 10M 10M 0 100.0 [#####] /snap/canonical-livepatch/235 /dev/loop2 10M 10M 0 100.0 [#####] /snap/canonical-livepatch/246 /dev/loop3 111M 111M 0 100.0 [#####] /snap/core/16091 /dev/loop4 111M 111M 0 100.0 [#####] /snap/core/16202 /dev/loop5 67M 67M 0 100.0 [#####] /snap/core20/2015 /dev/loop6 67M 67M 0 100.0 [#####] /snap/core20/2105 /dev/loop7 78M 78M 0 100.0 [#####] /snap/core22/1033 /dev/loop8 78M 78M 0 100.0 [#####] /snap/core22/864 /dev/loop10 258M 258M 0 100.0 [#####] /snap/firefox/3600 /dev/loop16 258M 258M 0 100.0 [#####] /snap/firefox/3626 /dev/loop11 367M 367M 0 100.0 [#####] /snap/gnome-3-38-2004/140 /dev/loop12 367M 367M 0 100.0 [#####] /snap/gnome-3-38-2004/143 /dev/loop13 521M 521M 0 100.0 [#####] /snap/gnome-42-2204/132 /dev/loop14 521M 521M 0 100.0 [#####] /snap/gnome-42-2204/141 /dev/loop15 96M 96M 0 100.0 [#####] /snap/gtk-common-themes/1535 /dev/loop17 43M 43M 0 100.0 [#####] /snap/snapd/20290 /dev/loop19 42M 42M 0 100.0 [#####] /snap/snapd/20671 /dev/loop18 89M 89M 0 100.0 [#####] /snap/ttyd/302 /dev/nvme0n1p1 503G 253G 225G 50.3 [###..] /var/snap/firefox/~mon/host-hunspell |
As you can see, there are a bunch of loop devices which are Snaps, which is perfectly normal for many Ubuntu-based systems. You can also see that I’ve used slightly more than half of my drive space and clever observers would notice that the drive is an NVMe SSD.
Closure:
So, that was a quick and easy article about how you can check filesystem space use, specifically in Lubuntu but easily applied to other distros. There are many ways to accomplish this task in Linux, which means this is just one among many such tools. It shouldn’t take too long to learn how to use pydf if that’s the tool you want to use.
Thanks for reading! If you want to help, or if the site has helped you, you can donate, register to help, write an article, or buy inexpensive hosting to start your site. If you scroll down, you can sign up for the newsletter, vote for the article, and comment.