Access Recovery Mode On Ubuntu

Today’s article shouldn’t be too long, but covers something important, which is how to access recovery mode on Ubuntu. If your Linux system has problems, you may need to access the recovery mode in order to fix it. This shouldn’t be a very long article, and I don’t think it’s all that complicated. Others may view this as complicated, but it seems pretty basic to me.

It isn’t all that complicated a process, but it’s something you should memorize, just in case you have no other way to access a search engine to learn this information. This is one of those skills you really ought to know by rote. It is one of those things about Linux that you probably should have memorized. 

What is Recovery Mode?

When you boot to recovery mode, you’ll be given a choice of booting to any of your currently installed kernels. The system then boots with the minimal amount of resources and mounts the root partition as read only.

You might be interested in a recent article on the subject of multiple kernels:

Show Installed Kernels In Ubuntu

Recovery mode lets you access the system to troubleshoot problems. It probably isn’t a necessary step for most issues, but it’s a necessary step that you will want to take if your desktop isn’t otherwise loading. If you’re unable to get to the GUI desktop, you should try recovery mode.

You can also try previous kernels by doing this. Recovery mode is just one option you’ll have from the GRUB menu. You get to pick your other kernels and even enter a text mode to work on your system via the CLI. For most folks that have had the kind of difficulties that stop the GUI from loading, trying recovery mode is a good step to take.

This may very well work in other operating systems. I’m being specific to Ubuntu because that’s what I have pictures for. Well, technically I’m using Lubuntu in a VM to get the pictures, but this should work for all sorts of distros. Do me a favor and leave a comment if you know this works in other distros. It’s way too late in the day and I don’t have time to check.

Access Recovery Mode On Ubuntu:

Well, you don’t need a terminal for this exercise, but you do need to reboot your computer. I suppose we can do this from a terminal, if you really want. You can just as easily use the GUI, or you can close things down gracefully and then run the following command in the terminal:

BEFORE YOU DO THAT…

We need to know if you are using EUFI/EFI boot or if you’re using the legacy BIOS mode to boot your computer. Fortunately, I’ve already covered this!

How To: Tell If You Are You Using UEFI or BIOS

Now, when your computer reboots, it’s going to perform a quick POST (Power On Self Test). That’s the point when you can decide to just let it boot or decide to enter a temporary boot menu. These shouldn’t be confused. If you’re interested in accessing your temporary boot menu, read this article:

How do I ‘Boot to USB’? (Or CD/DVD, if Such is Available)

As soon as POST ends and the OS starts to load, there’s a very brief window of time when you can press a key and access the GRUB menu. Trust me, this works. You may have to try multiple times before you get the hang of it, but this 100% works.

If you have a working keyboard, this works. You just need to time it right. You can try pressing and holding the right key as soon as you reboot, or you can try tapping the key over and over again. Should you have issues getting it right, check your settings for “Fast Boot” and temporarily disable that to give you more time.

If you’re using UEFI, the key you’ll press is the ESC key.
If you’re using BIOS, the key you’ll press is the SHIFT key.

Assuming you’ve done this right, you’re now at the GRUB menu…

The GRUB Menu:

GRUB stands for “Grand Unified Bootloader” and is what you’ll be seeing (and using) on a stock Ubuntu configuration. There are other bootloaders out there, but we’re assuming you’ve not changed from the default.

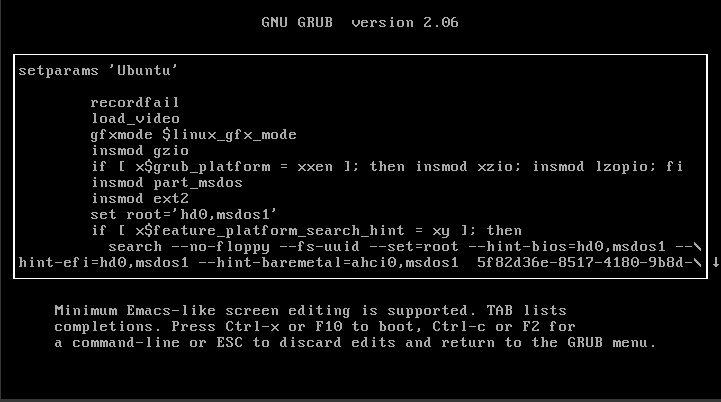
If you’ve done the above steps properly, you’ll see a GRUB screen. If you haven’t done this correctly, you’ll see the splash screen as the operating system starts to load. When you see the splash screen, you might as well just reboot so that you can try this all over again.

The first screen you’ll see will look like this:

the grub boot screen
I’ve highlighted the choice you want to select with your arrow keys and enter button.

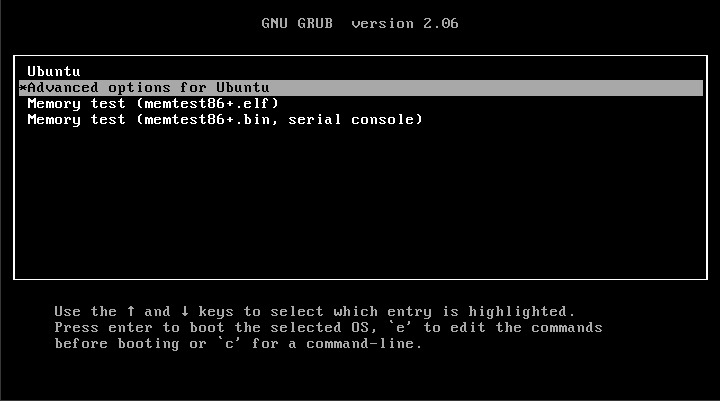
As indicated, you want to select the advanced options for Ubuntu. Of course, that won’t be the case if you’re using a different distro. You’ll want to pick the advanced options for that distro.

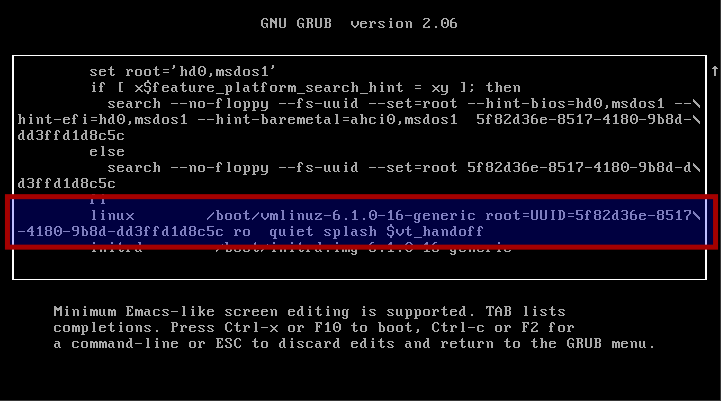
Finally, you need to select the correct option to access the recovery mode on Ubuntu. It’s really obvious, but here’s a handy picture:

grub option to pick the recovery mode for ubuntu
You can see that you can also select the recovery mode from an older kernel.

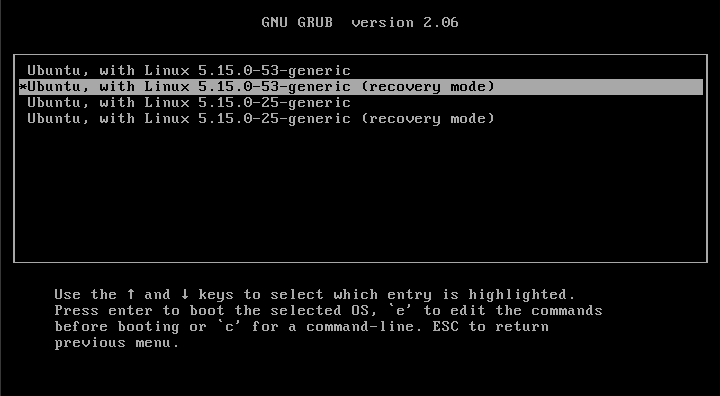
Once you’ve done that, and with any luck, your computer will boot to the recovery mode, and you’ll have learned how to access recovery mode on Ubuntu. You can see the option to boot to an older kernel is there as well. That’s another useful tool to have in your Linux toolbox.

Closure:

Well, if everything goes perfect (and it seldom does), you won’t need to access recovery mode on Ubuntu. It’s just not something you’ll need to do. But, if things don’t go perfect – and we tend to tweak, modify, and break things as Linux users, you do have a recovery mode, and it’s not too hard to access it. Of course, what you do once you’ve entered recovery mode is up to you and will depend on your problems, but you now know how to access it.

Thanks for reading! If you want to help, or if the site has helped you, you can donate, register to help, write an article, or buy inexpensive hosting to start your site. If you scroll down, you can sign up for the newsletter, vote for the article, and comment.

Boot To Text Mode In Linux

Today’s article will be a quick and easy article, so easy that a newbie can follow it, and will cover how to boot to text mode in Linux. Booting to text mode is something you might want to do for troubleshooting or repair. It might look hard, and require some good timing, but it’s not all that challenging.

What do I mean?

Well, when you boot your personal computer with Linux on it the system boots into a graphical environment, a GUI. If you boot to text mode, there’s no GUI being loaded. It’s just like you were working in the terminal, but there was no GUI to fall back on. 

For most people using Linux on the desktop, this isn’t something done all that often. It’s mostly useful for things like the above-mentioned troubleshooting and repair. When there’s a problem that’s exacerbated by the GUI, booting to text mode is a good idea and a great feature.

This is only for systemd users and is sometimes called ‘console mode’. This article also assumes that you’re using GRUB as your bootloader. If either of those is not true, you can safely ignore this article.

If you’re asked at a forum to repair your system by booting into text mode, this is the article for you. It’s not something you’ll need often, but it’s something worth knowing, or at least knowing that it can be done. It’s not even all that complicated.

Also, if you noticed an outage yesterday, there was a giant dumpster fire that needed to be put out. It wasn’t a literal dumpster fire, just a bunch of crap that all managed to land at the same time.

The symptoms made me think the site was hacked, but that’s not what happened. There were some changes made at the server level and things did not trickle down. The server migration went well for many people, but I have a complicated setup. I also use a CDN, which further compounded the issues.

Things were fixed upstream. There was no hack, but there were some traffic spikes recently. Nobody’s personal information was leaked. No software was compromised. It was just a ****storm that required more effort than expected.

The server is still being worked on as I write this article. Data was seemingly corrupted in multiple tables, which shows the value of backups. Nothing of any value has been lost in the process – except some traffic. I hope that those people were able to find the information they were looking for, and I formally apologize for the downtime.

Boot To Text Mode:

You need some pretty good timing for this and it may take some people a few tries to get it right. I’ve done this many times and I still don’t always get it right on the first try.

When you boot your computer, it performs the “POST” (which is the Power On Self Test). It goes by quickly these days. In many cases, it doesn’t even tell you that it’s performing the POST. In those cases, it may show you a logo for the computer. It happens on your computer, even if you don’t see it.

Now, between the end of the POST and before Linux starts loading, you need to press a key to stop Linux from loading. You want to access GRUB.

The key you press is going to vary, but it’s just one of two keys.

If you’re using legacy (BIOS) then you need the SHIFT key.

If you’re using UEFI, then you need the ESC key.

After POST ends and before GRUB loads Linux, you need to press the appropriate key. You need to know which you’re using, BIOS or UEFI. You could just keep trying until you find out which one works for you. With the reduced friction between Linux and UEFI, you might not know which system you’re using. I suppose that’s a good thing.

Anyhow, you should end up with a screen that looks like this:

the grub menu
The helpful arrow is your next step in this process of booting to text mode.

As you can see, you next want to press the E on your keyboard.

You’ll next see a screen that looks like this:

this is the boot parameters in use
These are the boot parameters in use by GRUB. We’ll edit this.

Use your arrow keys to navigate to the line that begins with linux.

Make sure the line also includes vmlinuz.

The line you want to edit will start with the first word and contain the second word, but it will exist.

You want to go to the end of that line. Depending on your GRUB resolution, the line may span multiple lines. In other words, you’ll be editing where there’s a hard new line and not paying attention to the actual formatting.

That may look something like this:

this is the file you want to edit.
That’s the line you want to edit. Note that it spans two lines.

At the very end of that line, you simply need to hit the space bar and add the number three. Like, literally, you’re just adding:

In the example image above, that 3 would be added just after the word ‘handoff’. The 3 is telling the system to boot to the multi-user.target and doesn’t load a graphical environment.

There are directions at the bottom, but just press F10 to continue booting to text mode. The next screen you see should look a whole lot like this one:

This is the result if you decide you want to boot to text mode in Linux.
Tada! That’d be a success. If you see that, you’ve booted into text mode! Congratulations!

This isn’t a permanent change. When you use this method to boot to text mode, you’re only going to boot into text mode that one time. There are ways to set the computer to always boot to text mode, but that’s not within the scope of this article. 

You may have to try this a few times. The process is simple after you get to the GRUB menu, but accessing that GRUB menu may be problematic. You may need good timing (unless you’re set to display this screen on every boot) to access the menu in the first place.

Again, you’ll need to know if you’re using BIOS or UEFI. That’ll help you avoid frustration. I linked to it above, but it wasn’t all that well highlighted. I’ve written an article that teaches you how to tell if you’re using BIOS or UEFI.

Knowing which key will bring up the GRUB menu might just save you a bunch of frustration, as I know this has frustrated people in the past. This bugged one user enough for them to insist their OS didn’t have the option, that it was impossible to do. (They were using one of the official Ubuntu flavors, with a default install. So, they were just upset that they couldn’t get it working.)

Closure:

If you remember the intro well, you’ll know that this article has some drama behind it. You’ll know that the site was down yesterday and that there were continued issues today. I was awake at 04:30 to see if the site was up and running. Things looked pretty good.

I then wrote one article and the system went crazy, crashing when I tried to schedule it for publication. The upstream hosting company then tried some more magic potions and they wanted me to try again.

Alas, that ate the article I wrote…

Fortunately, WordPress is awesome and they stored a cached copy in my browser’s cache. They found this and propagated almost all of the fields. This was great!

That was when I noticed that I’d already covered that subject in the past – twice in fact. In my defense, I write a lot of articles and this was a fine subject to write about. 

At this point, I just wrote another article. That’s this article, for those who weren’t keeping track. We’re still not 100% certain that all the bugs are ironed out, but we’ll see. I’ll schedule it for publication at the usual time and try to observe this as much as I can. This presumes that I’m able to save it and schedule it without any problems. We shall see… (The save draft button does appear to work.)

Thanks for reading! If you want to help, or if the site has helped you, you can donate, register to help, write an article, or buy inexpensive hosting to start your site. If you scroll down, you can sign up for the newsletter, vote for the article, and comment.

Subscribe To Our Newsletter
Get notified when new articles are published! It's free and I won't send you any spam.
Linux Tips
Creative Commons License
This work is licensed under a Creative Commons Attribution 4.0 International License.