That’s right, today’s article is going to be yet another SSH related article, this time it’s about using the SSH verbose mode. It’s handy for debugging SSH connections, plus the information can help you understand more about how SSH works. This is a fine article even for those just starting out with SSH and Linux.
I know, I know… I do a lot of SSH articles. In my defense, they’re fun – and there’s just so much to SSH that many people don’t know. It’s a tool that I use all the time, so it’s only natural that I share articles on the SSH subject. I’m bound to run out of ideas for ’em eventually.
For those that don’t know, SSH stands for “Secure Shell”. It’s a way to remotely control computers within the terminal – though you can actually forward some graphics applications over SSH.
If you’re unfamiliar with SSH, you might try reading some of these articles:
Install SSH to Remotely Control Your Linux Computers
Prevent SSH Root Login
Check Your SSH Server Configuration
Alternatively, you can search for SSH articles and discover quite a few other articles on the subject of SSH. As mentioned in the preamble, and I have gotten pretty formulaic, there are quite a few SSH articles.
There are quite a few SSH articles because there’s a lot to learn. You don’t start off by running, you start by stumbling a few steps and working your way up.
So, with all that in mind, let’s have another SSH-related article…
Using The SSH Verbose Mode:
This article requires an open terminal, like many other articles on this site. If you don’t know how to open the terminal, you can do so with your keyboard – just press
Of course, you need a computer you can connect to with SSH installed. If you don’t have a remote device, you can enable SSH on your local computer and then just connect to user@localhost and practice all these remote commands.
There are three different modes in SSH verbose mode. They’re indicated with a -v, a -vv, and -vvv. To use them, the command would look similar to the following commanda:
1 2 3 | ssh -v <user>@<address> ssh -vv <user>@<address> ssh -vvv <user>@<address> |
In the first mode, that is -v, you get details about the client-side activities.
In the second mode, that is -vv, you get details about both the client-side activities and the server-side activities.
With the third mode, that is -vvv, you get even more details, more verbosity, about both the client-side and server-side activities.
For example, this is some of the text output from a -v SSH verbose mode:
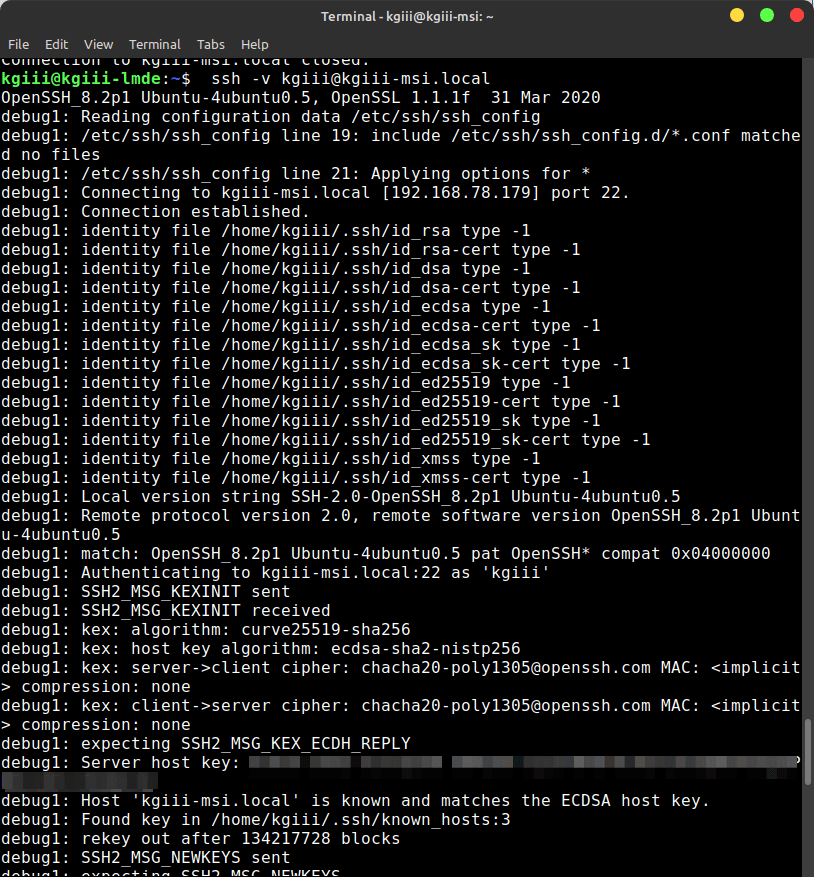
You’ll get even more verbosity as you go up through the levels of SSH verbose mode. This is useful for debugging your SSH connections – but it’s also useful for those who aren’t sure what’s going on behind the scene. When using SSH’s verbose mode, you can see what’s actually going on behind the curtain. That means you can learn more about what’s going on with your SSH connections.
Closure:
So, yeah… It’s another SSH article. I wrote this one ’cause I was thinking about it. I was thinking about it because I’d recently done another SSH-related article. So, I figured I might as well cover SSH verbose mode while thinking about it. Otherwise, I’d have made a note of it in my files and maybe never bothered with the article. Besides, if you want a different article, you’re always welcome to write it yourself and I’ll (quite likely) publish it.
Thanks for reading! If you want to help, or if the site has helped you, you can donate, register to help, write an article, or buy inexpensive hosting to start your own site. If you scroll down, you can sign up for the newsletter, vote for the article, and comment.