How To: String Commands Together In The Terminal

Today’s article is about how you can string commands together in the terminal. You can do so in a few different ways, for a few different reasons. This article will explain some of those to you, hopefully making your life easier.

There are a number of reasons why you’d want to string commands together. I find it easier to just run certain commands together. I also find it easier for some aliases. (Speaking of which, I really need to do an article about aliases!)

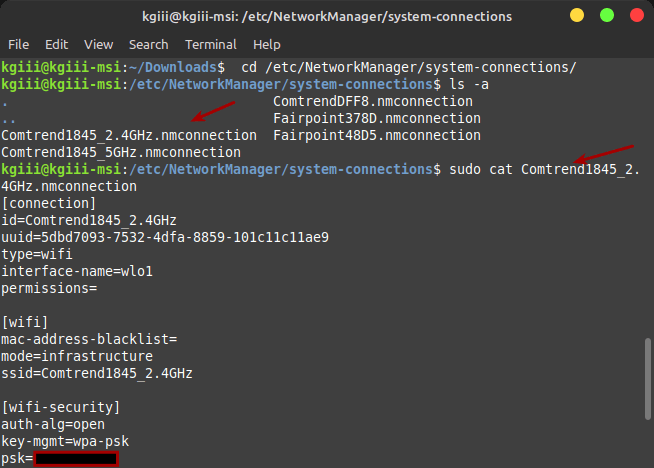
For example, you might want to run change to the Foo directory and then list the files inside it. Well, one way to write that command would be cd Foo && ls -la. In that case, you’d change the directory to Foo and then you’d list all the files within that directory. As I said, there are a number of ways to do this and a number of reasons why.

This article won’t be all that long – or even all that difficult. But, this is a pretty basic skill you’d want to have if you’re working in the terminal. It’s one of those tools you’ll (maybe) find yourself using more often once you’re used to it. I, for one, use it with some frequency. You can string commands together and then go make coffee!

String Commands Together:

Obviously, you’re going to need an open terminal. If you don’t know how to open the terminal, you can do so with your keyboard – just press CTRL + ALT + T and your default terminal should open.

With your terminal open, you’ll want one of the following operators:

; run the next command no matter what.
&& run the next command only if the first one succeeds.
|| run the next command only if the first one failed to run.

The ; operator can be used something like this:

Them the && operator can be used something like this:

Finally, the || operator can be used something like this:

You could string them along something like:

See? It’s not all that complicated. You can also swap the ; operator for a single ampersand. It’ll do the same thing, run the following command regardless of the results of the first. So, cd Downloads ; touch foo and cd Downloads & touch foo are functionally the same.

Closure:

Yup, another article – said and done. This one is, as promised, not all that difficult or even all that long. Still, I hope you’ve learned something and know now how to string commands together in the terminal. It’s a pretty useful skill to have. Feel free to leave a comment explaining how you already use these operators to string commands together.

Thanks for reading! If you want to help, or if the site has helped you, you can donate, register to help, write an article, or buy inexpensive hosting to start your own site. If you scroll down, you can sign up for the newsletter, vote for the article, and comment.

How To: Find The File Type In The Linux Terminal

There are many file types in Linux, and we’ll learn to find the file type in the Linux terminal in this article. It’s not terribly difficult and is a good basic article, with a command not that widely discussed. It’s a good time to learn.

Let’s start at the beginning… As many of my readers are new, there’s some stuff you ought to know.

First things first, everything in Linux is a file. I realize that that may confuse some folks new to Unix/Linux, but it’s true. If you don’t know how this works, click this link. That should explain it well enough.

Linux also uses the whole Magic Bytes thing. You can click here and learn about Magic Bytes. To explain it a bit differently than Wikipedia – it’s why you can make a text file without an extension and still have it open with a text editor when you click on it. The system sets Magic Bytes that mark the file as being of a certain type.

Well, there’s a tool that you can use in the terminal to find a file type. Amazingly enough, that tool is called ‘file’. The man page for which is clear:

file — determine file type

Yup, that’s the tool and that’s what it does. It’s pretty accurate and works with a number of file types. It checks things like whether the file is an empty file, what response it sends when queried, if it has Magic Bytes, and the language used in the file. It’s pretty comprehensive.

Find The File Type:

Obviously, this requires an open terminal. After all, we’re finding the file type in the terminal. That kinda needs an open terminal! Just press CTRL + ALT + T and your default terminal should open. Tada!

Now, with your terminal open, and enter the following command. I’m pretty sure this will work on any desktop Linux!

It’ll happily spit out that you have a data file on your hands.

But, here, let’s see if we can fool it. Grab an image and call it image.png (or whatever extension) and run file <filename.extension> to see the output. Now, rename the file to just plain ‘image’ and run the command again (sans extension). What does it tell you? It should look something like this:

file command in action
See? It still knows that it’s an image file. Images use the Magic Bytes.

Go ahead and try to fool it. Rename it image.txt and try it again. Pretty neat, huh?

I don’t need to patronize, by now you get the idea. You see what it can do. Well, there’s a bit more. You can create a text file with a list of files in it (with their path if in different directory) and the run file on that file you created – just make sure it’s a plain text file that you created. It’ll happily output the types of all the files listed inside.

You can also use the whole wildcard thing. You can get all the file types in a directory with this command:

If you want all the files starting with the letter I, you’d do this:

If you want, you can even use it on compressed files. For that, there’s the -z flag. It looks something like this:

It’ll spit out some information, perhaps letting you know the minimum version of your archive manager needed to open it. It doesn’t give you information about the compressed files, however. To do that, you’d have to extract the files first.

Closure:

And there you have it. You have yet another article! This one shows you how to find the file type in the terminal, and is a handy tool indeed. I normally take the entirety of January off, but I can’t do that this year. This year, I must ensure there are articles. Maybe next year! The good news is I can author these things with a wee bit o’ the wine in me. So, there’s that!

Thanks for reading! If you want to help, or if the site has helped you, you can donate, register to help, write an article, or buy inexpensive hosting to start your own site. If you scroll down, you can sign up for the newsletter, vote for the article, and comment.

Want To See The WiFi Password In The Terminal?

It’s remarkably easy (assuming one can gain access to a privileged account) to get the WiFi password from the terminal. It does generally require sudo or root. It’s literally three commands. It’s the kind of attack you’d possibly worry about in an office where you don’t regularly log out of your device when you leave it. It might be an akin to attack from the ‘evil maid‘, as well, but not just quite. 

It really requires only two pieces of knowledge. The first is how to gain elevated permissions on the device and the other is the name of the network device – usually easy enough to surmise. It’s pretty easy information to get under those circumstances – circumstances we may all have been guilty of. Perhaps we typed a sudo command and then walked off to get coffsssee while it updated itself? Who knows – but it’s really just that easy.

Is it a security issue? Not if your security is any good, it isn’t. But, if anyone has physical access to the device, they pretty much own the device. If your security is any good, nobody should get this far and internal practices would prevent fellow employees from doing much harm. I could speak for hours about security, I just can not seem to do it coherently. 

Anyhow, here’s how you view the wifi password in the terminal.

WiFi Password From The Terminal:

Obviously, you need an open terminal. Just press CTRL + ALT + T and your default terminal should open.

First, you must change to the directory where this sort of information is stored. 

Find the network name (SSID)… You can usually guess that, or narrow it down rapidly on sight, but you can also just find the SSID by typing iwgetid Either way, just enter this:

The password will be happily shown to you in plain text. I’m not even kidding. This is what the whole process looks like and shows you how easy it is:

I am elite hackor!
Tada! There it is in plain ol’ text, easily captured and saved away.

Obviously, I knew the sudo password – I’d have easily figured out the rest. Even if I didn’t, there really weren’t all that many choices and a little tab completion goes a long ways. It’s a good example of why you should lock your screen and logout of your computer if you’re going to be away from it. (Of course, there’s always a risk vs reward thing and it probably doesn’t really matter to most of us.)

Closure:

There you have it! You can now find the WiFi password from the terminal. This shouldn’t ever be a risk, because you already practice good security. But, it’s a fun little trick to know. It doesn’t take a whole lot of effort and it makes for another article. Another one is written and done!

Thanks for reading! If you want to help, or if the site has helped you, you can donate, register to help, write an article, or buy inexpensive hosting to start your own site. If you scroll down, you can sign up for the newsletter, vote for the article, and comment.

Show Date And Time In The Terminal

Today’s article is a nice and easy one, where I show you how to show the date and time in the terminal. It seems like a nice and easy article to write when I’m not feeling well. I’ll try to not let my ailments hamper the article in any way. 

Normally, I’d have a few articles written ahead of time. This time, I only have one article written ahead of time and it’s my ’emergency’ article. I’m not doing that poorly, so I’ll write this one. I’m pretty dedicated to doing an article every other day.

Anyhow, as I said, this article will show you how to get the date and time from the terminal. You can actually get the time just from running uptime, but there’s more to it. Linux actually has a ‘date’ command, which is what we’ll be using for this exercise. The date command’s man page describes it like:

date – print or set the system date and time

We will only be using the date command to print the time in the terminal. There are easier ways to set and maintain the time. With NTP being common, you really shouldn’t have to worry much about keeping the time accurate enough on your system.

Why would you want to know the date and time? Not everyone uses a desktop environment with a GUI and a clock. You may need to know the system time when you’re working on it remotely. There are all sorts of reasons. In fact, I once wrote an entire article about finding your timezone in Linux.

Show Date And Time In The Terminal:

This article requires an open terminal, just like many other articles on this site. Just press CTRL + ALT + T and your default terminal should open.

Now, this is nice and obvious… With your terminal open, just type in:

You’ll get an output similar to this one:

Tada! You’re done!

Just kidding! There’s more to it. If you want to show just the time, you can just use this command:

If you want to show the date and have it formatted like we do in the US, you can use this command:

Want to know the date 3 weeks ago? (You can also use days for this command)? Well then, you can try this command:

How about if you want to know how many days into the year you are? Well, you can do that with:

Those are about the most interesting ways to show the date and time in the terminal, at least the most interesting ways that I can think of at this moment in time. If you use the date command for anything else, let us know by leaving a comment!

Closure:

There you have it, yet another article! This one shows you how to show the date and time in the terminal, just in case you want to do that. It’s a nice and easy exercise and, as far as tools go, is one that’s at least easy to remember. It’s probably not the most important tool you can have in your toolbox, but at least it’s in there. (Please be gentle pointing out any errors, part of this article was written with the help of a heating pad.)

Thanks for reading! If you want to help, or if the site has helped you, you can donate, register to help, write an article, or buy inexpensive hosting to start your own site. If you scroll down, you can sign up for the newsletter, vote for the article, and comment.

How To: Find Your Timezone In The Terminal

This article is about your system time, specifically how to find your timezone in the terminal. It shouldn’t be a very long article and it should be relatively easy and suitable for new Linux users.

Why would you want to find your timezone in the terminal? Well, for starters you may not have the proper time set and need to verify it. You may also be working with servers scattered across the globe and knowing the timezone may be important.

As you may need things synchronized, knowing the timezone could be important. Seeing as you’re not always able to access a GUI desktop, you might want to find your timezone in the terminal. So, to those end, this article will share a few ways to do so.

Find Your Timezone In The Terminal:

Obviously, this article requires an open terminal. If you don’t know how to open the terminal, you can do so with your keyboard – just press CTRL + ALT + T and your default terminal should open. If you’re operating remotely, you probably already have a terminal open.

Anyhow, there are multiple ways to do this. For starters, you can just use the date command. It looks like this:

The output will have your timezone in it. For example, the output of that command on one of my boxes looks like:

As you can see, the timezone is at the end. In my case, it’s “EDT” and that’s probably the easiest way to get the timezone information.

You can also use ‘timedatectl’ which looks like this:

That’ll give you the timezone and even tell you the adjustment from GMT. If you want, you can use grep with it.

That will, of course, just output the line containing your timezone. Also, I have no idea why it’s two words. I know it as one word, but here we are and I suppose it’s just not that important.

I have one more way to find your timezone in the terminal and it’ll output your timezone in text. It’s just:

The output from that would look a little like this:

So, there are a few ways. There are surely other ways, so feel free to leave a comment sharing them.

Closure:

And there you have it, another article. This one shares how to find your timezone in the terminal. It’s a relatively easy article to follow and not really a tool I expect most users to need. Still, it’s there if you need it and this article stands as a reference to it.

Thanks for reading! If you want to help, or if the site has helped you, you can donate, register to help, write an article, or buy inexpensive hosting to start your own site. If you scroll down, you can sign up for the newsletter, vote for the article, and comment.

Subscribe To Our Newsletter
Get notified when new articles are published! It's free and I won't send you any spam.
Linux Tips
Creative Commons License
This work is licensed under a Creative Commons Attribution 4.0 International License.