Upgrade Ubuntu From The Terminal

Today’s article will show how to update and upgrade Ubuntu from the terminal. Of course, this will work on any system that uses apt, including Debian, Lubuntu, Linux Mint, etc… You can always upgrade when the GUI tells you to, but you can do it manually on your own time.

Once in a while, I come across someone who refuses to upgrade. This is a bad idea. Upgrades include things like security upgrades and they’re pretty much mandatory. It’s Linux, so you don’t “have to”, but it makes you a bad netizen because those security upgrades may very well mean your computer is being used as a spam relay or, worse, a part of a botnet.

So, please, upgrade your Ubuntu systems – and, really, all Linux boxes should get regular upgrades. I can’t emphasize this enough! Upgrade your system – if not for you then for the rest of us who have to deal with enough internet hostility. Malware exists for Linux, as does exploits for Linux and the software you have installed. Even if you don’t care about your own experiences, care about the rest of the people on the ‘net. Thanks!

For this article, we’ll be using apt. Apt is apt-get in disguise, but not quite the same. If you’re scripting you use apt-get, because it’s more stable. When you’re running commands yourself, use apt because it’s faster/easier. 

This article should be pretty quick and easy.

Upgrade Ubuntu From The Terminal:

Obviously, this article requires an open terminal. You can open one with your keyboard – just press CTRL + ALT + T and your default terminal should open.

Once you have your terminal open, we’ll go ahead and update the database (the cache) to see if any upgrades are available. To do that, you run:

It’ll tell you if upgrades are available and give you some more information – such as telling you how to see which application upgrades are available. In this case, we’re just going to upgrade everything. Like so:

That is sometimes interactive. It will want you to agree manually to the upgrades. You can just skip all that by adding a -y flag. Even better, you can now string both commands together and save some time monitoring the terminal. That command, and I use this pretty much exclusively by way of alias, is:

The && means that the next command will only run if the first has been completed successfully. You can even add autoremove to this string of commands and keep things a little cleaner automatically.

The autoremove will “remove packages that were automatically
installed to satisfy dependencies for other packages and are now no
longer needed as dependencies changed or the package(s) needing
them were removed in the meantime.” You might as well include it, as it’s pretty harmless and will save you some disk space.

Finally, there’s full-upgrade which is quite similar to the old apt-get dist-upgrade, in that it will upgrade you to a new release if both a new release is available and your settings are to upgrade to new releases (instead of staying on a LTS branch, for example). You’ll find that full-upgrade is also capable of deleting unneeded files all on its own.

To use full-upgrade, you’d still run the update first and then run the command. You can also pack them together, like so:

And there you have it. That’s about all you really need to know about upgrading Ubuntu from the terminal. It’s not hard, so just do it. Yeah, once in a blue moon it breaks something. That’s usually easily fixed and the risk is worth the benefits – to you and the rest of the internet.

Closure:

I can’t emphasize it enough – do your upgrades regularly. Now you know how to upgrade Ubuntu from the terminal, which is something I naturally do out of habit. I actually have it aliased to the ‘update’ command and it takes care of all that for me. I can’t remember the last time it broke anything – but it has to have been multiple years ago. Breakage isn’t a real risk, as things are usually heavily tested.

Thanks for reading! If you want to help, or if the site has helped you, you can donate, register to help, write an article, or buy inexpensive hosting to start your own site. If you scroll down, you can sign up for the newsletter, vote for the article, and comment.
Meta: I’m Now An Official Lubuntu (And Ubuntu) Member!

It goes without saying that I’m a pretty big Lubuntu fan. The reason it goes without saying is because (as anyone that knows me knows) I have said it plenty of times already! This ‘award’, becoming an official Lubuntu Member, is recognition for past activity in the Linux (specifically in the Lubuntu/Ubuntu sphere) community.

My application was voted on and approved on the 14th of November, so just a few days before you saw this. I actually missed the email notification (just an automated message informing me that I’d been added to a group) and didn’t notice until the congratulations started pouring in. I’ve since received guidance from my mentor, thankfully.

If you don’t know what it means (and what responsibilities you have) to be an official Lubuntu Member, you can learn more about the Membership by clicking this link. There’s more to it and I’ve not yet gone through all the benefits, but I’m pretty happy to have been voted into a rather exclusive club.

Darned right! Not a whole lot of people on the planet can say they’ve been official Ubuntu Members! I guess there are ‘more than 500’ of us currently, which is still a tiny drop in the ocean that is Linux users and the general population at large!

So, yes… Yes, it does make me happy to be a member. The recognition is nice and it’s comfortable to say ‘my peers’ – even though they all pretty much know so much more than I do.

My Lubuntu History:

You should probably start by reading my article here:

What it’s Like To Beta-test Linux, Specifically Lubuntu

That’ll give you most of the information you might need.

Anyhow, Lubuntu has been around since its official recognition in 2011. I’ve been using it nearly as long, as I was really happy to have an Ubuntu official-flavor with LXDE – my preferred desktop at the time. I dare say that it’s still kinda my official favorite DE, but I really have grown to like LXQt. It grows on you in time and is maturing nicely.

About 14 months ago… You know, it’ll take a minute, but let’s get some numbers for posterity! 

Alright, it began officially in October of 2020, when I said the following:

I have some free time coming up. I can toss some hours at this, but not for this release. Do you want testing on bare metal, or is testing in a VM adequate? Is the #Lubuntu IRC the place to go?

Which is the official start of my testing – so to speak. I jumped in just a little while later that month, after 20.10 was released. That means 21.04 was my first full-cycle participation. We’re now testing 22.04 and watching the changes has been informative and interesting.

One of my continued goals has been to learn more while helping. And, man… Did I learn a lot. I’m still learning a lot, and I now have a much better understanding of how Linux works behind the scenes. My troubleshooting abilities have increased because of it. I highly encourage others to get involved. Jump in at the deep end. The immersion helps!

My Lubuntu Future:

After the first cycle, I was actually able to (and was heavily encouraged to do so) apply for official membership. I decided to not apply at that time and to give myself a additional cycle before applying. It seemed prudent to make sure that I was really going to keep helping. 

Sure, the membership is about past contributions but, to me, it implies a level of commitment to future contributions. I plan on keeping on doing what I’ve been doing for the duration. I plan on continuing my education and stepping up to help with the tasks I am able to complete.

Man… It does feel nice to say ‘my peers’, but so many of them know so much more about Linux than I do. I am not even a programmer, at least not a very good one – and time doesn’t seem to be improving that ’cause I don’t have time to learn more. So, I definitely have a bit of that Impostor Syndrome going on.

Just reading the #lubuntu_dev chat has been super informative. Fortunately, I can jump in at any time and ask questions. They’ll help me understand, and point me towards additional educational resources. Everyone I could hope for stood up to help me get my feet on the ground and become a better tester.

It probably doesn’t need saying, but the people in and around the Lubuntu project are pretty awesome. Without them, I’d not be here – of course. I’ve spent a goodly number of years in academia, and it’s comforting to be able to surround myself with the smart people that make up the Lubuntu project.

My contributions elsewhere probably won’t change. I’ve been able to, and fortunate enough to, manage my time – and I’ve been able to set aside blocks of time for different tasks. So, I suspect this means I’m just going to keep doing what I’m doing for the foreseeable future.

This also bodes well for the site. If I’m doing what I have been doing, that includes keeping this site active, interesting, and regularly updated with new content. I might as well… If I still have stuff to write about, I might just as well keep writing.

Still, this isn’t set in stone. This site eats a ton of my time. I’m still only planning on a full year – but it seems likely that I’ll just keep pounding the keyboard while hoping an article pops out the other side. It has been a pretty good run so far.

Closure:

For the record: I sure as heck didn’t get here by myself. In fact, if it wasn’t for the many, many positive messages and prompting me to apply, I probably still wouldn’t have applied. I don’t think I’d have felt qualified, if it hadn’t been for the urging. 

The two members I’d like to thank the most for that aspect are Leok and guiverc. Of the two, I consider guiverc to be my mentor. I’m pretty sure there is an official title of “Mentor” in and among the official members. I don’t think guiverc really holds that title, but they have put up with my many questions and given me great guidance over the past year. 

So, I’d like to thank especially both Leok and guiverc, as well as all the other members who have encouraged me, educated me, or just plain tolerated me when I asked questions. I told ’em back at the start that I’d do my best to make sure their time spent helping me learn would not end up as wasted time, and I’d like to think I’ve demonstrated that and made true on my claim.

To the rest of the well-wishing folks, thanks! You too have likely given me reason to keep going with this, in one way or another. Just reading the site is helping to motivate me to continue learning and publishing. Also, please feel free to leave any congratulatory comments here on this site, avoiding leaving them across the various sites. 

As always, thanks for reading! If you want to help, or if the site has helped you, you can donate, register to help, write an article, or buy inexpensive hosting to start your own site. If you scroll down, you can sign up for the newsletter, vote for the article, and comment.
How To: Update Ubuntu From The Terminal

It’s possible, even easy, to update Ubuntu from the terminal. Personally, I almost always update from the terminal, regardless of distro. This article will tell you how to update Ubuntu from the terminal – but it’s equally valid for Debian, official Ubuntu flavors like Lubuntu or Kubuntu, and it’s also valid for distros based on Ubuntu or Debian – such as Mint.

I recently did an article about updating Fedora from the terminal. Boy howdy, I hope that link works! It’s scheduled for publication so it doesn’t show me the real URL that it’ll have when it has been published! So, I hope I typed it properly! Either way, I recently did said article and figured I might as well do one for Ubuntu.

The tool we’ll be using is known as ‘APT‘ and apt has been a staple of Linux since Debian introduced it in the late nineties. It’s known as “Advanced Package Tool” and is used to configure and install applications. Even if you’re doing it graphically, it’s usually apt under the hood when you’re using Debian, Ubuntu, Mint, etc…

There really isn’t a whole lot to this, so it should be a reasonably short article. It’s also an article that may make the terminal more approachable for people who are new to Linux. Once you see how easy it is, you might decide to try it yourself! If it goes well, you might learn more about the terminal and the many ways you can use it. We can find out!

Update Ubuntu From The Terminal:

This article requires an open terminal, like oh so many other articles on this site. If you don’t know how to open the terminal, you can do so with your keyboard – just press CTRL + ALT + T and your default terminal should pop open.

Once you have your terminal open, you’re going to update your database of available software and the version numbers of said software. This database will be checked against the database of software (and versions) that you have already installed. It’s just a simple command:

That’ll let you know if there’s any software that needs to be updated and may take a few seconds to complete. If any software is available it will let you know and you can upgrade to the newest version. The notification will look something like:

You can, as stated, see which applications need to be upgraded to new versions by running that command. This upgrade process may also add or remove system software as needed. But, to upgrade, it’s just as easy:

This will spit out a list of software that will be updated, will be added, or should be removed – and you can enter “Y” to agree to the upgrades before pressing ENTER to continue. That’s it, you’re done.

However, I like to alias (an article still not written should link here) all this to a single command. My actual command looks like this:

That will update the database and make sure it completes successfully. It will then upgrade the software, effectively entering the Y for you. Finally, it will automatically remove software that’s no longer needed. Some folks might consider that command a bit risky to run automatically, but I’ve been doing it for years. Use it at your own risk!

Closure:

That’s it, actually. There’s really not that much more I can tell you about how to update Ubuntu from the terminal. Sure, there are other apt commands, but those aren’t really important for this article. Unlike the Fedora article, there’s no handy way to undo an upgrade with apt.

Thanks for reading! If you want to help, or if the site has helped you, you can donate, register to help, write an article, or buy inexpensive hosting to start your own site. If you scroll down, you can sign up for the newsletter, vote for the article, and comment.
How To: Use Wayland in a Live Ubuntu Instance

This article is based on an AskUbuntu question I answered a while back. The user wanted to know how to use Wayland in a live instance of Ubuntu. They wanted to test some Wayland stuff and this was how they wanted to do it.

I personally would have gone a different route, but that’s fine. There are likely other people who have this same question, so it seems prudent to put the answer up here, as others will likely want to use Wayland in a live environment.

It actually turned out to be pretty easy, so this isn’t going to be a very long article. If you follow the directions carefully, you should be able to use Wayland while running Ubuntu live.

Use Wayland in Ubuntu Live:

The first thing you need to do is boot into the live instance of Ubuntu, and then you change the way you login. You don’t want to automatically login for this exercise.

Click in the bottom right and ‘Show Applications.’ Once there, you can enter the word ‘users’, click on the settings app offered, and then disable automatic login.

Next, you have change the password. You’re forced to deal with Ubuntu’s need for a complex password. The password you pick must be at least 12 characters long, not a dictionary word, and have a mix of numbers and letters. 

Next, you want to edit “/etc/gdm3/custom.conf” and comment out the line that disables Wayland. To do this, we’ll open a terminal by pressing CTRL + ALT + T. That opens the terminal where you’ll enter:

Find the line:

Change it to (comment it out):

Make sure to save it. Just press CTRL + X, then Y, and then ENTER and nano will save it.

Restart gdm3 with:

If that doesn’t automatically log you out, log out manually.

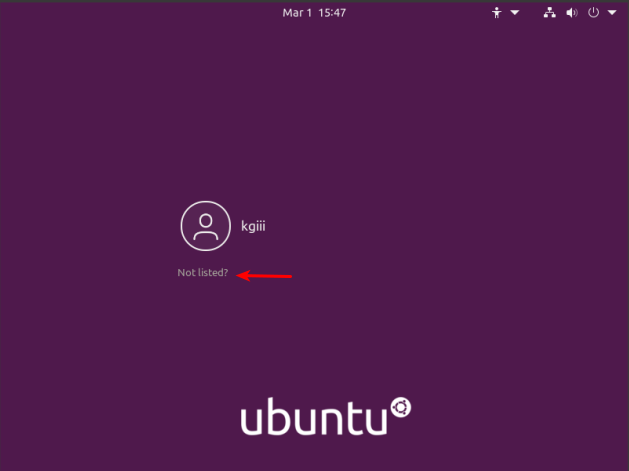
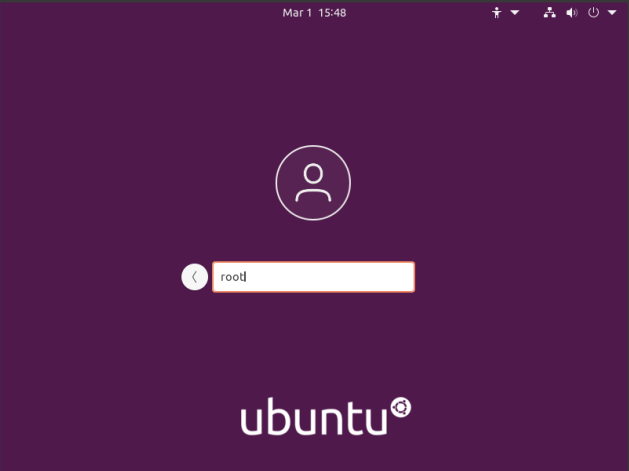
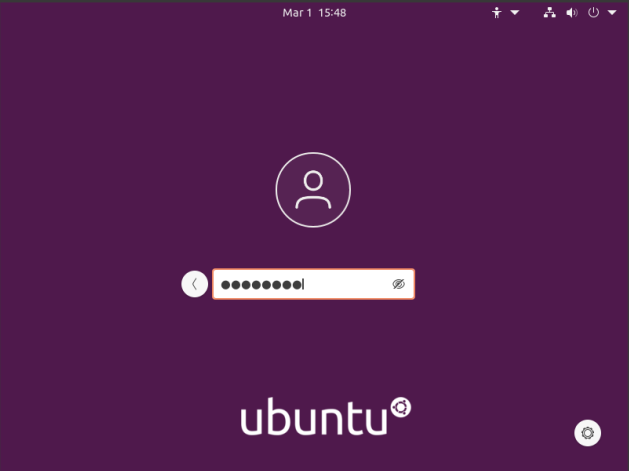
Now start the process to log back in, but after you click the user, there’s an icon in the lower right. It’s a gear icon. Click that gear icon and choose  “Ubuntu on Wayland”. Then enter your password and press ENTER.

If everything worked, you’re now logged in with Wayland.

Now, if you want to verify that you’re using Wayland…

Press CTRL + ALT + T
to open the terminal and enter:

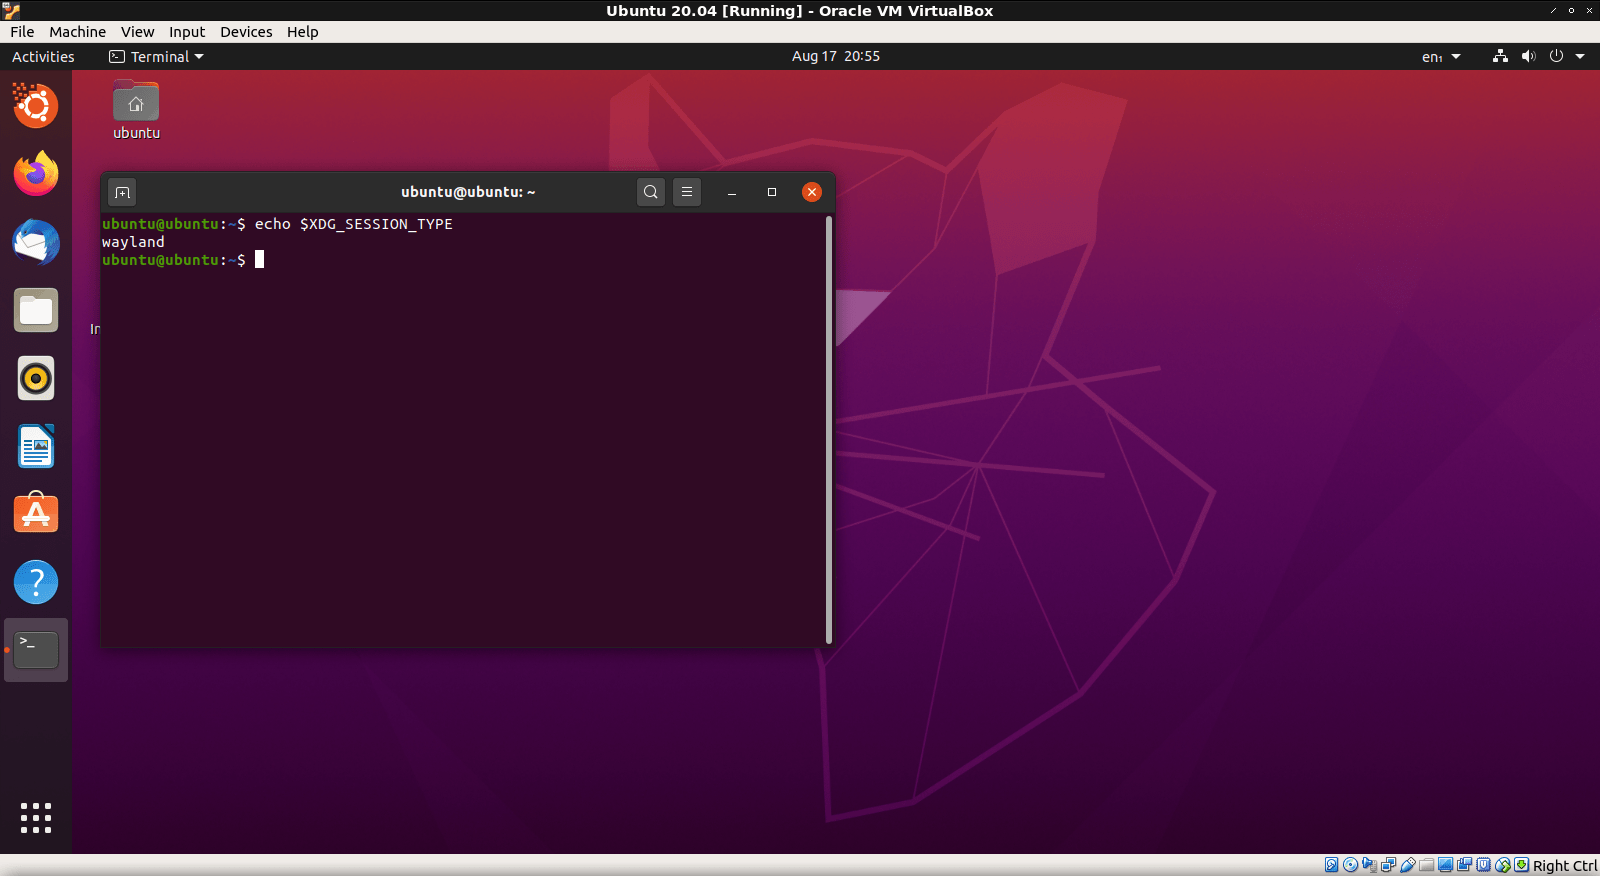
If you have done everything correctly, it looks like this:

live ubuntu running wayland
See? That’s how you use Wayland in a live Ubuntu instance. And now you know…

So, there you have it for those that want it. If you want to use Wayland then you can. You can do that in a live environment if you want. It’s Linux. You can do most anything, if you put enough work in.

Closure:

And there you have it. Another article is in the books. This one helps you use Wayland and helps you use it in a live Ubuntu instance. I suspect you could use this as a basis for other distros, but I’ve never actually tested that theory out. If you have tried it, let me know in a comment. Thanks!

Thanks for reading! If you want to help, or if the site has helped you, you can donate, register to help, write an article, or buy inexpensive hosting to start your own site. If you scroll down, you can sign up for the newsletter, vote for the article, and comment.

Linux Tips
Creative Commons License
This work is licensed under a Creative Commons Attribution 4.0 International License.