Today’s article isn’t all that Linux specific, but pertains to your personal information and whether or not it has been leaked or hacked. This is good information to know. While there’s not much that you can do after the fact, there are steps you can take when the inevitable happens and those steps will vary depending on the severity of the hack and how much information the bad folks got away with.
Basically, when you visit sites you leave at least some information behind. Depending on the site, you may leave more information behind than other sites. For instance, you may leave behind your email address when you signed up for their newsletter. This is relatively benign (insert plug for the Linux-Tips newsletter), but more concerning when you add more information to it – such as your password, phone number, username, answers to security questions, etc…
Sometimes, those sites aren’t all that well defended and people manage to find exploits that give them access to this data. These are known as data breaches. Your data is then, more often than not, put up somewhere online for sale or even for free. The usual goal is to sell this data, as profit is the ultimate motive these days.
There’s quite a bit that bad actors can do with this hacked and leaked data. This is especially true if you do things like re-use passwords. By the way, that’s something you should never do. Don’t use a password or a ‘password system’. Generate random passwords for every use.
Enter “have i been pwned?”
This have i been pwned? site has been around for a long time. You can visit the site by clicking the following:
Go there and enter your email address or phone number. It will then let you know if your data has been exposed in a data breach. The site’s name is a play on the word ‘pwned’ – which means similar to ‘owned’ or, in this case, your personal information been exposed by way of a data breach.
If your personal information has been included in a data breach that was made public, it’ll be listed in the results. For example, I have one email address that was involved in a very dark time for Linux Mint. See this:
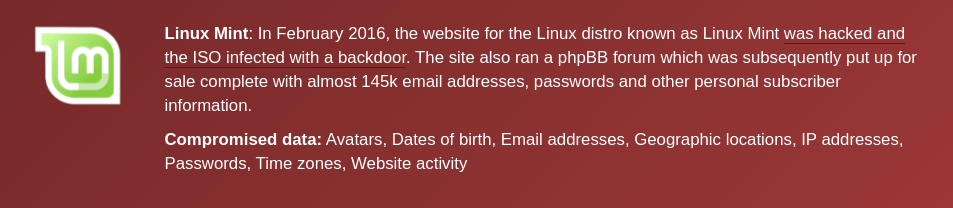
You can be reasonably comfortable putting your email into that site. They have a long, long history of good behavior and, at the end of the day, you’d just lose your email address. So, feel free to drop your email addresses into the site.
NOTE: I take your personal information seriously. If I ask for it, I secure it. I only ask for as much information as required for the role. Signing up for the newsletter doesn’t even ask for a username! Passwords are salted and hashed (not saved in plain text). There’s a layered approach to prevent compromise, including things like requiring 2FA for administrative roles.
Again, “have i been pwned?” has no motivation to do anything with your email address and their reputation is pretty solid. You can drop your email address into the search box safely.
They Lost Your Personal Information:
So, what can you do if you found out that your personal information has been compromised? There’s not a whole lot, actually. Once the data is out there, it’s out there. You can’t do anything to take it back.
What you can do is stop doing business with these people. You can change your passwords for the compromised sites. You can also check other accounts for signs of compromise. Depending on the data that was lost, you can lock your credit or use a credit monitoring service.
When (not ‘if’) you find your email and personal information in these lists, it can be a little jarring. It’s not entirely unlike finding out that your house has been broken into. But, you can relax. It’s not the end of the world or anything of that nature.
In many cases, passwords aren’t stored in plain text. They’re hashed and salted before they’re stored. The password you typed in is just checked against the hashed values and, so long as you match, you’re let into your account. That’s a great thing, a great start even, but rainbow table attacks still exist to attack hashed passwords.
If there are extra security steps you can take, take them! If you can enable 2FA (2 Factor Authentication), they by all means do so. A login that requires a second factor, such as a code sent to email or to text message, is much more secure. This is more useful before a hack occurs, of course.
When you give out your personal information, ask yourself if you truly need to give the information and if you trust the company with that information. Different companies may have different trust levels for you. I trust this site with all my information, ’cause I own it. I trust sneakydownload.site enough to have my email address and nothing more. There’s a pretty broad spectrum of trust and a very personal choice to make.
Closure:
This article could easily run thousands of words, as security, privacy, and personal information are broad subjects. Be careful who you trust and be sure to check in once in a while to see if your personal information has been compromised. On Linux-Tips.us, I just avoid collecting data. I find it easier to protect your data if I don’t actually have it. However, even this small site is under attack constantly:
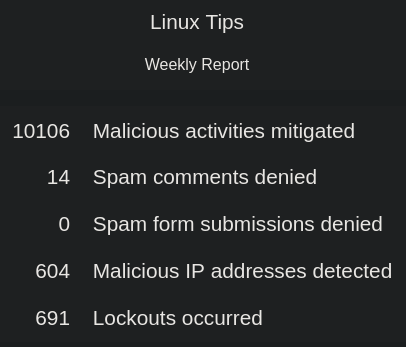
The two spam comment selections are from people/bots who made it through the first levels of defense. Even the rest of the numbers are people who made it through the basic security checks, now that I think about it in this light. Point being that a site is constantly under attack and your personal information is a commodity, so protect it well.
Thanks for reading! If you want to help, or if the site has helped you, you can donate, register to help, write an article, or buy inexpensive hosting to start your own site. If you scroll down, you can sign up for the newsletter, vote for the article, and comment.